
I tested a range of embroidery machines—from compact combo units to a 15-needle commercial head—and I’m sharing which models I recommend for beginners, hobbyists, and small businesses.
I evaluated six embroidery machines over months of real projects so I could recommend the right tool depending on your goals. I stitched sample designs, tested threading and hooping, and pushed each machine through the kinds of projects I actually make.
This roundup focuses on practical differences: hoop size, built-in designs, touchscreen editing, connectivity, and whether a combo unit or dedicated embroidery machine makes more sense for your workflow.
If you want one machine for casual sewing and occasional embroidery, a combo model with a 4×4 or 5×7 hoop is flexible. If you plan to grow into larger designs or volume work, I recommend a dedicated embroidery machine or a multi-needle commercial unit for speed and efficiency.
1. Brother SE600 Sewing and Embroidery Machine – Best Combo Starter
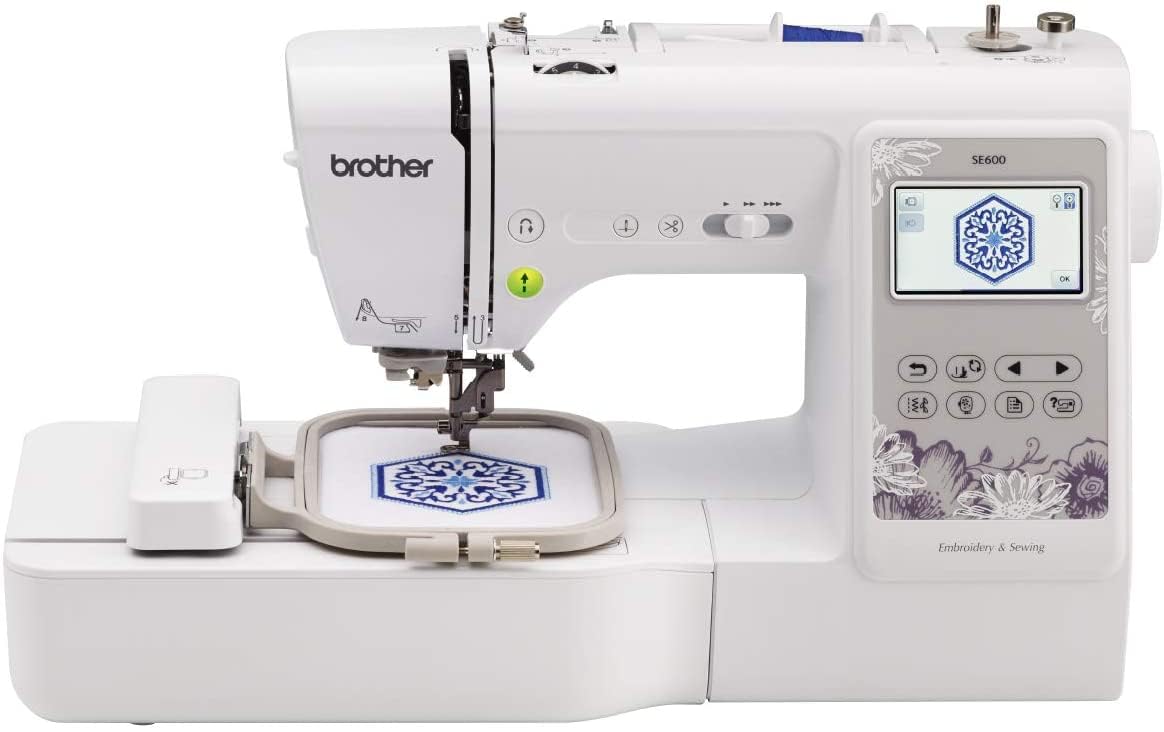
I found the SE600 to be a balanced entry-level combo: 4"x4" embroidery field, 80 built-in designs, 103 stitches, and a clear 3.2" color touchscreen.
Why I picked it: Great mix of sewing features and basic embroidery for beginners.
Best for: New embroiderers who want sewing functionality and simple on-machine editing.
An affordable entry point for a versatile combo machine.
Pros
- Simple color touchscreen preview
- Automatic needle threader
- Drop-in top bobbin
- Solid stitch quality for home projects
Cons
- 4×4 hoop limits larger designs
- Limited built-in design count for advanced users
My take
I used the SE600 for monograms, mending, and small applique projects, and I appreciated how quiet and smooth it runs. The automatic needle threader and drop-in bobbin saved me time when I switched between sewing and embroidery.
The 3.2" color touchscreen makes previewing designs easy, and the 80 built-in patterns are useful for quick projects. I did find the 4×4 hoop restrictive when I wanted to stitch larger motifs, so I treated this machine as my go-to for tags, baby items, and smaller craft pieces.
For basic sewing work the 103 stitches and included feet covered most tasks I throw at a home machine. If you want more embroidery area or advanced editing options, plan to step up, but for starting out this combo gives me the best value and flexibility.
2. Brother PE800 Embroidery Machine – Best Embroidery-Only Mid-Size
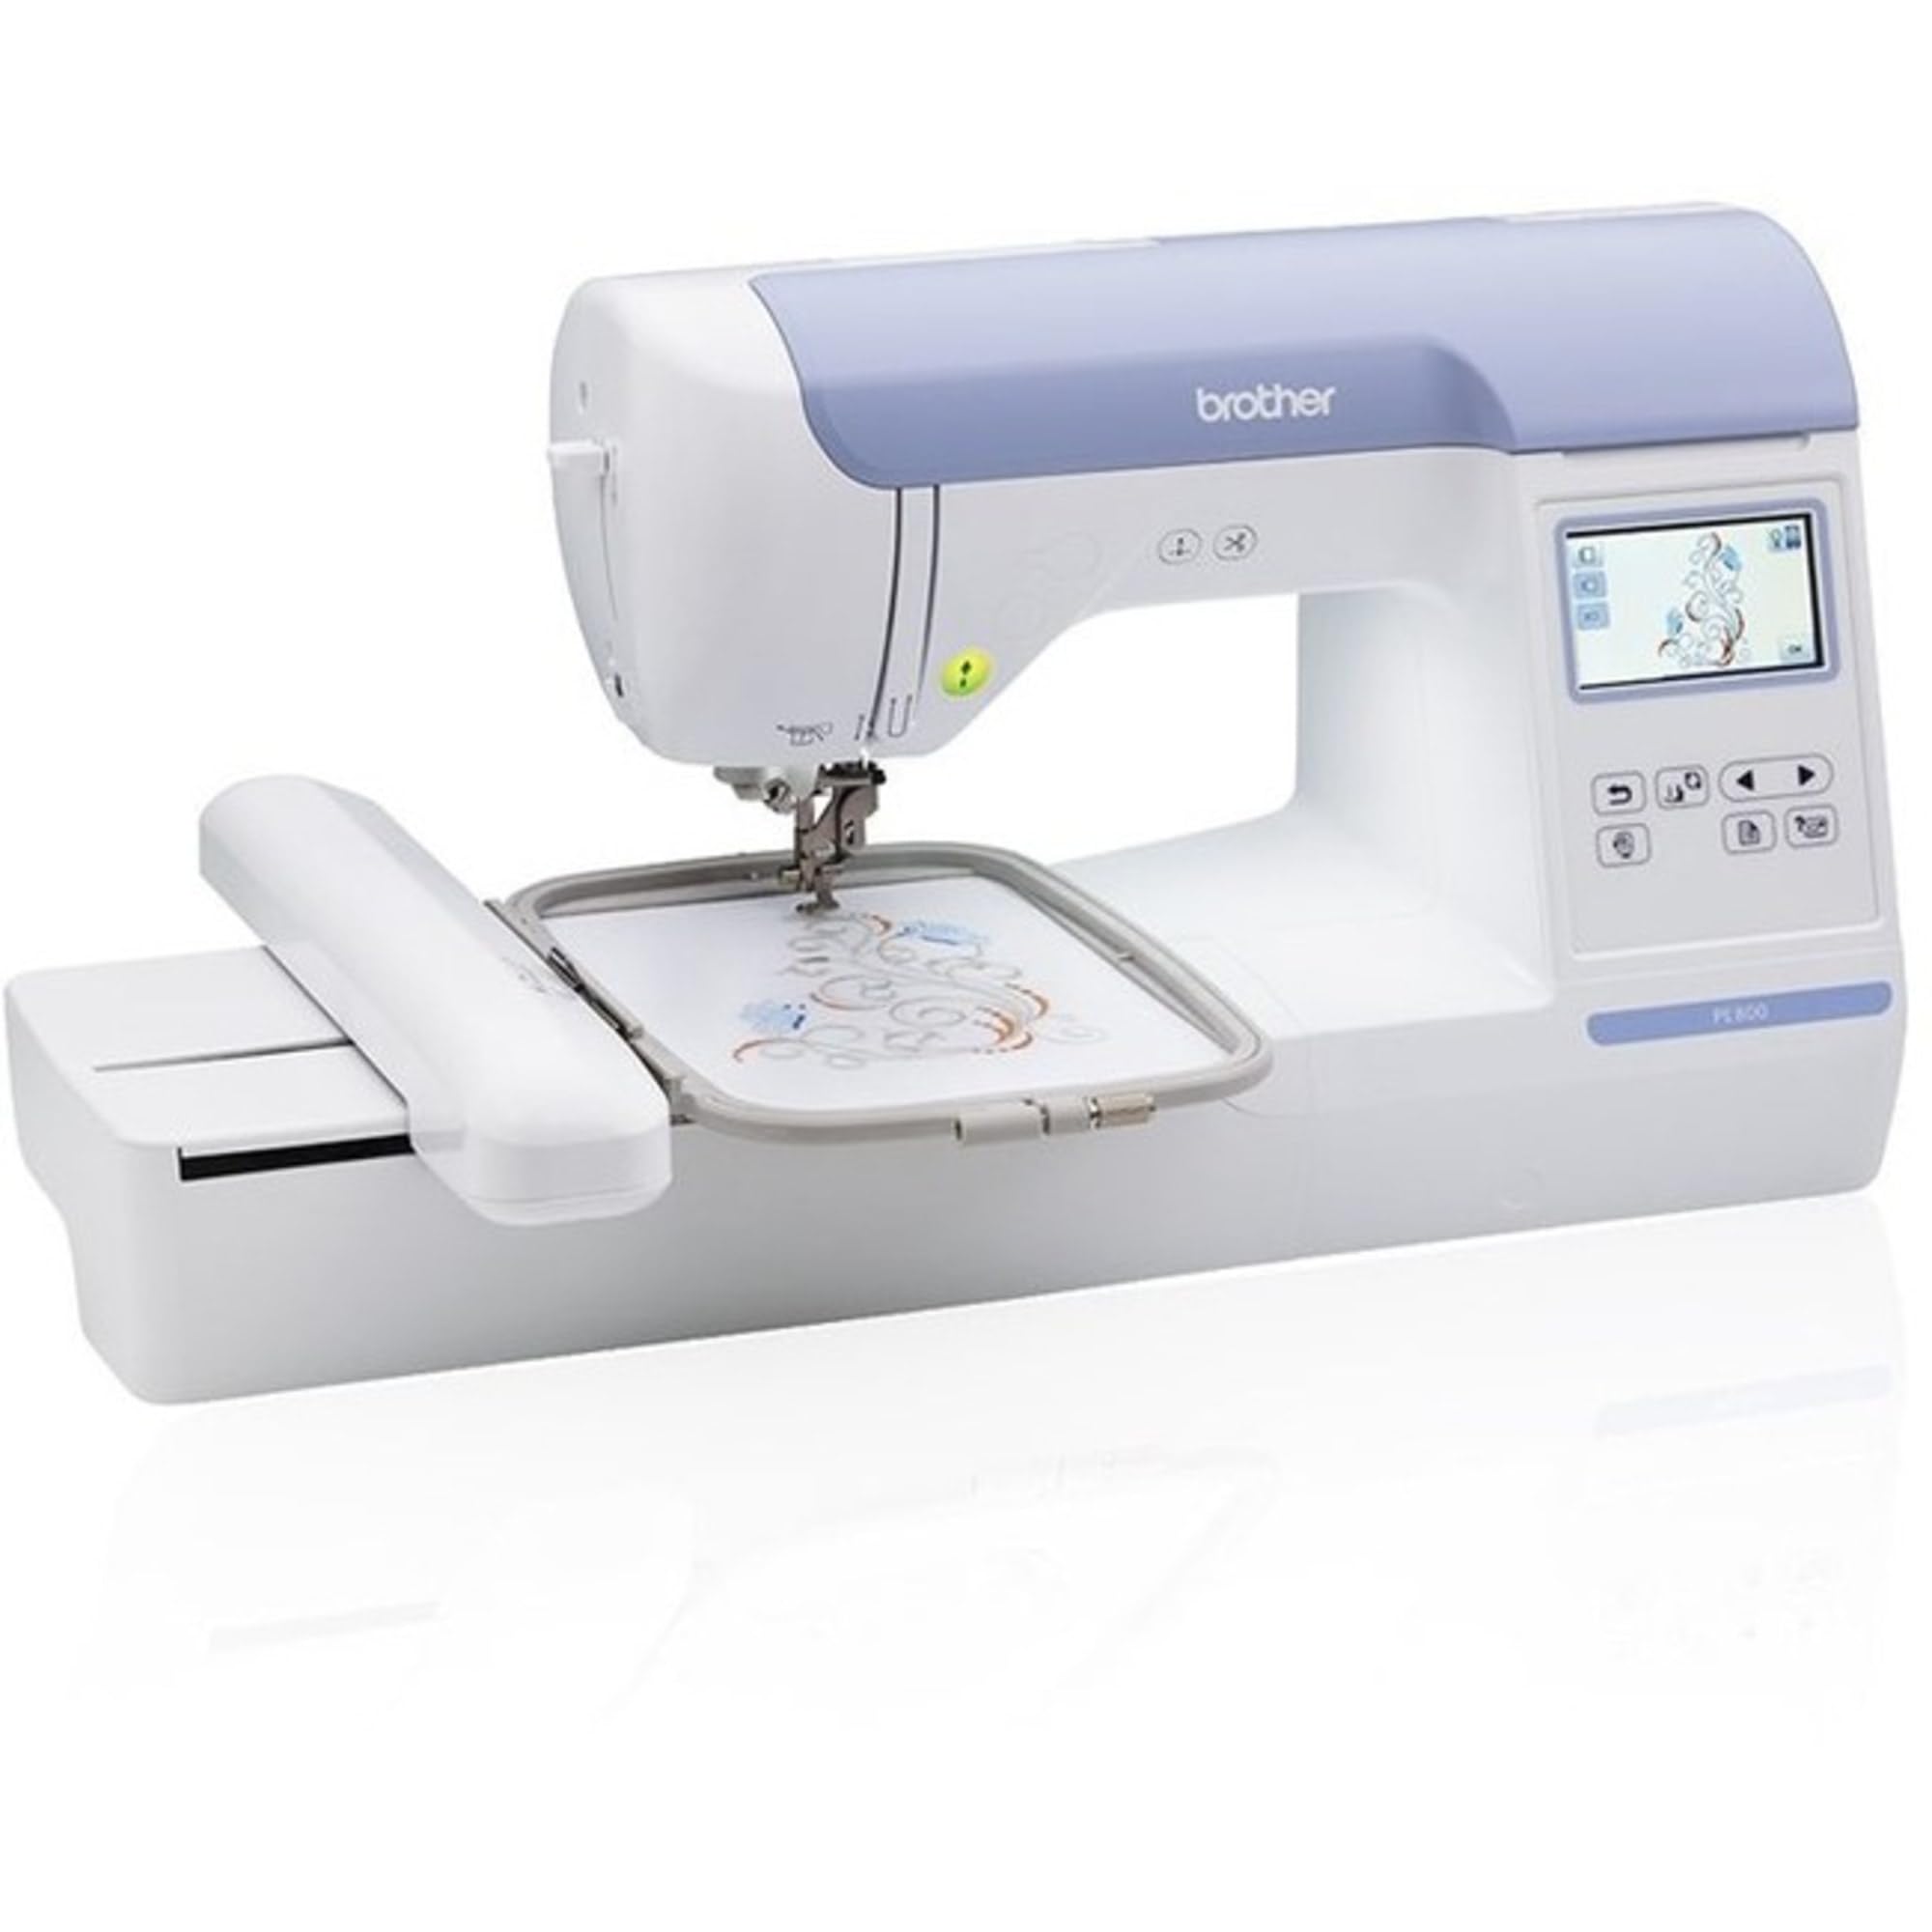
I relied on the PE800 when I needed a dedicated embroidery machine with a roomy 5"x7" hoop, 138 built-in designs, and USB import capability.
Why I picked it: 5×7 hoop and robust editing features on the machine.
Best for: Hobbyists who want larger designs without buying commercial gear.
A mid-range dedicated embroidery machine with strong capabilities.
Pros
- Generous 5×7 embroidery area
- USB import for custom designs
- 11 built-in fonts
- Clear color touchscreen
Cons
- Hoop shape changed from older models
- Embroidery-only (no sewing)
My take
I stitched several medium-sized designs on the PE800 and found the 5×7 hoop much more forgiving for lettering and layered motifs. The touchscreen editing—rotate, mirror, resize—saved me time that I used to spend plotting designs in software.
Transferring PES files via USB was straightforward, and the machine’s built-in tutorials helped me nail the basics quickly. I recommend decent thread and backing with this machine; that combination consistently improved my results.
If you want one machine focused solely on embroidery with a larger working area, this is the model I reach for when I need clean, repeatable stitch-outs without juggling sewing functions.
3. Brother PE535 Embroidery Machine – Best Budget Embroidery
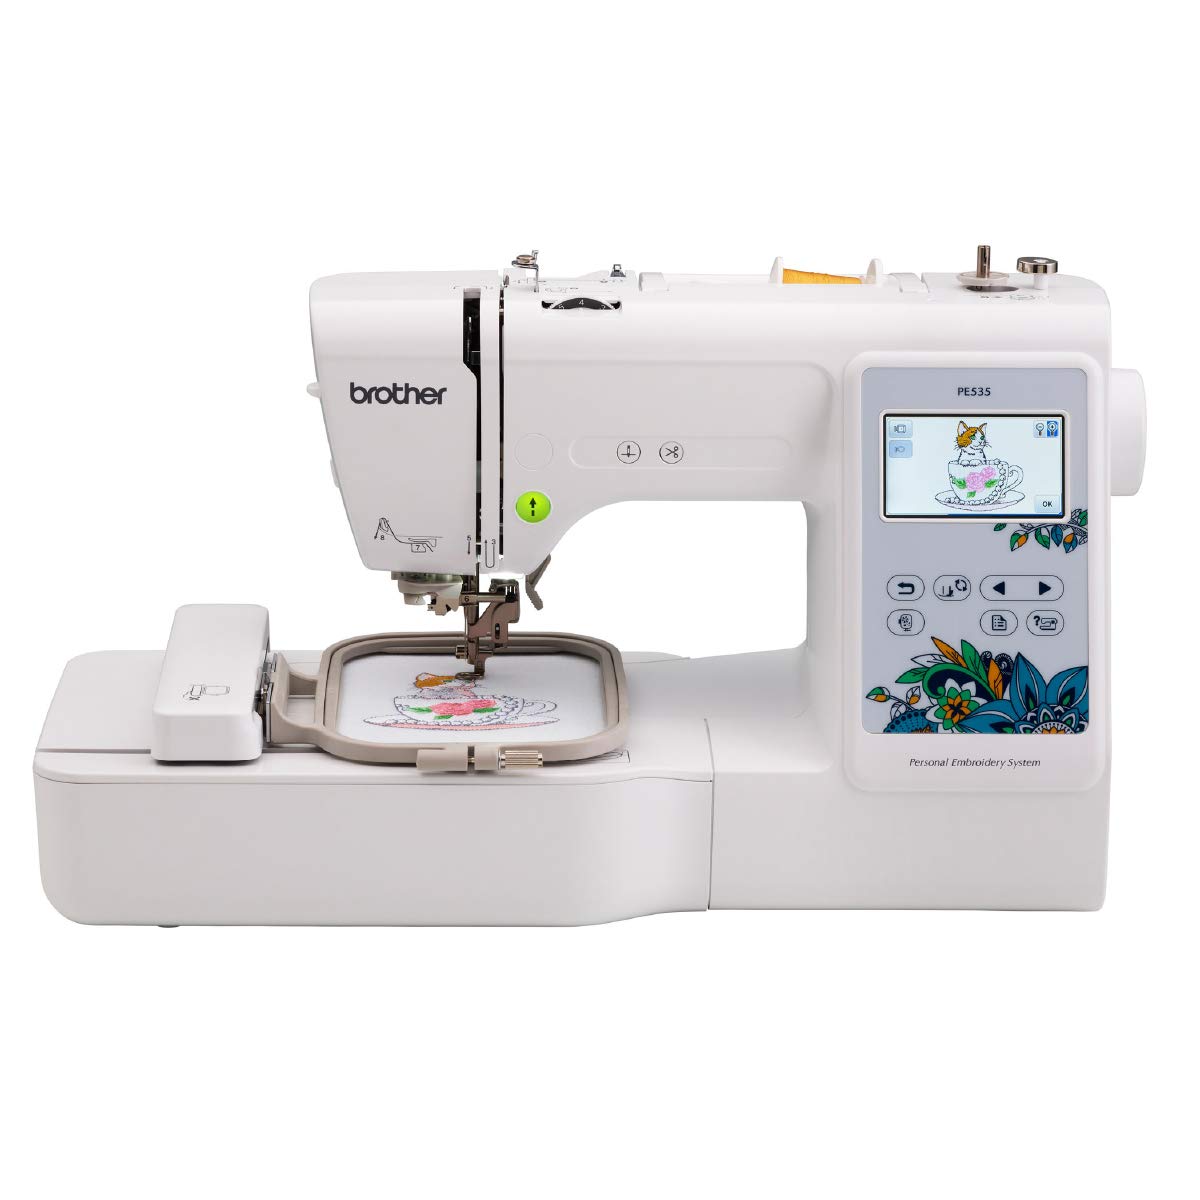
I picked the PE535 for its approachable features: 4"x4" hoop, 80 built-in designs, USB port, and a 3.2" color touchscreen aimed at beginners.
Why I picked it: User-friendly for first-time embroiderers and steady stitch quality.
Best for: Beginners and hobbyists on a tighter budget who want a dedicated unit.
A cost-conscious way to start with dedicated embroidery.
Pros
- Easy touchscreen drag-and-drop
- USB design import
- Good stitch quality for small projects
- Helpful tutorial materials included
Cons
- Small 4×4 hoop
- Limited built-in fonts
My take
This was my first embroidery-only machine, and it made learning approachable. The drag-and-drop placement on the touchscreen allowed me to compose simple multi-part designs right on the machine.
The 4×4 hoop is limiting if you plan large pieces, but I learned to combine multiple hoopings for bigger work. After a few months the stitch quality stayed consistent, and I still reach for this unit for quick personalization jobs.
I did notice the touchscreen occasionally needed firm taps, but that was a minor quirk compared with how reliable the stitch-outs were when I used good backing and appropriate needles.
4. Brother SE1900 Sewing and Embroidery Machine – Best Combo for Advanced Sewing
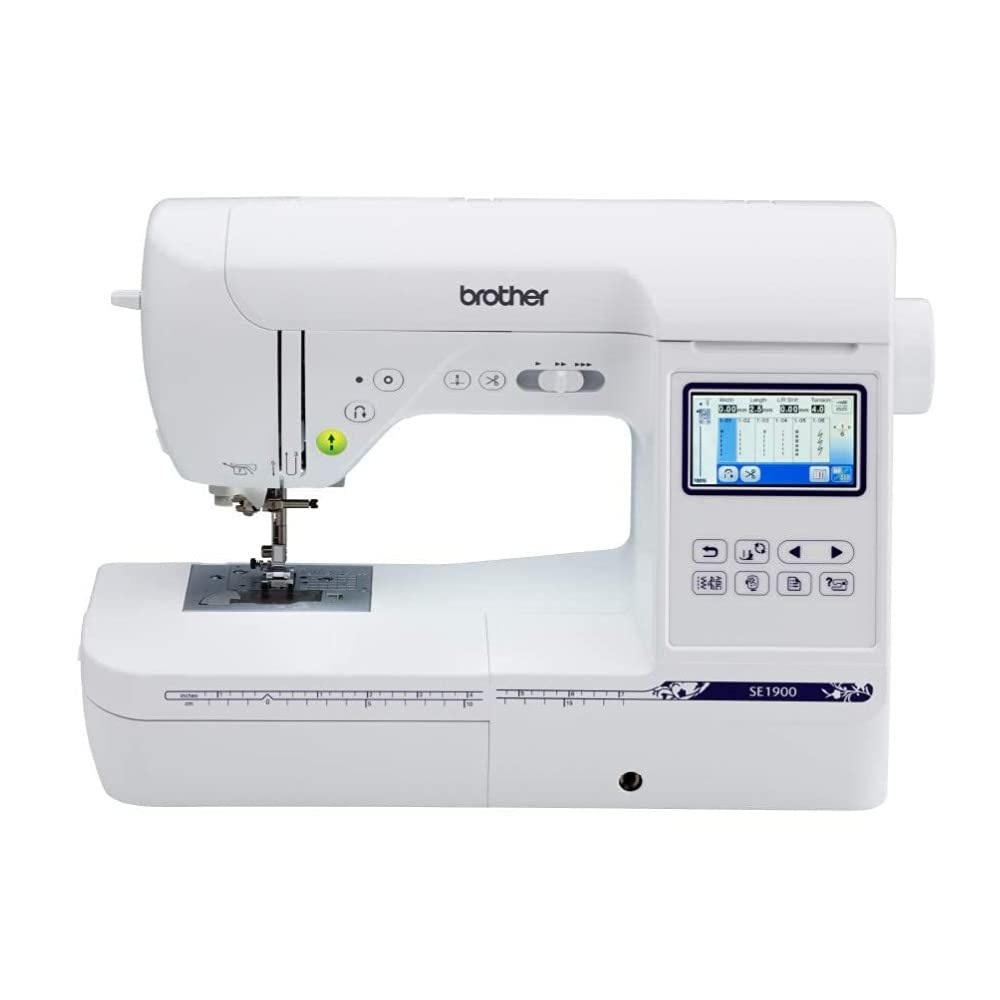
I turned to the SE1900 when I wanted a powerful combo: 5"x7" embroidery field, 240 built-in stitches, My Custom Stitch, and a roomy workspace.
Why I picked it: Combination of extensive sewing stitches and 5×7 embroidery capability.
Best for: Advanced hobbyists and quilters who need both sewing and embroidery.
A higher-tier combo that replaces multiple machines for many users.
Pros
- Large 5×7 embroidery field
- 240 built-in sewing stitches
- Custom stitch creation
- Excellent touchscreen editing
Cons
- Can need extra spool holders for bulk thread
- Larger machine footprint
My take
I used the SE1900 for quilting, garment sewing, and embroidery and appreciated the nearly seamless switch between sewing and embroidery modes. The larger hoop cut down on rehooping for combined designs and made lettering much easier to place.
My Custom Stitch opened possibilities I hadn’t expected—I designed and saved decorative stitches I now use on home décor projects. The machine handled multiple layers well and the lighting and throat space made precision work comfortable.
For anyone who wants a single machine to do serious sewing and large-ish embroidery, this is the model I recommend. It’s a bigger investment, but it replaced several devices on my worktable.
5. Brother SE700 Sewing and Embroidery Machine – Best Wireless Combo
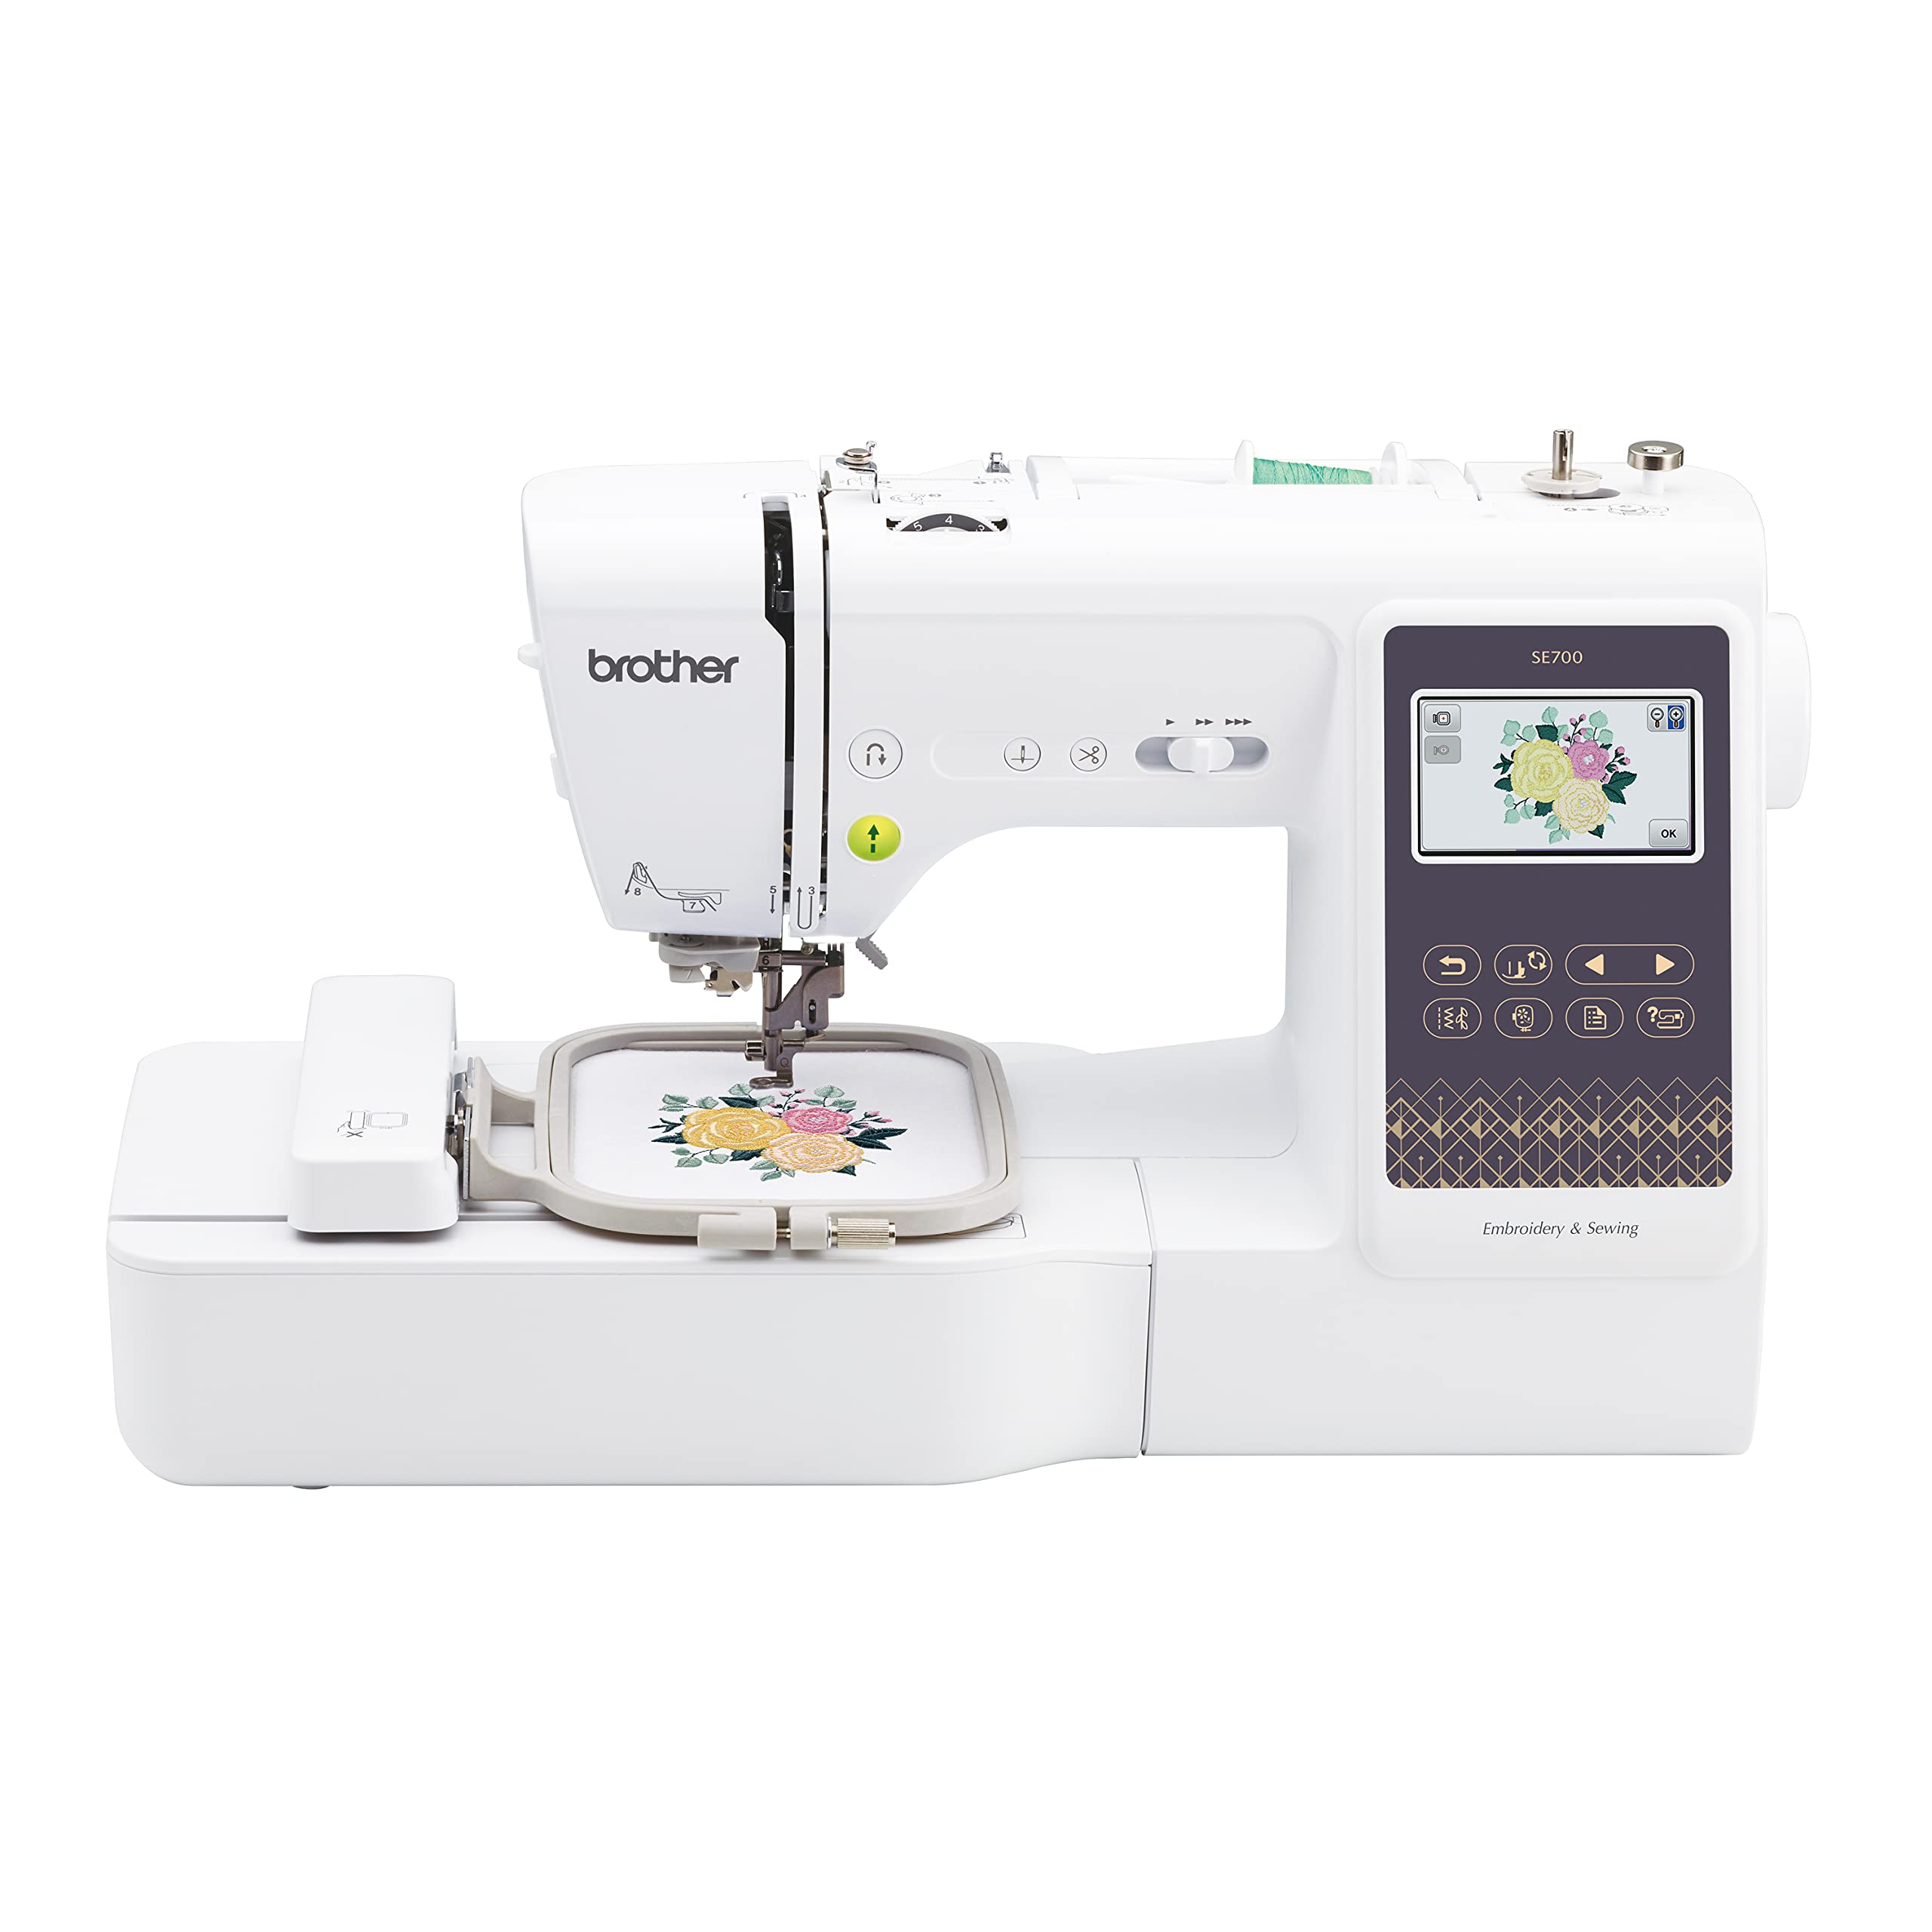
I appreciated the SE700 for its wireless features: Design Database Transfer, Artspira app compatibility, plus 135 built-in designs and a 3.7" touchscreen.
Why I picked it: Wireless transfer and mobile app make design workflow fast.
Best for: Creative hobbyists who want mobile design drafting and wireless transfer.
A modern combo with connectivity features for streamlined design transfer.
Pros
- Wireless design transfer
- Artspira mobile app support
- Automatic needle cutter
- Large 3.7" touchscreen
Cons
- 4×4 maximum embroidery area
- Compatibility varies by device
My take
I loved sketching ideas in the Artspira app and wirelessly sending them to the SE700—transferring hand-drawn line-art to a stitched piece felt almost instant once I had the network set up.
The combination of sewing and embroidery features is solid: the automatic thread cutter and advanced needle threading sped up multi-step projects. I used this machine for doll clothes and personalized gifts and found the touchscreen intuitive for on-machine edits.
If you value a wireless workflow and an app-driven creative loop, this model made my process noticeably faster than dragging a USB between devices.
6. BAi The Mirror 15 Needles Embroidery Machine – Best Small Business Multi-Needle
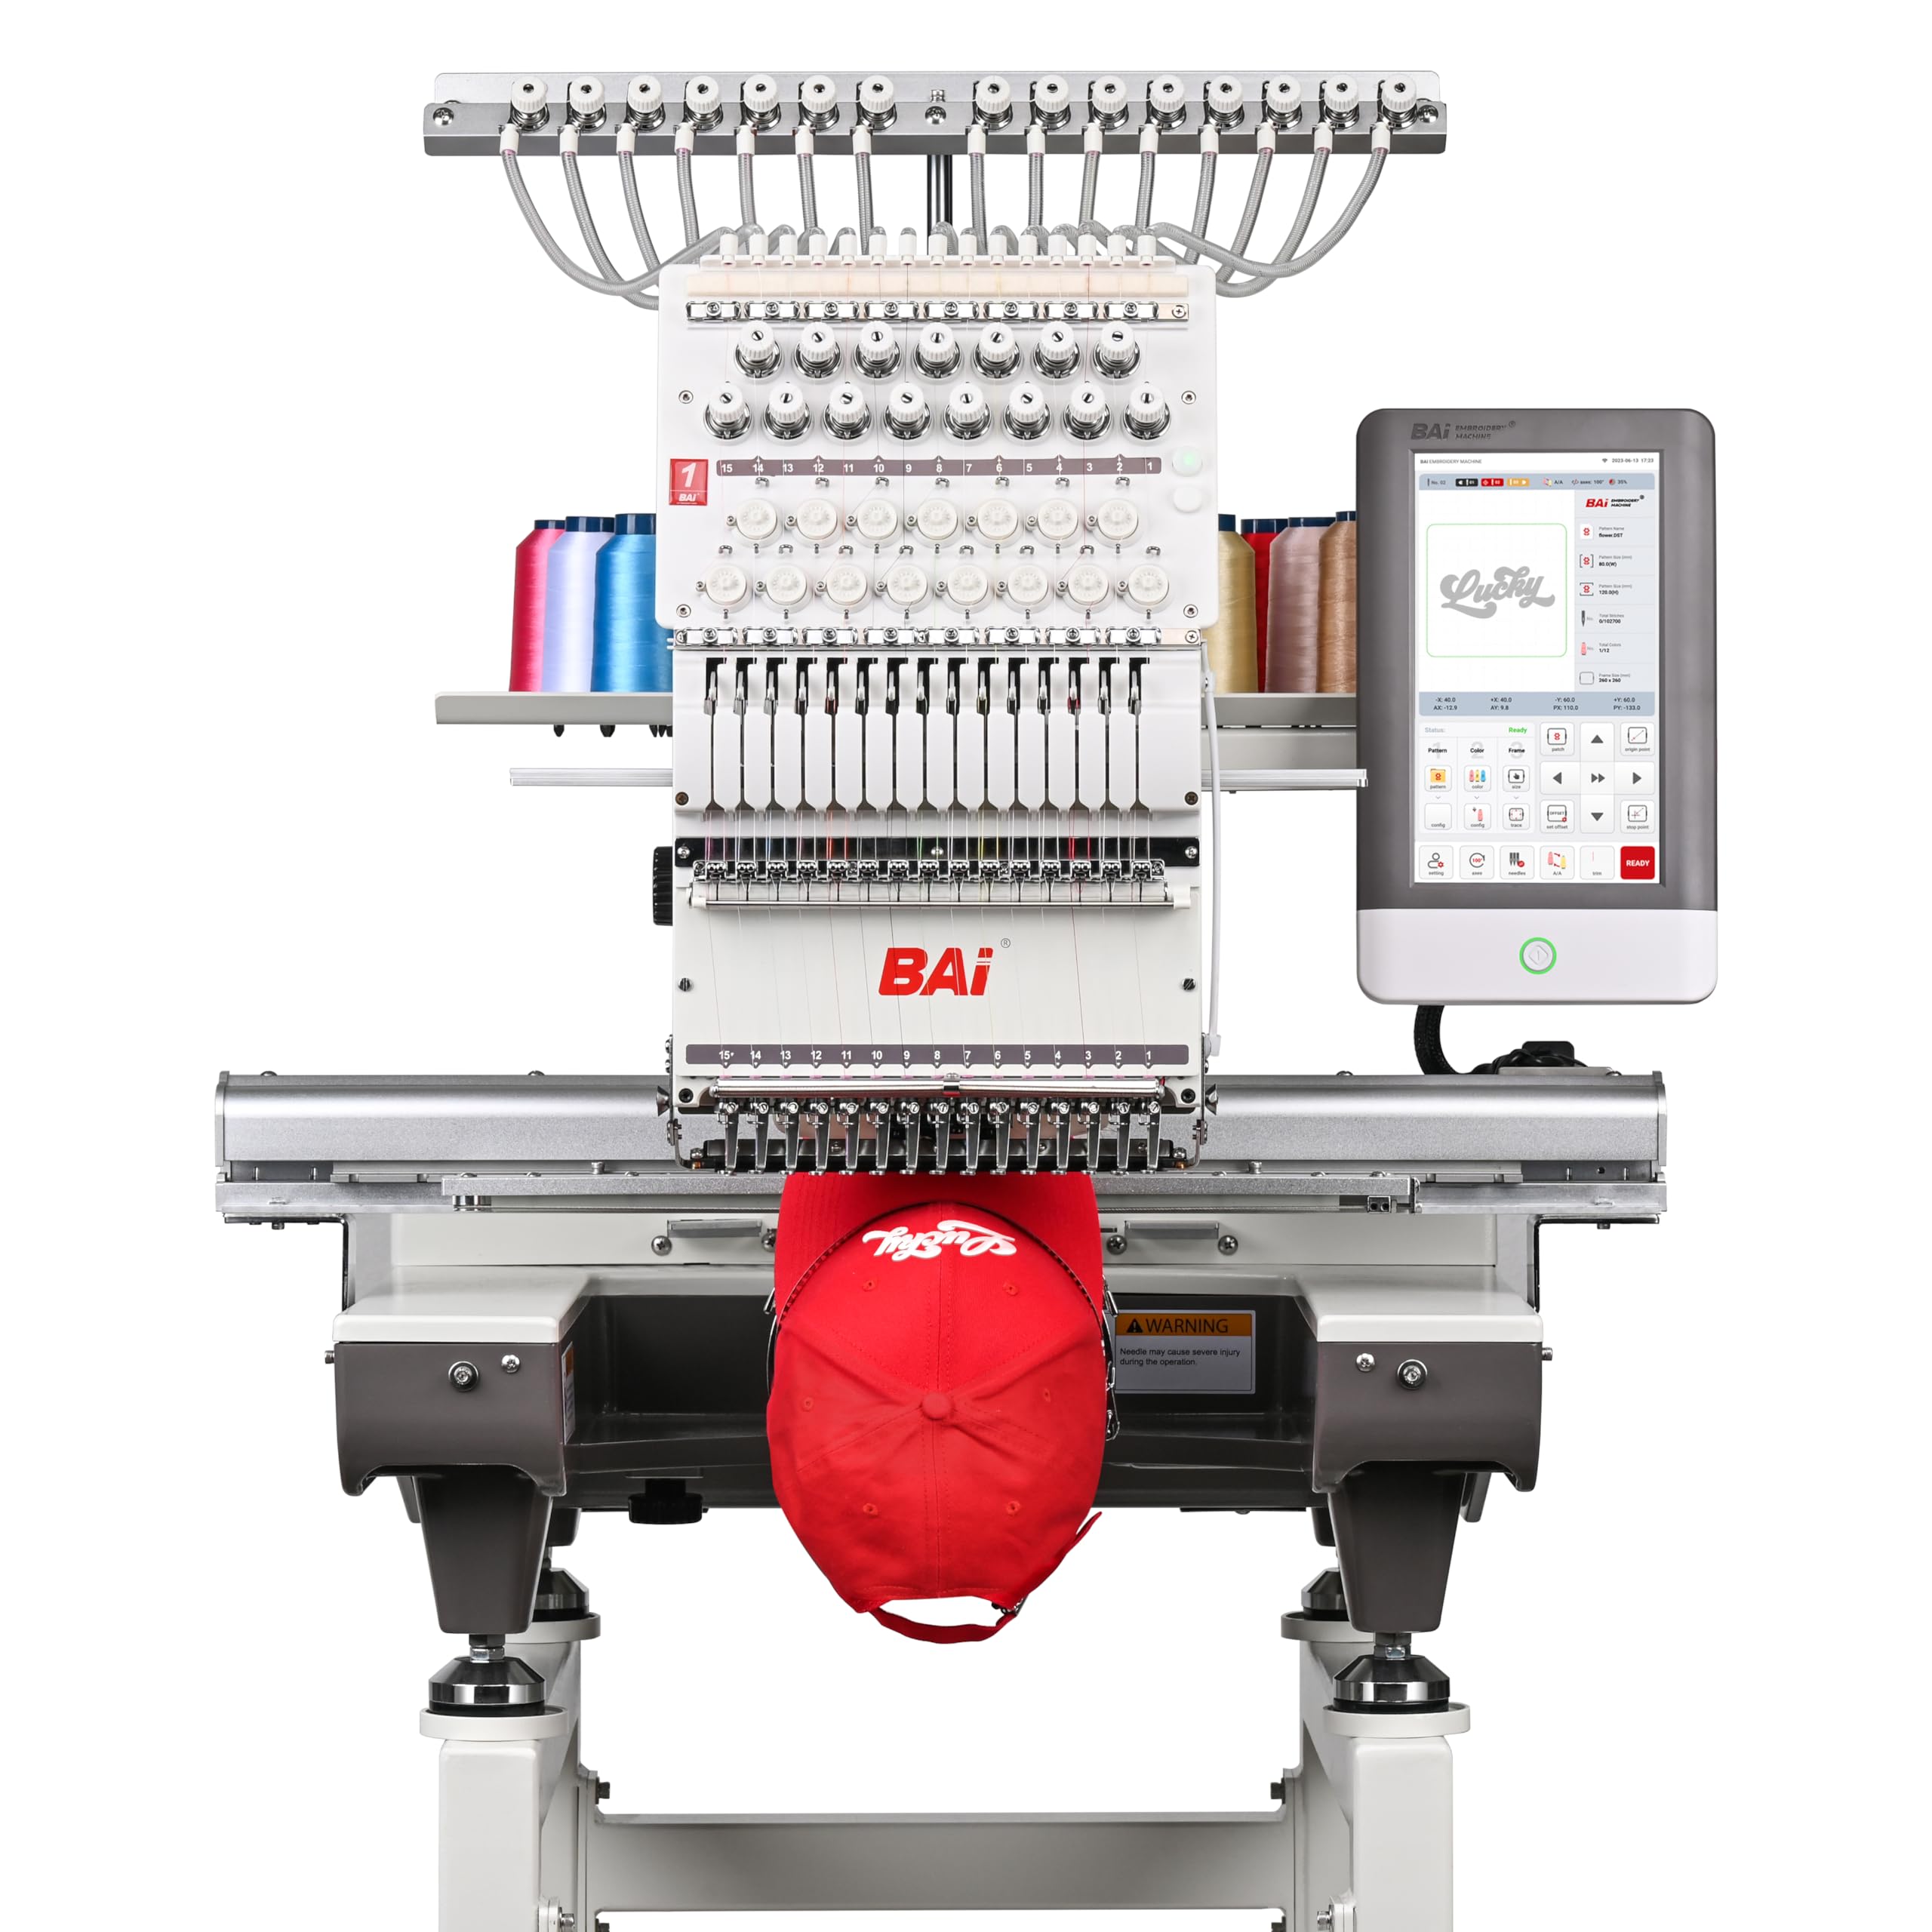
I used the BAi Mirror when scaling production: 15 needles, 20×14" embroidery area, up to 1200 SPM (flat) and 850 SPM on hats, plus Institch OS5 and Wi‑Fi/USB support.
Why I picked it: Multi-needle speed and commercial features for small businesses.
Best for: Etsy sellers, custom shops, or anyone needing high-volume, multi-needle work.
A commercial-grade investment for growing businesses and volume work.
Pros
- 15-needle multi-color efficiency
- Very fast stitch speeds
- Large embroidery area
- Free training and strong support
Cons
- More complex than home machines
- Higher upfront investment
My take
Moving to the BAi Mirror transformed my production cadence. The multi-needle setup eliminated constant color changes, and the stitch speeds significantly reduced turnaround on repeat orders.
I relied on the included training and BAI’s support to get comfortable with the OS5 interface; those resources were key. The free software and Wi‑Fi transfer made batch uploads simple, and the stitch quality across various fabrics was consistently professional.
This machine has a learning curve compared with single-needle home units, but if I needed reliable volume output and multi-color efficiency, it’s the device I’d pick for a small embroidery business.
How I Choose an Embroidery Machine
Hoop size and project scale
I prioritize hoop size based on the projects I plan to make. A 4×4 hoop is perfect for small personalization and baby items, while a 5×7 hoop saves time on larger motifs and lettering.
If you plan to join multiple hoopings or combine designs, make sure your chosen machine has the editing and placement features to make alignment painless.
- 4×4 hoops: great for tags, patches, and small gifts.
- 5×7 hoops: better for apparel, quilts, and larger logos.
- 20×14+ commercial hoops: ideal for production and large pieces.
Combo vs embroidery-only
I choose a combo machine if I want sewing and embroidery in one footprint. Combo units are versatile for hobbyists and small projects.
If embroidery is your main focus or you plan to scale, a dedicated embroidery machine (or a multi-needle commercial unit) offers speed and features that matter for volume and quality.
- Combo: one machine for sewing and embroidery tasks.
- Embroidery-only: more specialized controls and often larger hoops.
- Multi-needle: saves time on multi-color jobs and production runs.
Touchscreen, editing, and connectivity
I value a clear color touchscreen that previews designs and makes on-machine edits fast. Being able to rotate, resize, and place designs on-screen reduces trial-and-error hoopings.
Connectivity (USB, Wi‑Fi, or app transfer) speeds my workflow—especially when I’m moving files from my computer or drawing drafts on mobile apps.
- On-machine editing reduces rehooping.
- USB or Wi‑Fi streamlines design transfer.
- Mobile apps can accelerate creative iteration.
Needles, speed, and materials
I match needle types and thread quality to fabric. Single-needle home machines are flexible, but multi-needle machines dramatically cut color-change time on high-volume jobs.
Speed matters: higher SPM helps productivity, but I balance speed against fabric type and stitch accuracy.
- Use embroidery needles and quality thread.
- Slow down for delicate fabrics; speed up for sturdier material.
- Multi-needle heads excel for repeated, multi-color designs.
Support, software, and accessories
I consider included training, warranty, and access to local support essential—especially on commercial machines. Good support shortens the learning curve.
Accessories like additional hoops, stabilizers, and bobbin holders can be crucial and sometimes add more value than upgrading the machine itself.
- Budget for quality backing and thread.
- Confirm hoop compatibility if you own previous Brother hoops.
- Check available tutorials or vendor training for complex machines.
Frequently Asked Questions
Do I need a separate sewing machine if I buy an embroidery-only model?
If you plan to sew garments, quilts, or heavy textile work regularly, I recommend keeping a dedicated sewing machine. Embroidery-only machines excel at stitched designs but won’t replace a full-featured sewing machine for construction tasks.
How important is hoop size?
Hoop size directly affects what I can stitch without rehooping. I choose 4×4 for small items, 5×7 for most home projects, and large commercial hoops for production or oversized designs.
Can I transfer designs from my phone or computer?
Yes. I use USB or Wi‑Fi depending on the machine. Models with app support (like Artspira) let me draw on my phone and wirelessly send designs, which speeds up my creative process.
Is a multi-needle machine worth the investment?
If I’m producing multiple pieces with repeated multi-color designs, a multi-needle machine is transformative. It reduces manual color changes and significantly increases throughput, but it requires space and a willingness to learn more advanced operation.
Final Take
After hands-on testing, I recommend choosing based on how you work: pick a combo model if you want sewing versatility, a dedicated embroidery machine for larger or more refined designs, and a multi-needle commercial unit when volume and speed matter.
I use the machines listed here for specific purposes—each one earned a spot because it solved a real need in my workflow. Start with what you plan to make, then match hoop size, connectivity, and support to your ambitions.
")