
I tested five Brother embroidery and combo machines to find the best options for beginners, hobbyists, and sewists who need larger hoops or wireless design transfer. Here are the machines I’d choose in each category and—
I spent hands-on time with five Brother machines so I could recommend the ones that actually make embroidery enjoyable. I focused on hoop size, ease of use, design import options, and how well each machine handles everyday projects.
Below I explain which machines I reach for first and why—whether I need a compact combo for quick monograms or a 5" x 7" field for larger work.
I compared hoop size, whether the machine is embroidery-only or a combo, built-in designs and fonts, touchscreen usability, and file import options (USB vs wireless) to pick machines for different needs.
1. Brother SE600 Sewing & Embroidery Combo – Best for Beginners
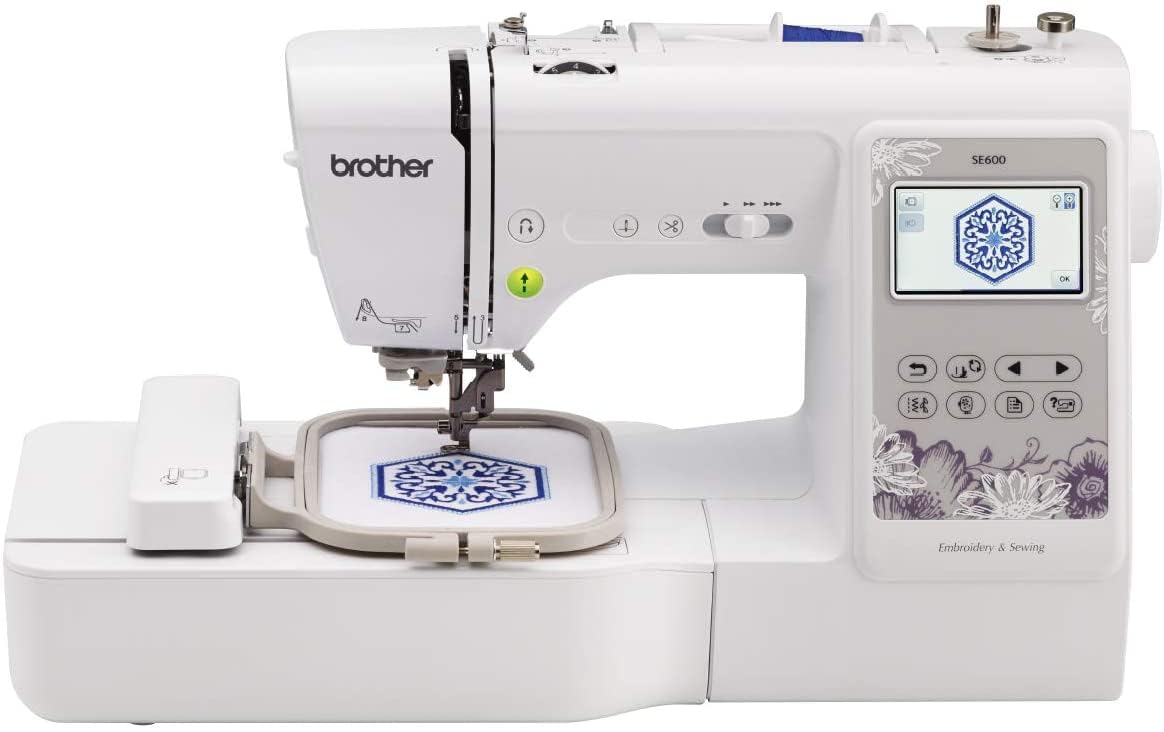
A compact combo I like for getting started with sewing and small-scale embroidery. The included 4" x 4" hoop, color touchscreen, and automatic needle threader make setup painless.
Why I picked it: Simple combo with everything I need to learn embroidery and do everyday sewing.
Best for: New sewists who want both sewing and embroidery in one compact machine.
A budget-friendly, entry-level combo option.
Pros
- Included 4" x 4" hoop
- 80 built-in embroidery designs
- 103 built-in sewing stitches
- Automatic needle threader
- Color touchscreen preview
Cons
- Small embroidery field for large designs
- Limited to basic monogramming
My take
This is the machine I reach for when I want a single unit that handles both mending and small personalization projects. The 4" x 4" hoop is perfect for monograms, small patches, and kid-sized decorations.
Threading is painless thanks to the automatic needle threader, and the drop-in bobbin stayed jam-free during my tests. I appreciated the 3.2" color touchscreen because I could preview designs before stitching without guessing.
Sewing with the SE600 felt smooth and quiet — it moves through seams confidently and the included feet cover everyday needs. Embroidery did have a learning curve, but the built-in designs and straightforward controls let me get solid results quickly.
If you plan to do larger emblems or multi-hoop projects often, you’ll find the embroidery field limiting. For starters and people who want a true combo without a huge footprint, this is the machine I recommend.
2. Brother PE800 Embroidery Machine – Best Embroidery-Only
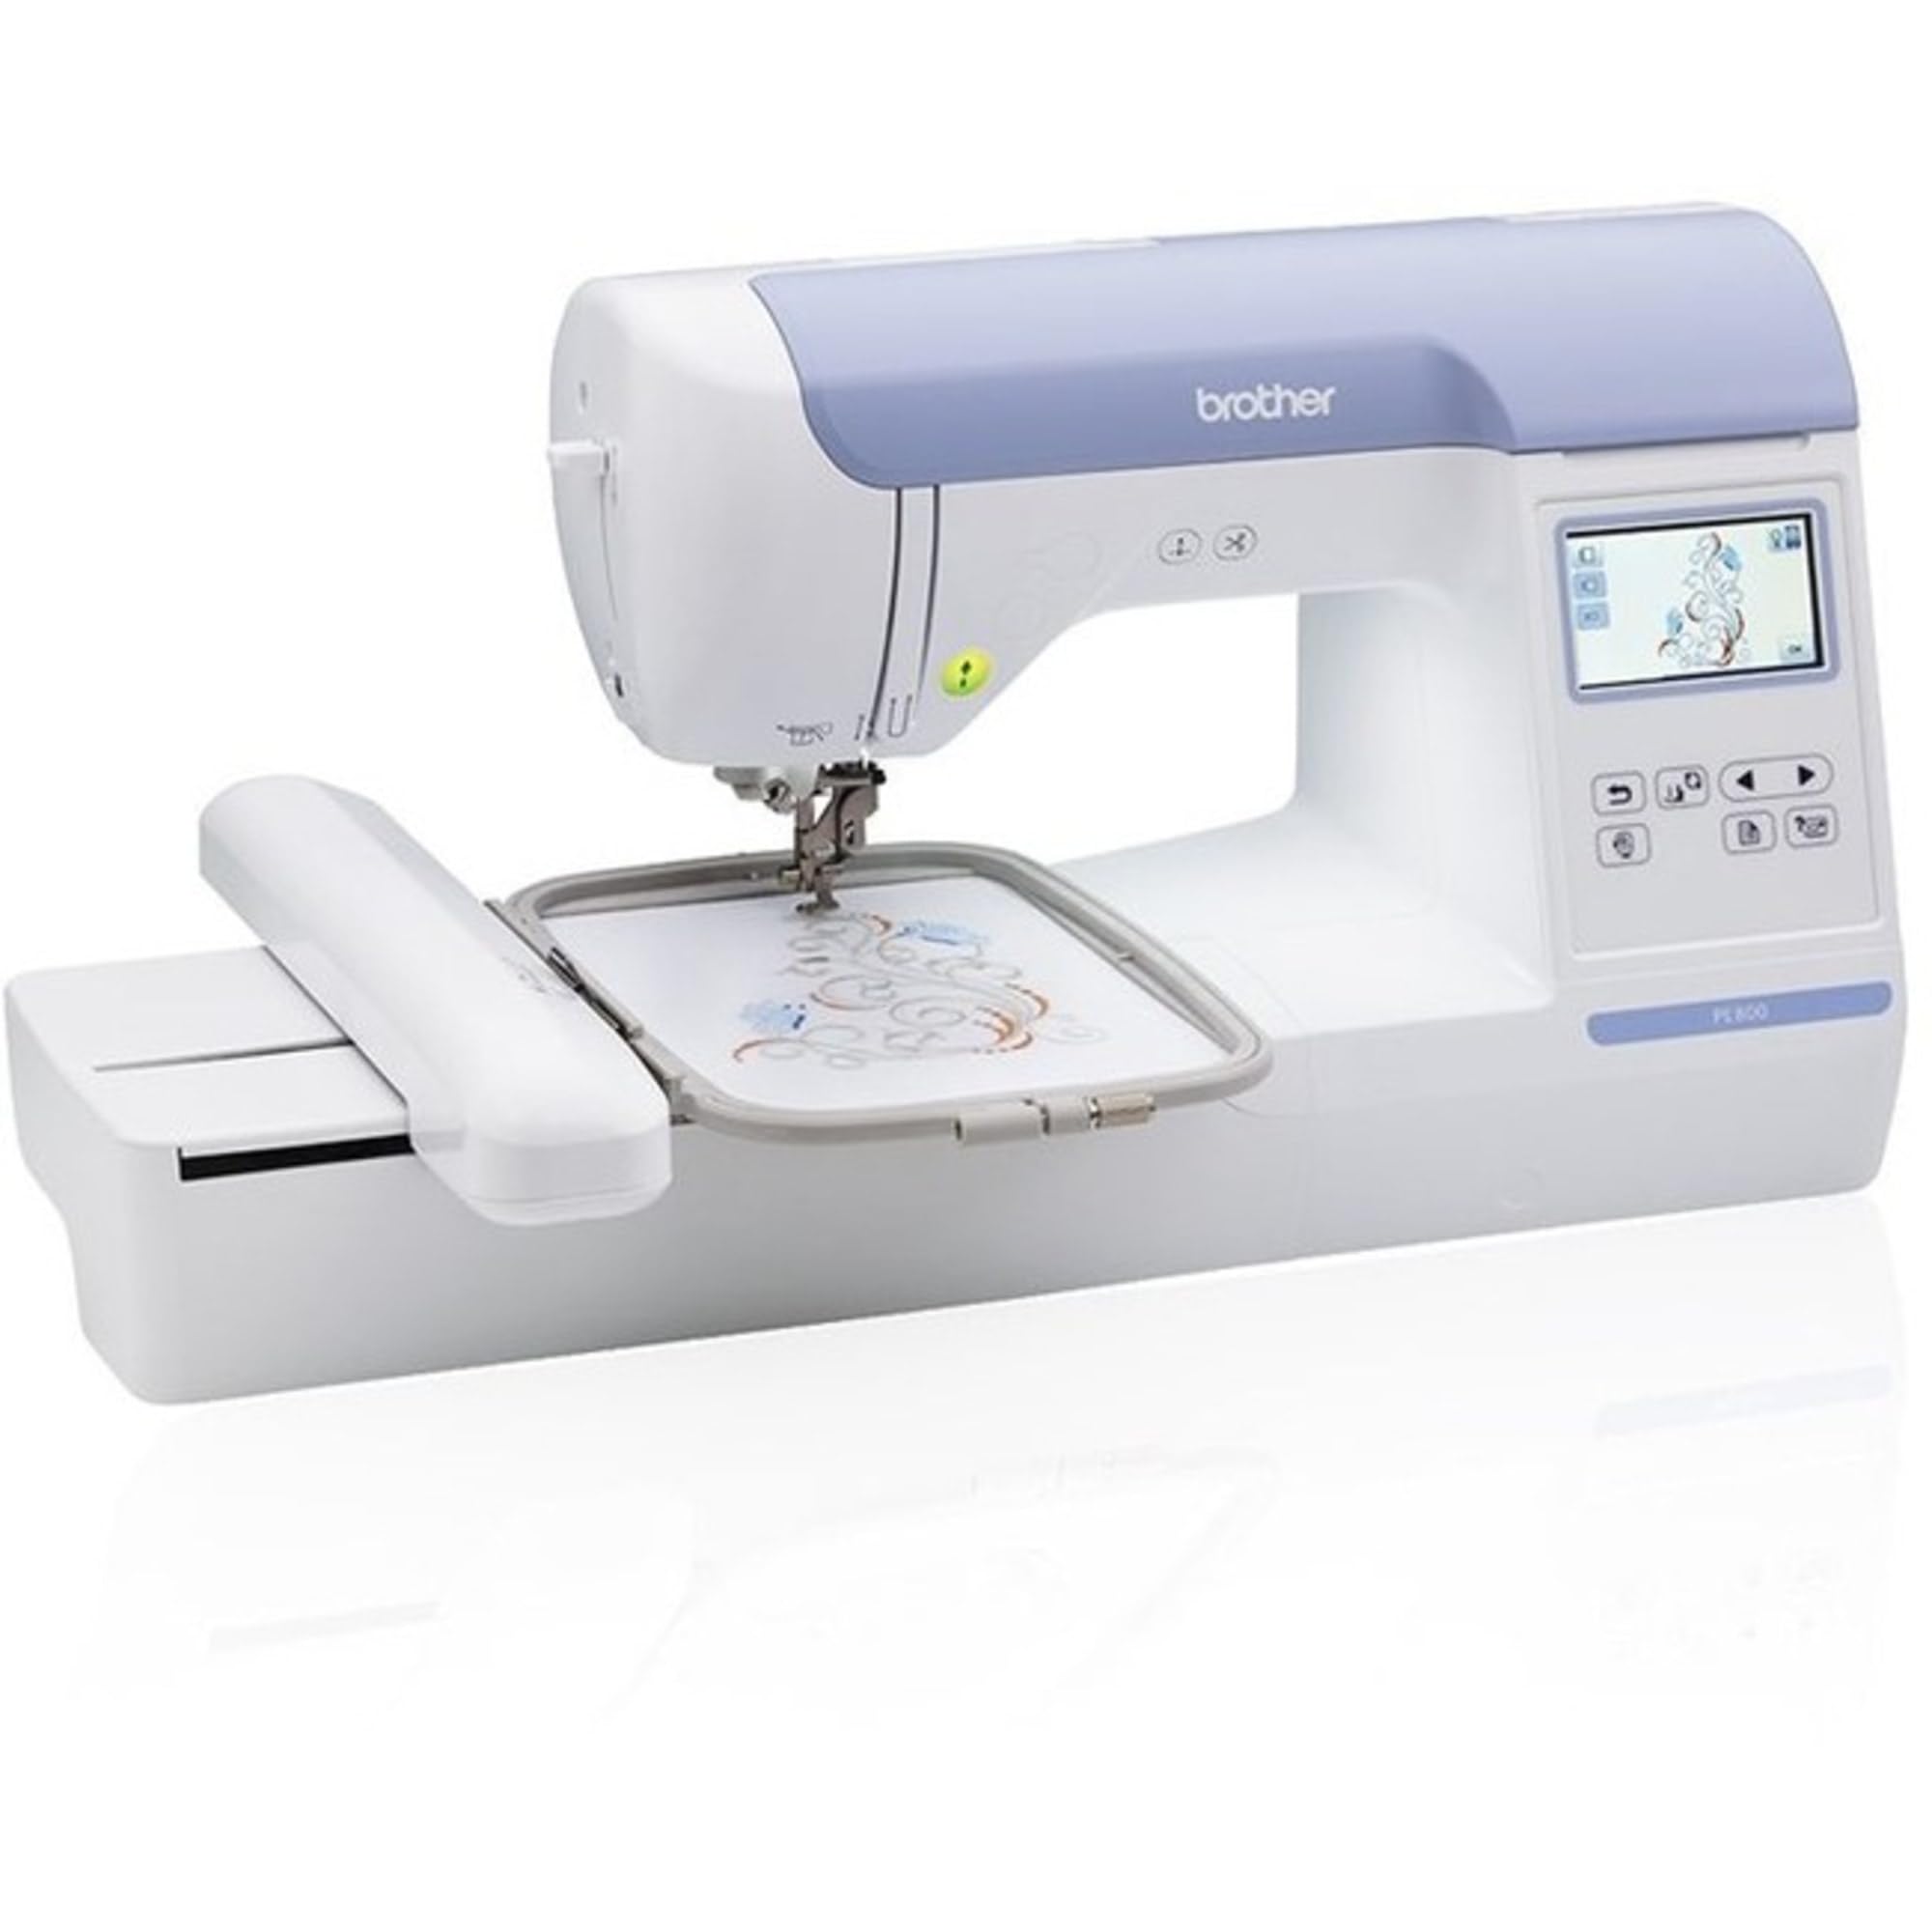
A dedicated embroidery machine with a roomy 5" x 7" hoop and robust editing on the color touchscreen. I like it when I need larger single-pass designs and easy USB importing.
Why I picked it: Larger 5" x 7" field and USB import make it my go-to for bigger work.
Best for: People focused on embroidery who need larger designs and import flexibility.
A mid-to-higher-range dedicated embroidery machine.
Pros
- 5" x 7" embroidery field
- 138 built-in designs
- USB design import
- 11 built-in font styles
- Color touchscreen editing
Cons
- Does not sew
- Hoop mounting can feel fiddly
My take
When I need a larger canvas, the PE800 is the machine I pick. The 5" x 7" hoop cuts down on rehooping and lets me stitch logos and larger monograms in one pass.
Design editing on the 3.2" color screen is surprisingly capable—I rotated, mirrored, and resized designs right on the display before stitching. Importing my own PES files via USB was straightforward, which saved me time compared with machines that limit on-board memory.
A note from working with this unit: it rewards decent thread and backing. I got the cleanest results using good-quality embroidery thread and tear-away backing. The PE800 is an embroidery workhorse for anyone ready to focus on stitched art rather than conventional sewing.
3. Brother PE535 Embroidery Machine – Best Value Embroidery
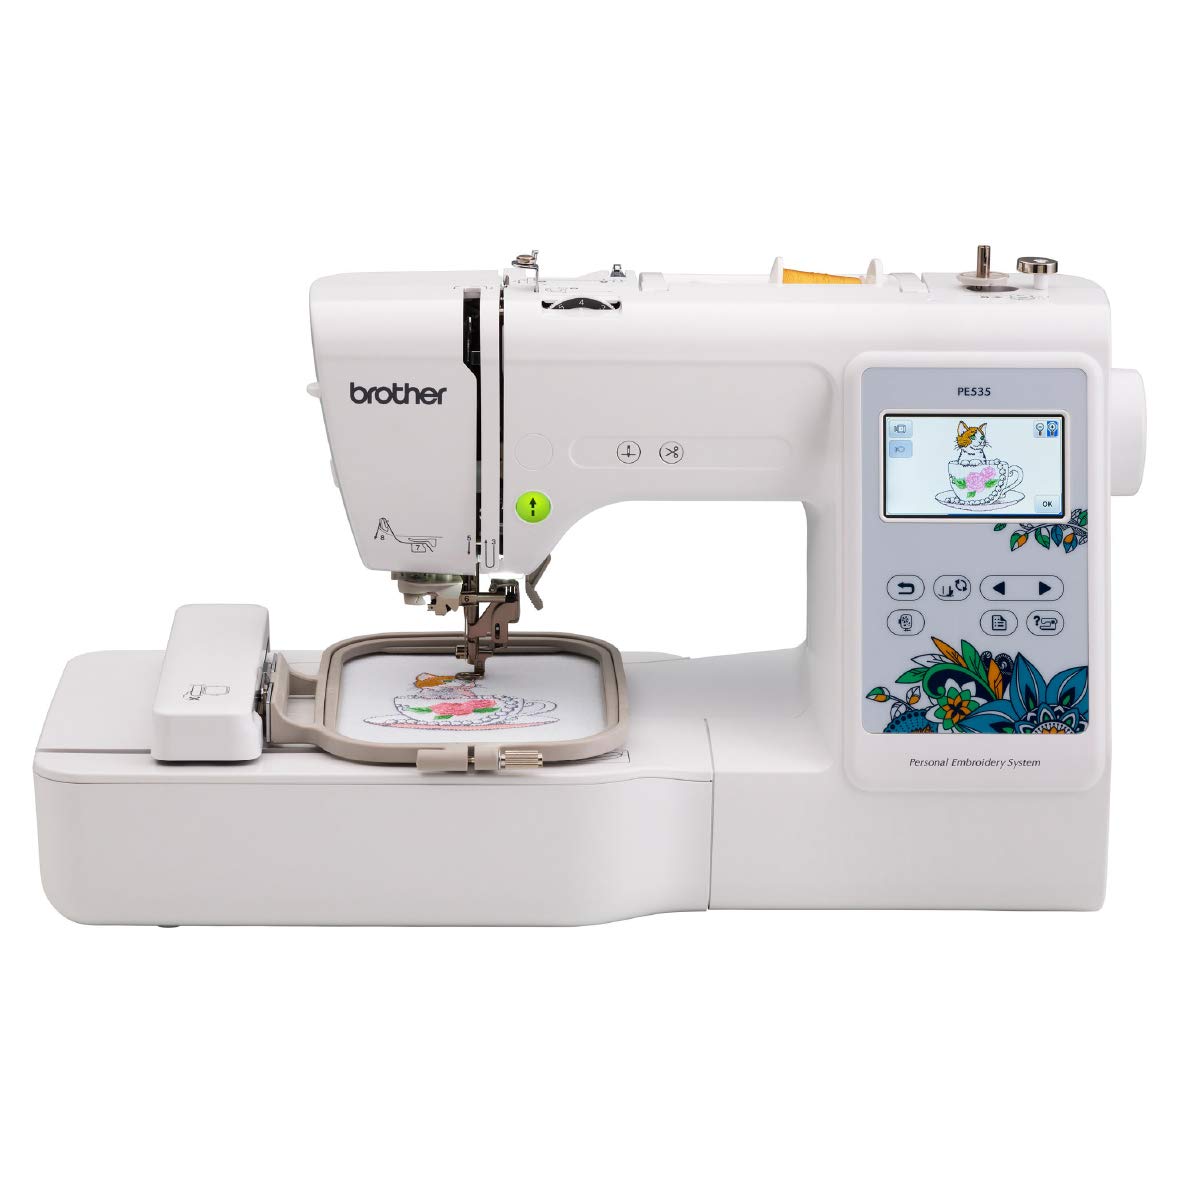
A straightforward embroidery-only machine that delivers great value for beginners. The 4" x 4" hoop and USB port let me experiment with designs without a steep learning curve.
Why I picked it: Affordability and ease of use for first-time machine embroiderers.
Best for: Beginners and hobbyists who want a friendly, affordable embroidery machine.
An approachable, budget-friendly embroidery option.
Pros
- Easy setup for beginners
- USB design upload
- 80 built-in designs
- Large color touchscreen
- Compact footprint
Cons
- 4" x 4" hoop limits larger projects
- Touchscreen can need firm taps
My take
This was the first embroidery machine I used and it made the hobby approachable. Set-up was quick and the instructional materials helped me move from zero to stitched samples within a few sessions.
The 4" x 4" hoop forced me to think in modules; I often build larger pieces by combining multiple passes. The USB port made bringing in new designs painless, and the drag-and-drop pattern placement on the touchscreen simplified positioning.
If you want simple, reliable embroidery without bells and whistles, the PE535 is the model I recommend for starting out. Just keep the hoop size in mind when planning projects.
4. Brother SE1900 Sewing & Embroidery Combo – Best for Advanced Sewing + Embroidery
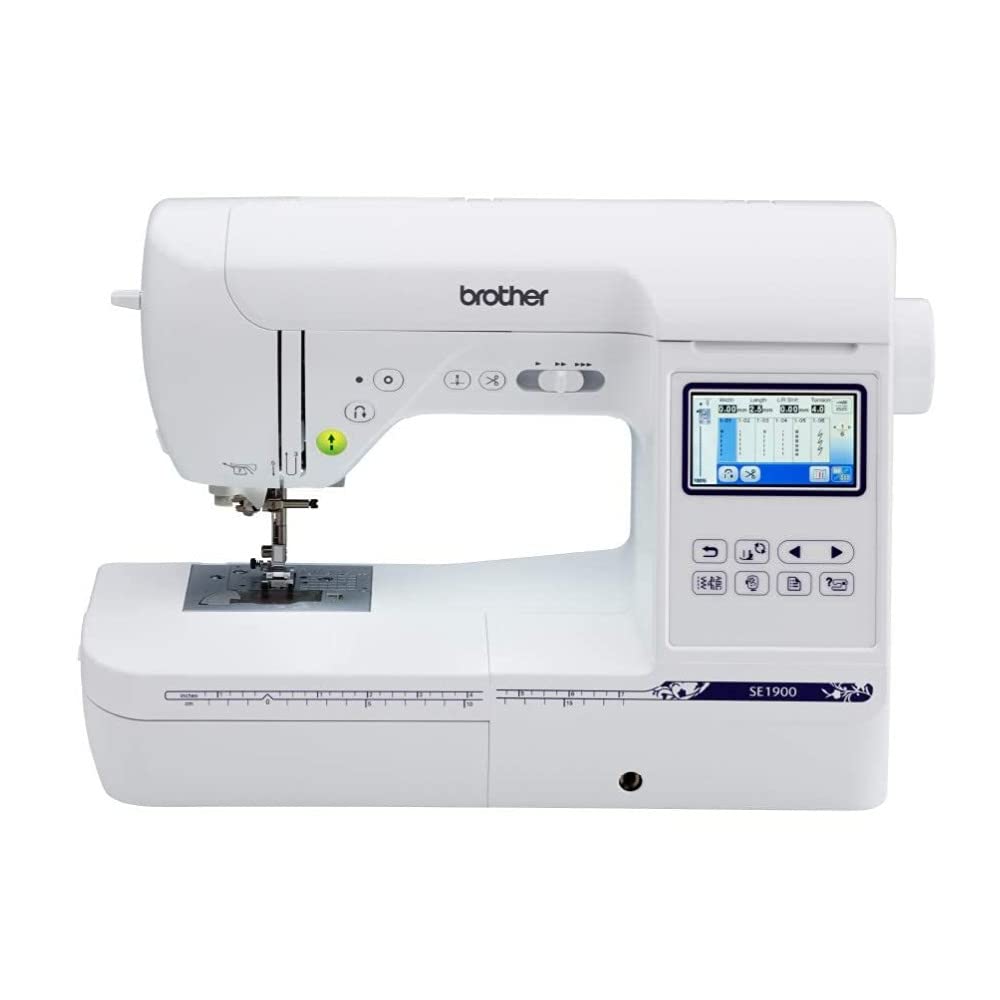
A versatile combo that I use when I need both extensive sewing features and a 5" x 7" embroidery field. The 240 stitches and My Custom Stitch make it a strong option for serious hobbyists.
Why I picked it: Combines a large hoop with advanced sewing features and custom stitch creation.
Best for: Experienced hobbyists and sewists who want robust sewing plus embroidery.
A higher-end combo built for serious hobby use.
Pros
- 5" x 7" embroidery field
- 240 built-in sewing stitches
- My Custom Stitch feature
- Advanced needle threader
- Large, bright workspace lighting
Cons
- Takes more bench space
- May need extra spindle for bulk cones
My take
I reach for the SE1900 when a project needs both detailed sewing and larger embroidery—quilting blocks with personalized motifs are a perfect match. The 5" x 7" hoop reduces rehooping and simplifies combining designs.
My Custom Stitch is where this machine stands out: I created and saved decorative stitches I use repeatedly. Sewing performance is quiet and precise, with excellent lighting and plenty of throat space for larger projects.
One practical point: if you use large commercial thread cones you’ll want a separate spindle holder to avoid tangles. Otherwise, the SE1900 has become my go-to when I want a single machine that handles serious sewing and capable embroidery.
5. Brother SE700 Sewing & Embroidery Combo – Best for Wireless Design Transfer
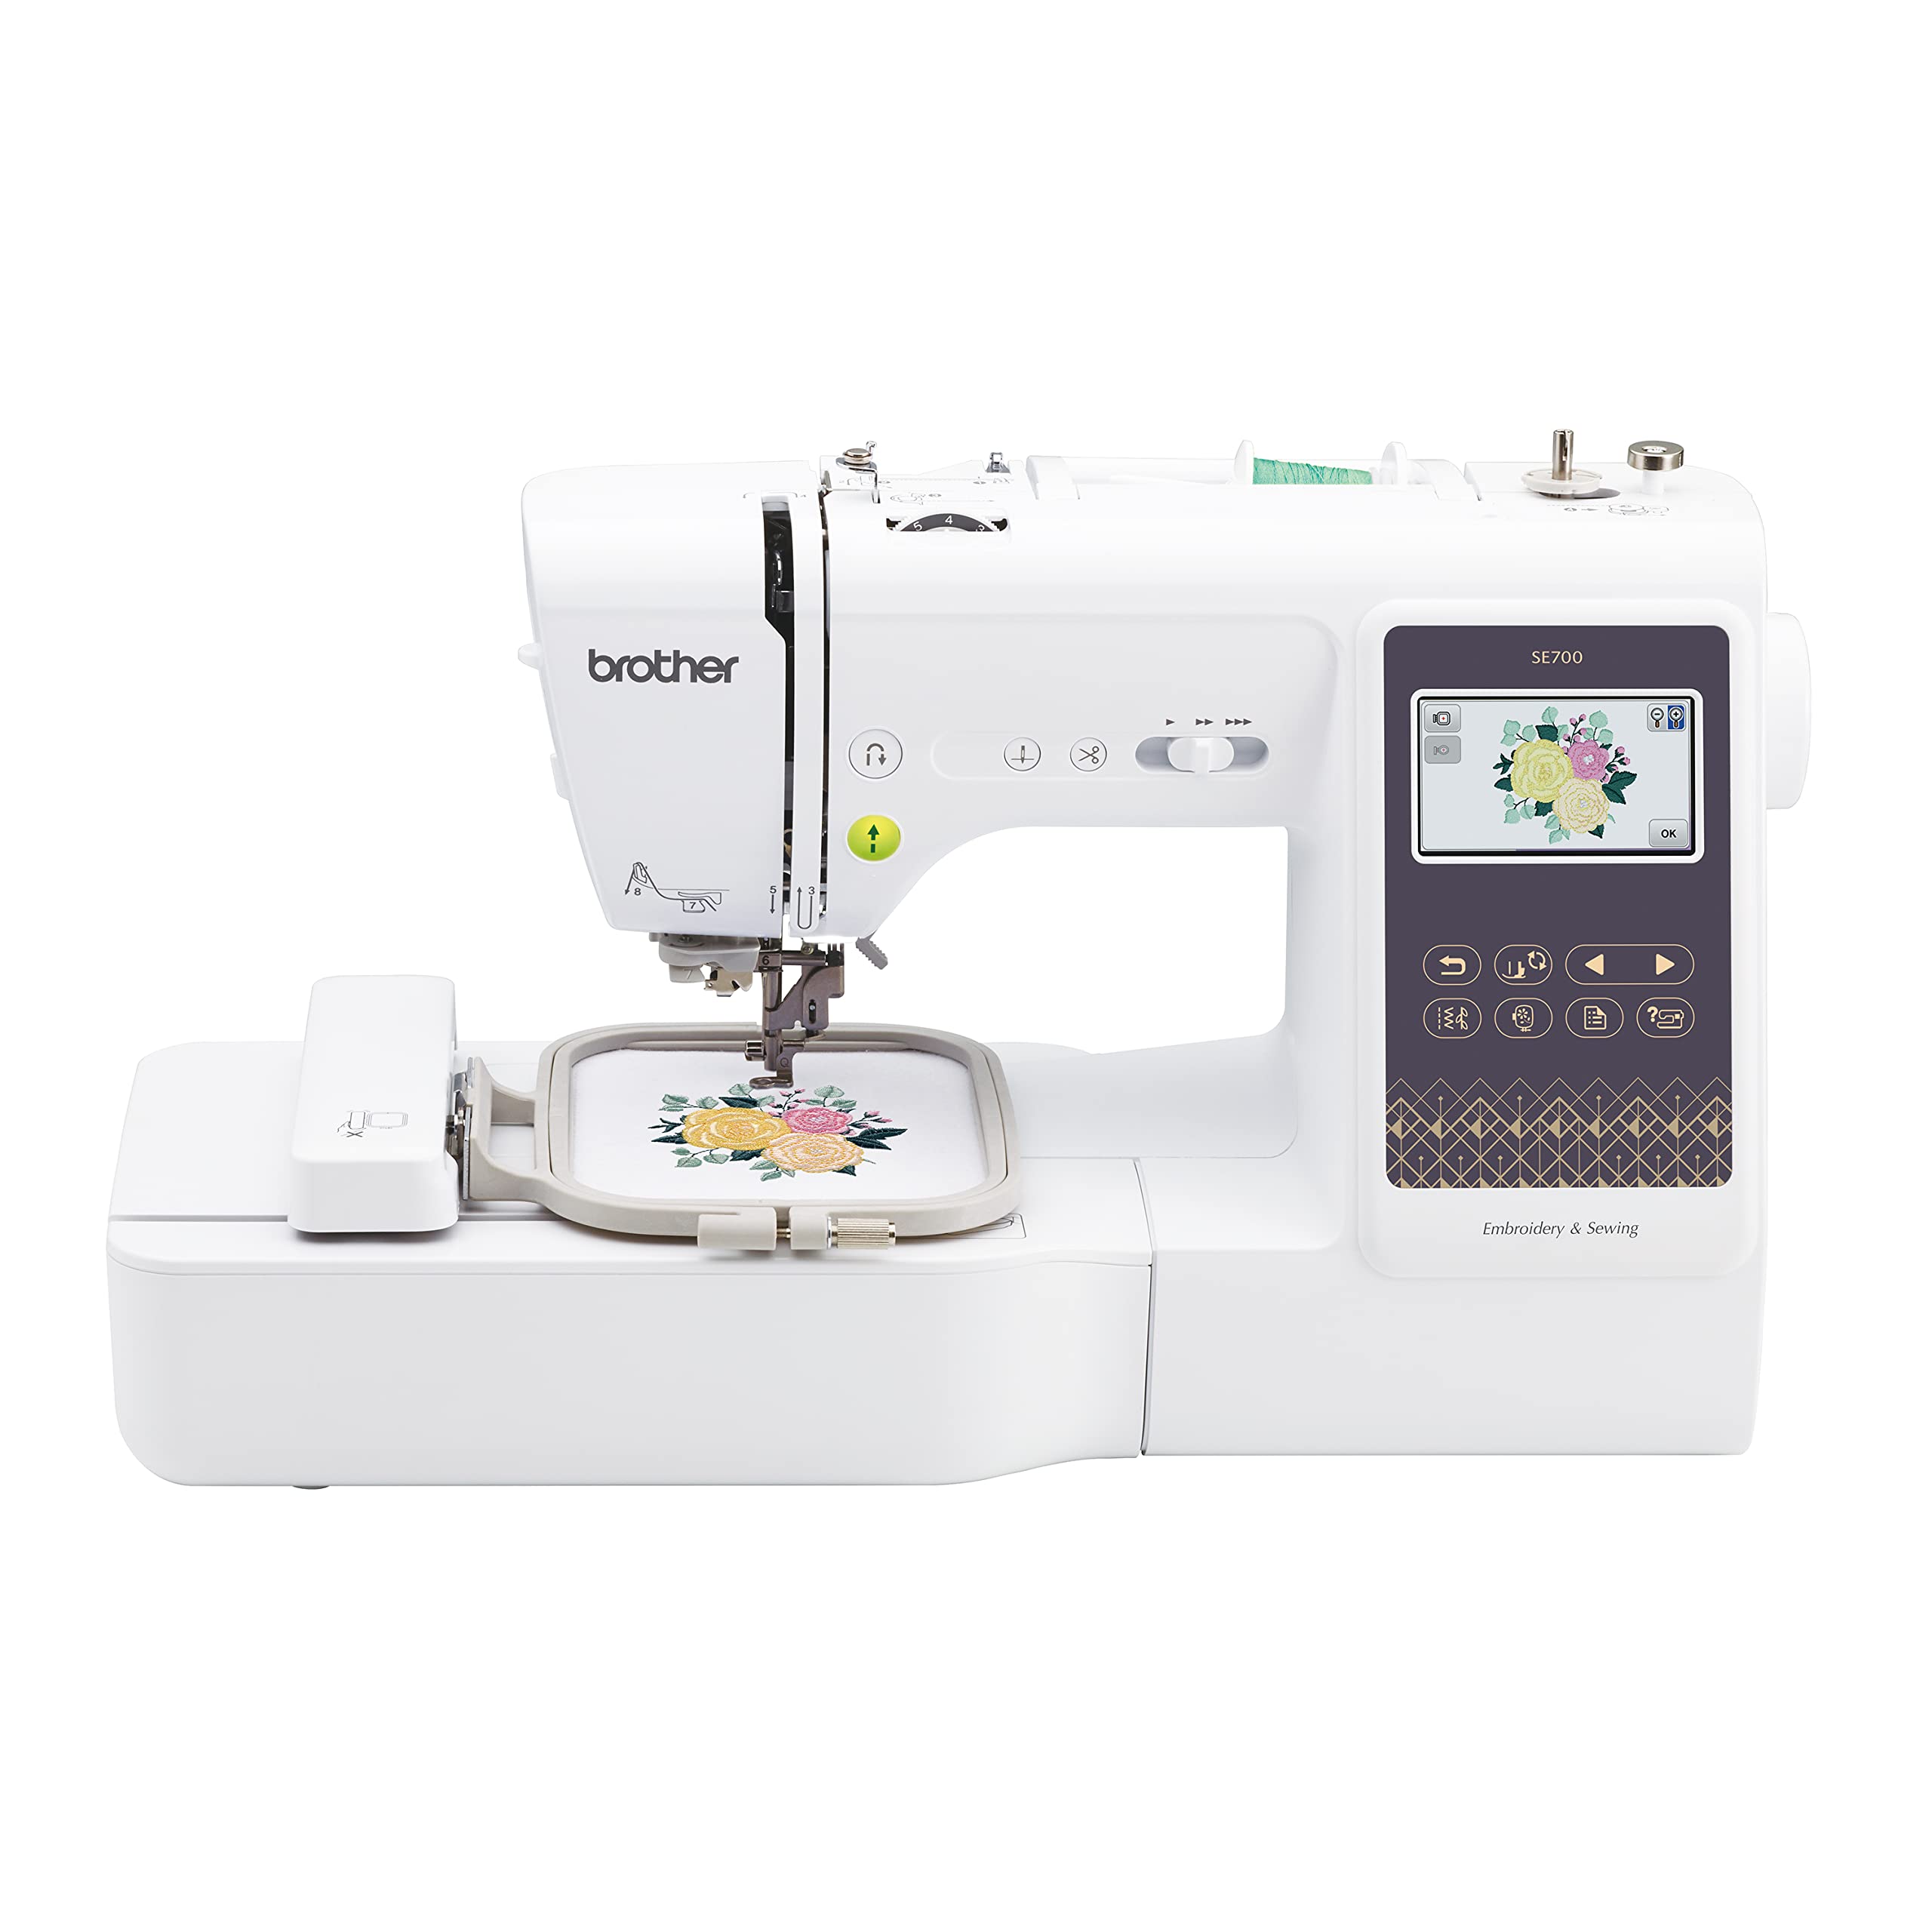
I like this combo for wireless design transfer and the Artspira app. The 3.7" touchscreen and mobile drawing options make it a creative, modern choice for hobbyists.
Why I picked it: Wireless LAN and mobile app integration for easy design transfer and creativity.
Best for: Crafters who want to draw or send designs from a phone or PC.
A midrange combo with modern connectivity features.
Pros
- Wireless LAN design transfer
- Artspira mobile app drawing
- 3.7" touchscreen
- Automatic thread cutter
- 103 sewing stitches
Cons
- 4" x 4" embroidery field
- Wireless compatibility varies by device
My take
I was pleasantly surprised by how smoothly designs moved from my laptop and mobile device to the machine. When I used the Artspira app to sketch simple line-art, wirelessly transferring and stitching felt seamless.
The 3.7" touchscreen gives me a little extra preview space and editing control compared with smaller displays, and automated features like thread cutting and needle-down make multi-step sewing easier.
I did have to pay attention to needle choice and tension—switching to dedicated embroidery needles and adjusting tension solved occasional needle breaks. For a hobbyist who values wireless convenience and app-driven creativity, the SE700 is the model I recommend.
How I Picked These Brother Machines
Key features I checked
I focused on the hoop size first—4" x 4" for compact work and 5" x 7" when I wanted larger designs with less rehooping. That choice alone often determines which machine I recommend.
Next I assessed whether the machine is embroidery-only or a combo. Combo machines add sewing versatility, but dedicated embroidery machines often offer larger hoops or more embroidery-focused controls.
I prioritized how designs get into the machine: USB import is reliable, and wireless transfer or app integration is a real convenience if you work from phone or desktop files.
- Hoop size: choose 4" x 4" or 5" x 7" based on project scale.
- Combo vs embroidery-only: pick sewing capability if you need mending or garment construction.
- Design transfer: USB is standard; wireless/app offers extra convenience.
- Built-in designs & fonts: useful starters, but plan to import PES files for flexibility.
- Needles, thread, and backing matter: quality supplies yield the cleanest results.
Tips from my hands-on time
Test touchscreens in person if you can—some require firmer taps than others. I found the larger touch displays easier to edit designs on-screen.
Use proper embroidery needles and good backing. I saw the cleanest stitches when I paired good thread with tear-away backing.
Consider workspace: combo machines that do both sewing and embroidery tend to be larger and heavier, so plan bench space accordingly.
- Carry extra bobbins and needles for long stitching sessions.
- Buy a small set of quality embroidery threads and backing to start.
- If using bulk cones, plan for a separate cone spindle.
Frequently Asked Questions
Do I need an embroidery-only machine or a combo?
I recommend a combo if you want to sew garments and occasionally embroider; it saves space and cost. Choose an embroidery-only model if you plan to do lots of larger embroidery and want a bigger hoop or a machine tuned specifically for embroidery.
What hoop size should I choose?
I pick a 4" x 4" hoop for small monograms, kids’ clothing, and frequent quick stitches. I choose a 5" x 7" hoop when I need fewer rehoops for logos, bigger motifs, or combining designs.
Can I import my own designs?
Yes. I used USB import on the PE800, PE535, and SE1900. The SE700 lets me send files wirelessly from my PC or phone via Brother’s transfer software and the Artspira app, which is handy when I’m sketching on a tablet.
Final Take
If I had to summarize: pick the SE600 or PE535 if you want an approachable, affordable start; the PE800 if you need a larger embroidery field; the SE1900 if you want a powerful combo for serious sewing and embroidery; and the SE700 if wireless design transfer and mobile sketching are important to you.
I’ve tested each of these machines and I reach for different ones depending on project size and workflow. Use hoop size, design transfer method, and whether you need full sewing capability to guide your choice.
")