
I tested four closet systems across different room types and budgets. These are the setups I kept coming back to for durability, flexibility, and easy installation.
I tried multiple closet systems in real rooms — tiny bedroom closets, a spare room turned walk-in, and a rental unit where I couldn’t alter walls. Each of the options below solved a different problem: maximizing hanging space, building a wall-to-wall setup, or creating a freestanding boutique wardrobe.
My focus was practical: sturdy materials, real load capacity, and how straightforward installation felt when I had only a few tools and limited time. I describe where each system shines and the trade-offs I noticed so you can pick the one that fits your layout and workflow.
If you want a freestanding, heavy-capacity solution, I gravitated toward the VIPEK unit. For modular wall-to-wall installs the Rubbermaid Configurations kits gave me the most finish and flexibility. The Amazon Basics rack is the best affordable, ready-to-go expandable option.
1. Amazon Basics Expandable Metal Closet Organizer – Best Overall
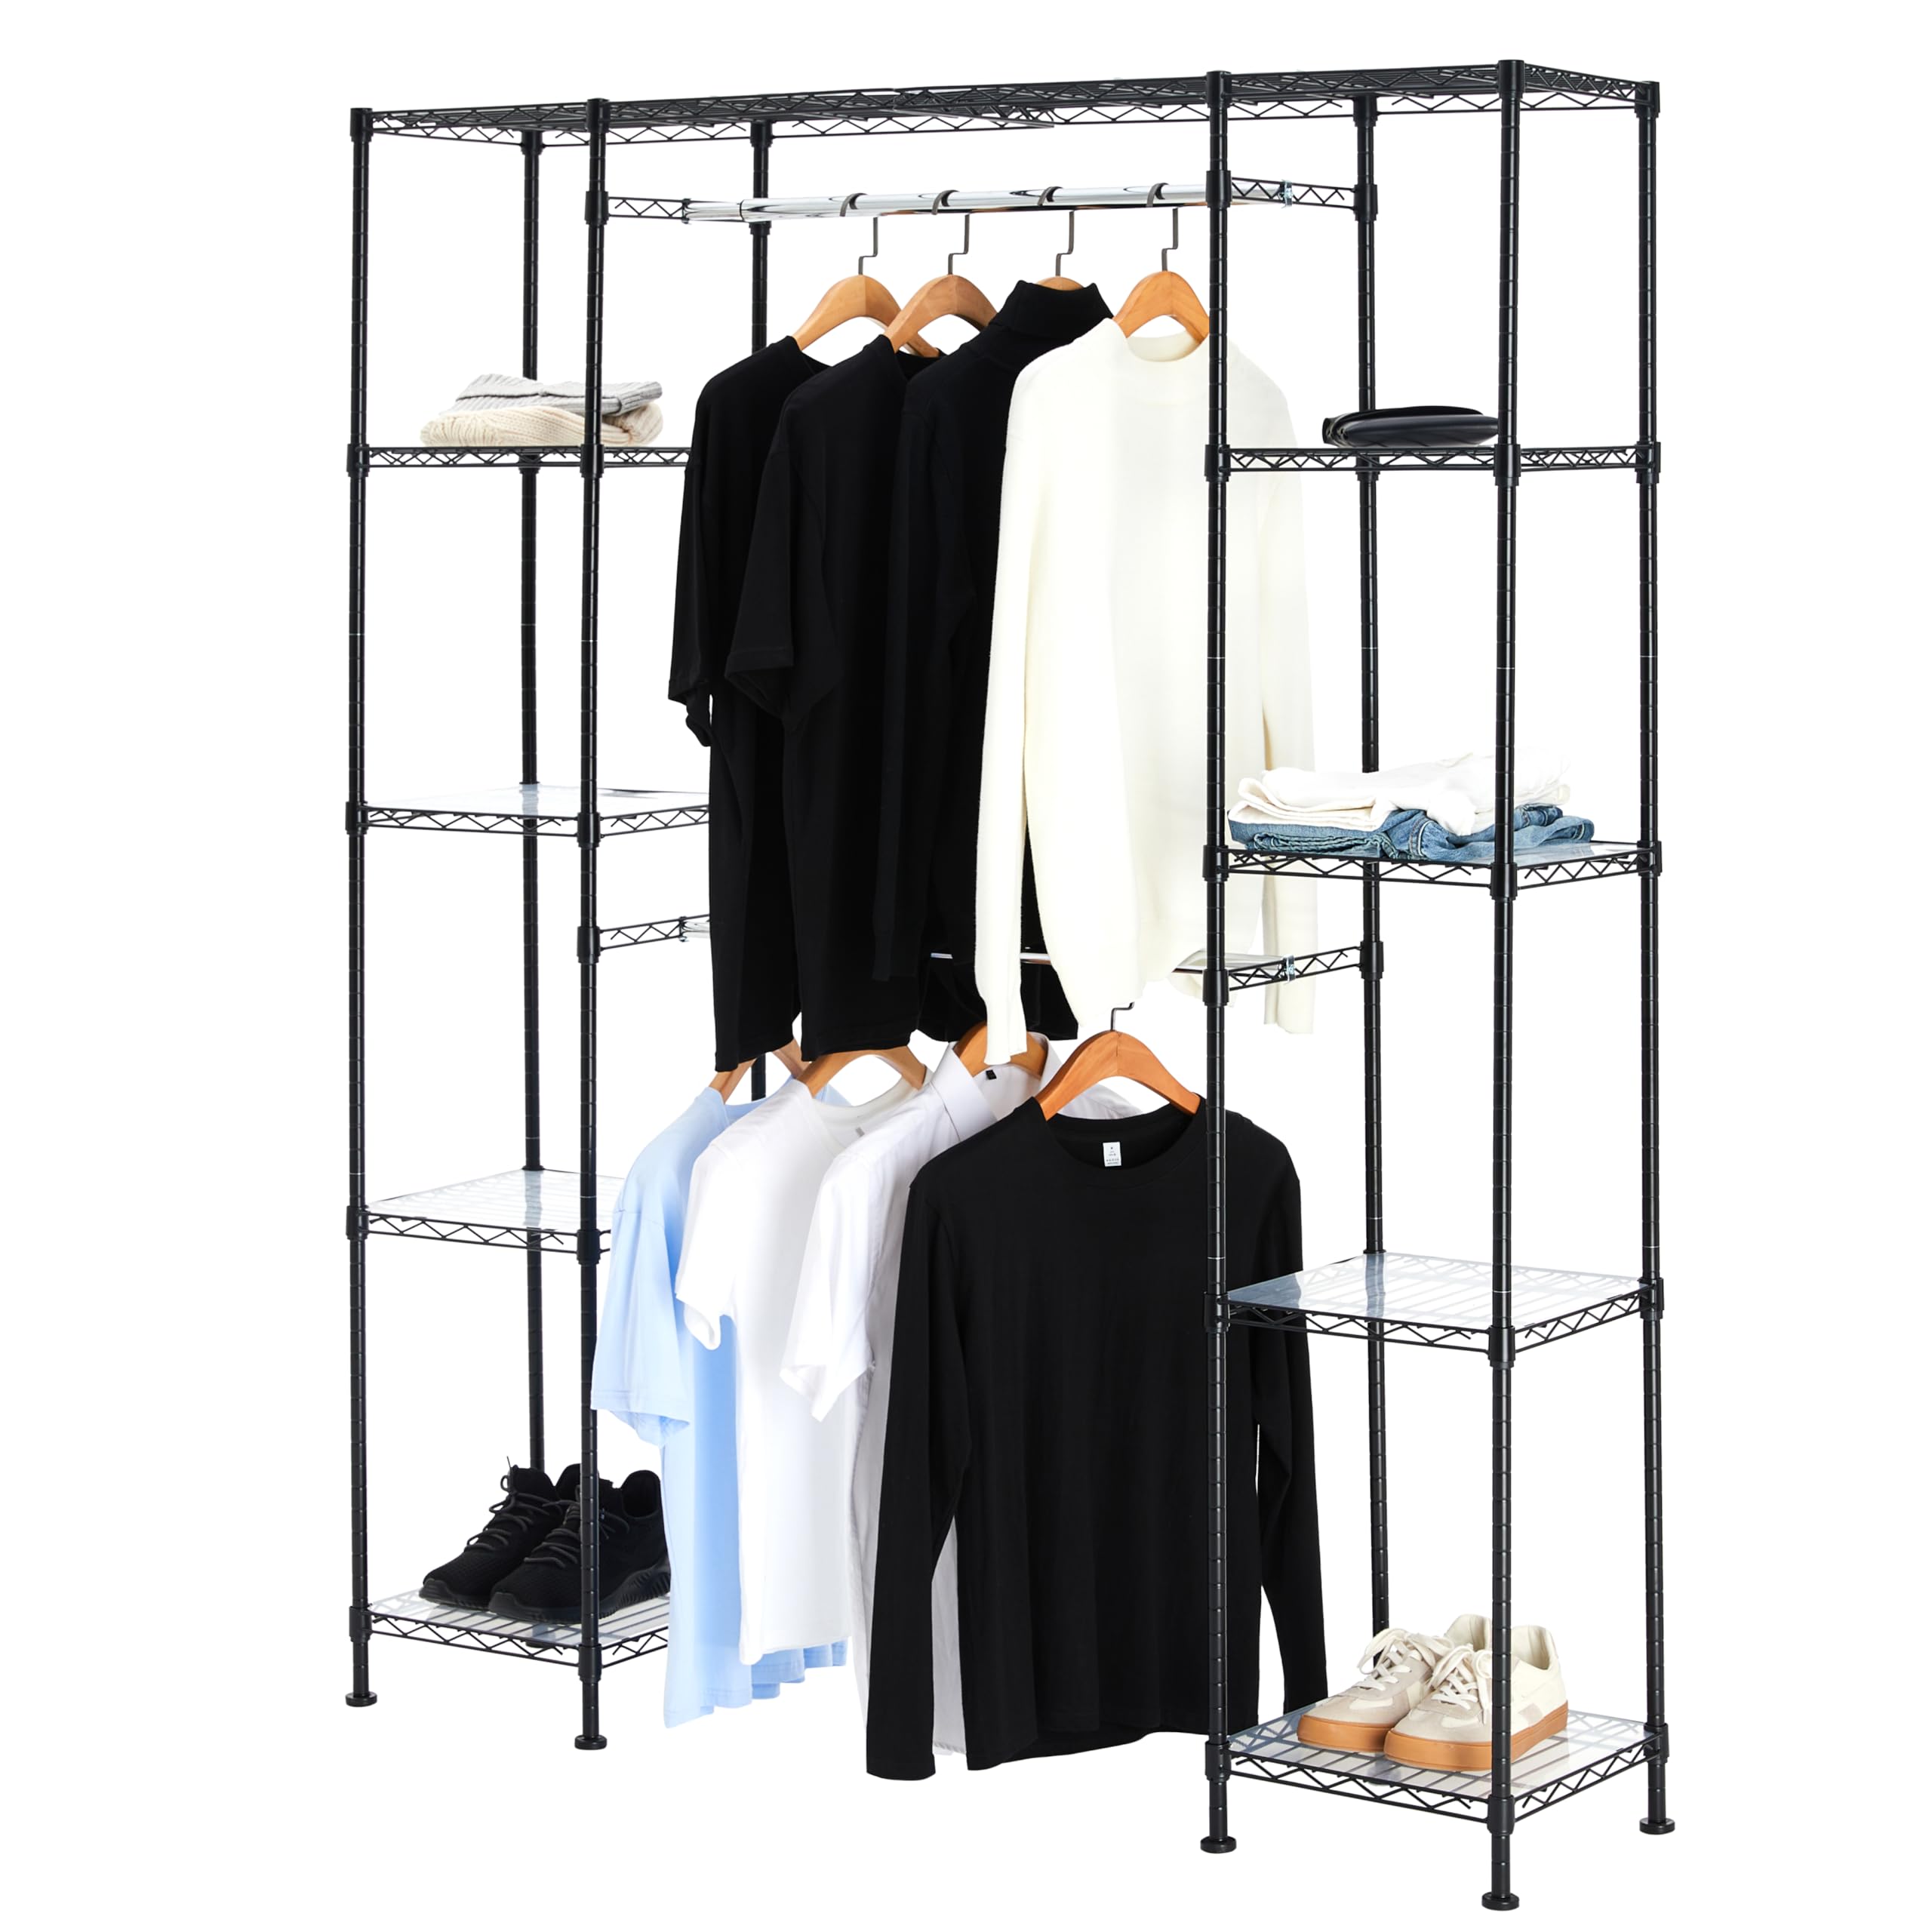
A roomy, expandable metal closet system with adjustable rods and heavy-duty shelves I trusted for long-term use.
Why I picked it: I liked the mix of adjustable shelving and two movable hanging rods plus the easy assembly.
Best for: Small bedrooms and rental closets where I need a lot of storage without built-in shelving.
An affordable, high-capacity wire system that feels like a step up from basic racks.
Pros
- Expandable width and heights
- Ten adjustable shelves
- Simple screw-together assembly
- Each shelf rated for heavy loads
- Includes wall-mounting hardware
Cons
- Wire aesthetic isn't for every decor
- Takes up floor footprint
My take
I installed this unit in a cramped bedroom closet and in a locker-room storage area at work; both times it dramatically increased usable space. The two hanging rods move in one-inch increments, so I could set up long-dress and short-hang zones without wasting vertical space.
Assembly was straightforward — I put one together solo in under an hour following the mostly visual instructions. The hardware and plastic slip sleeves aligned easily and the included plastic shelf liners helped prevent small items from tipping through the wire.
The shelves are stout; each is rated to hold heavy loads and felt solid when loaded with folded sweaters and boots. The four extra-wide leveling feet made it simple to stabilize on uneven floors, and the wall-mount hardware gave me extra confidence against tipping.
If you want a no-frills, expandable solution that handles both hanging and stacked storage, this is the versatile option I reach for first.
2. Rubbermaid Configurations Deluxe Closet Kit – Best for Wall-to-Wall Customization
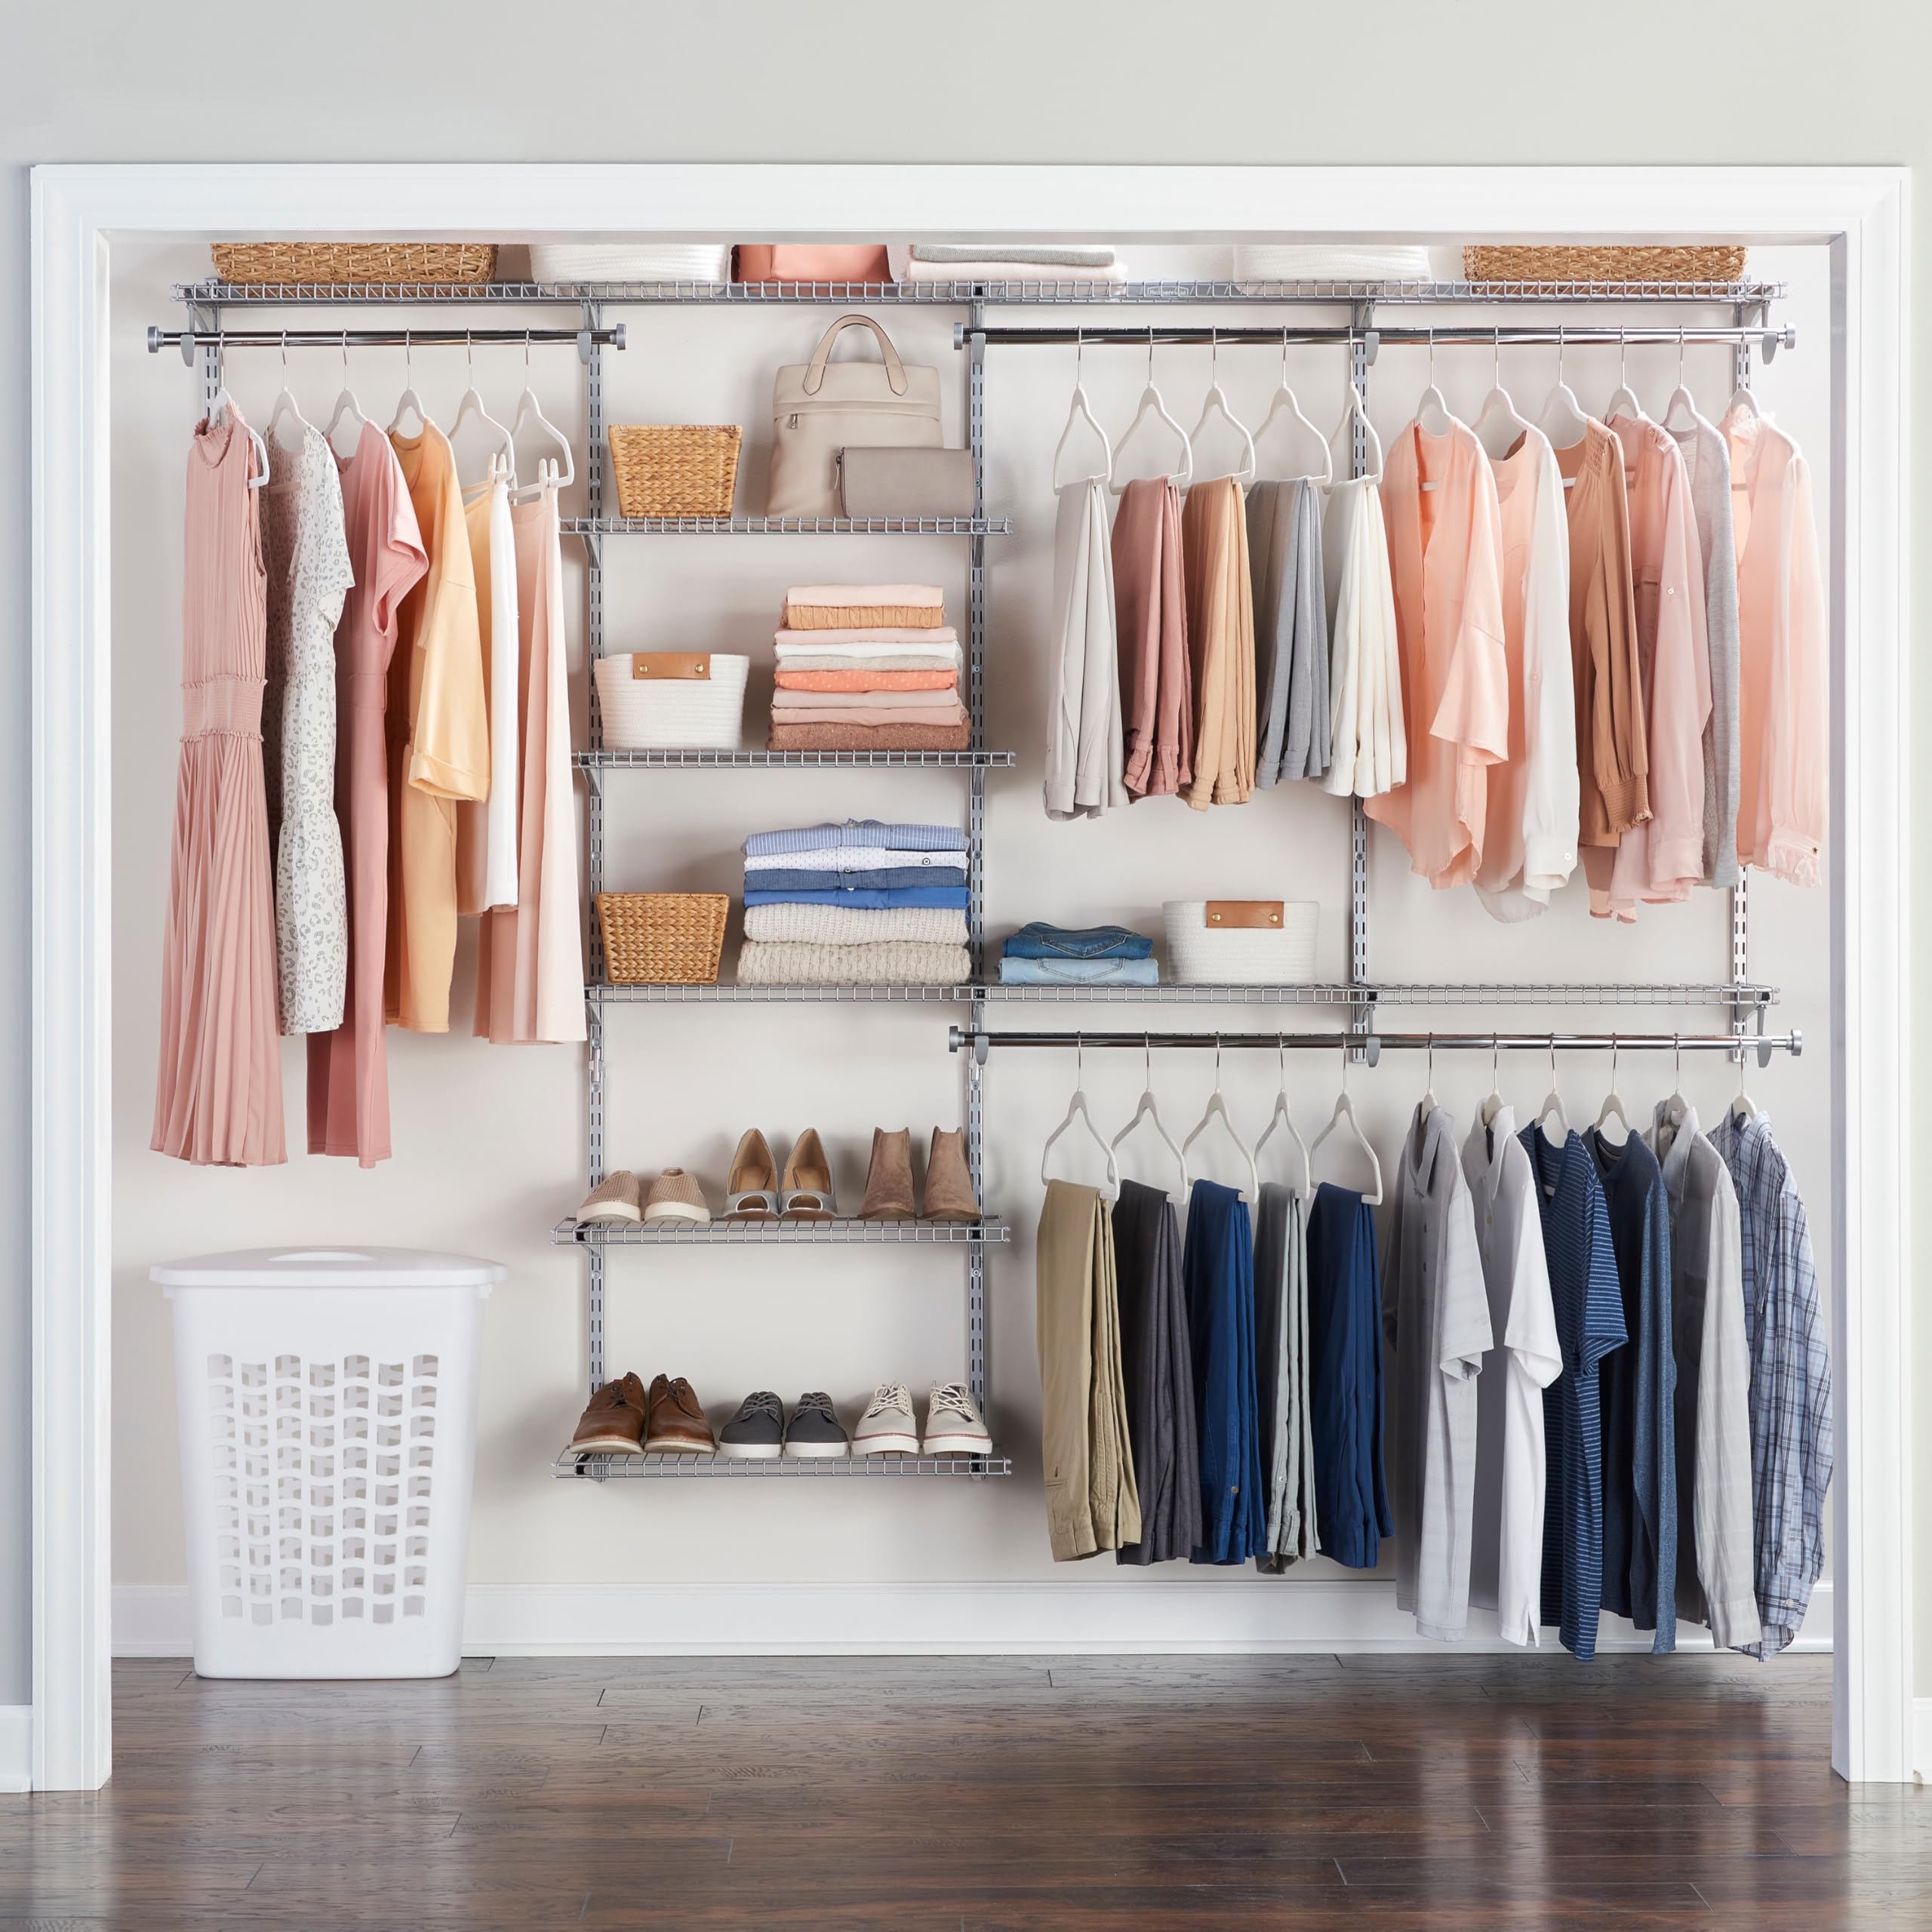
A modular wall-to-wall system with telescoping rods and epoxy-coated wire that reconfigures easily.
Why I picked it: I appreciated the modular pieces and the rust-resistant finish that made reconfiguring painless.
Best for: Walk-in or wide reach-in closets where I want a permanent, tidy installation.
A middle-ground investment that pays off for customizable, long-term closet setups.
Pros
- Fits 4–8 foot closet widths
- Telescoping hang rods
- Epoxy-coated wire resists rust
- Modular and reconfigurable
Cons
- Some pieces may need cutting in custom setups
- Requires wall anchors for heavy loads
My take
I installed the Deluxe Configurations kit in a reach-in closet and redesigned the layout twice without tools thanks to the modular brackets. The telescoping rods and expandable shelves let me get nearly wall-to-wall hanging and shelving without custom carpentry.
The epoxy finish reduces snag points and kept the kit looking clean after months of use. For peace of mind on heavier loads I swapped the included anchors for toggle bolts — that extra step cost me a few minutes and a small hardware purchase, but it eliminated any wobble where the uprights meet the wall.
If you need extra-length shelves in a particular layout, I cut a few longer shelves to size with an angle grinder. That’s not required for most installs, but the system’s design lets you overlap or trim shelves to fit unusual widths.
Overall, this is the kit I use when I want a near-permanent closet solution with a neat finish and the ability to rearrange later.
3. VIPEK Classic V6 Heavy-Duty Garment Rack – Best for Heavy Loads
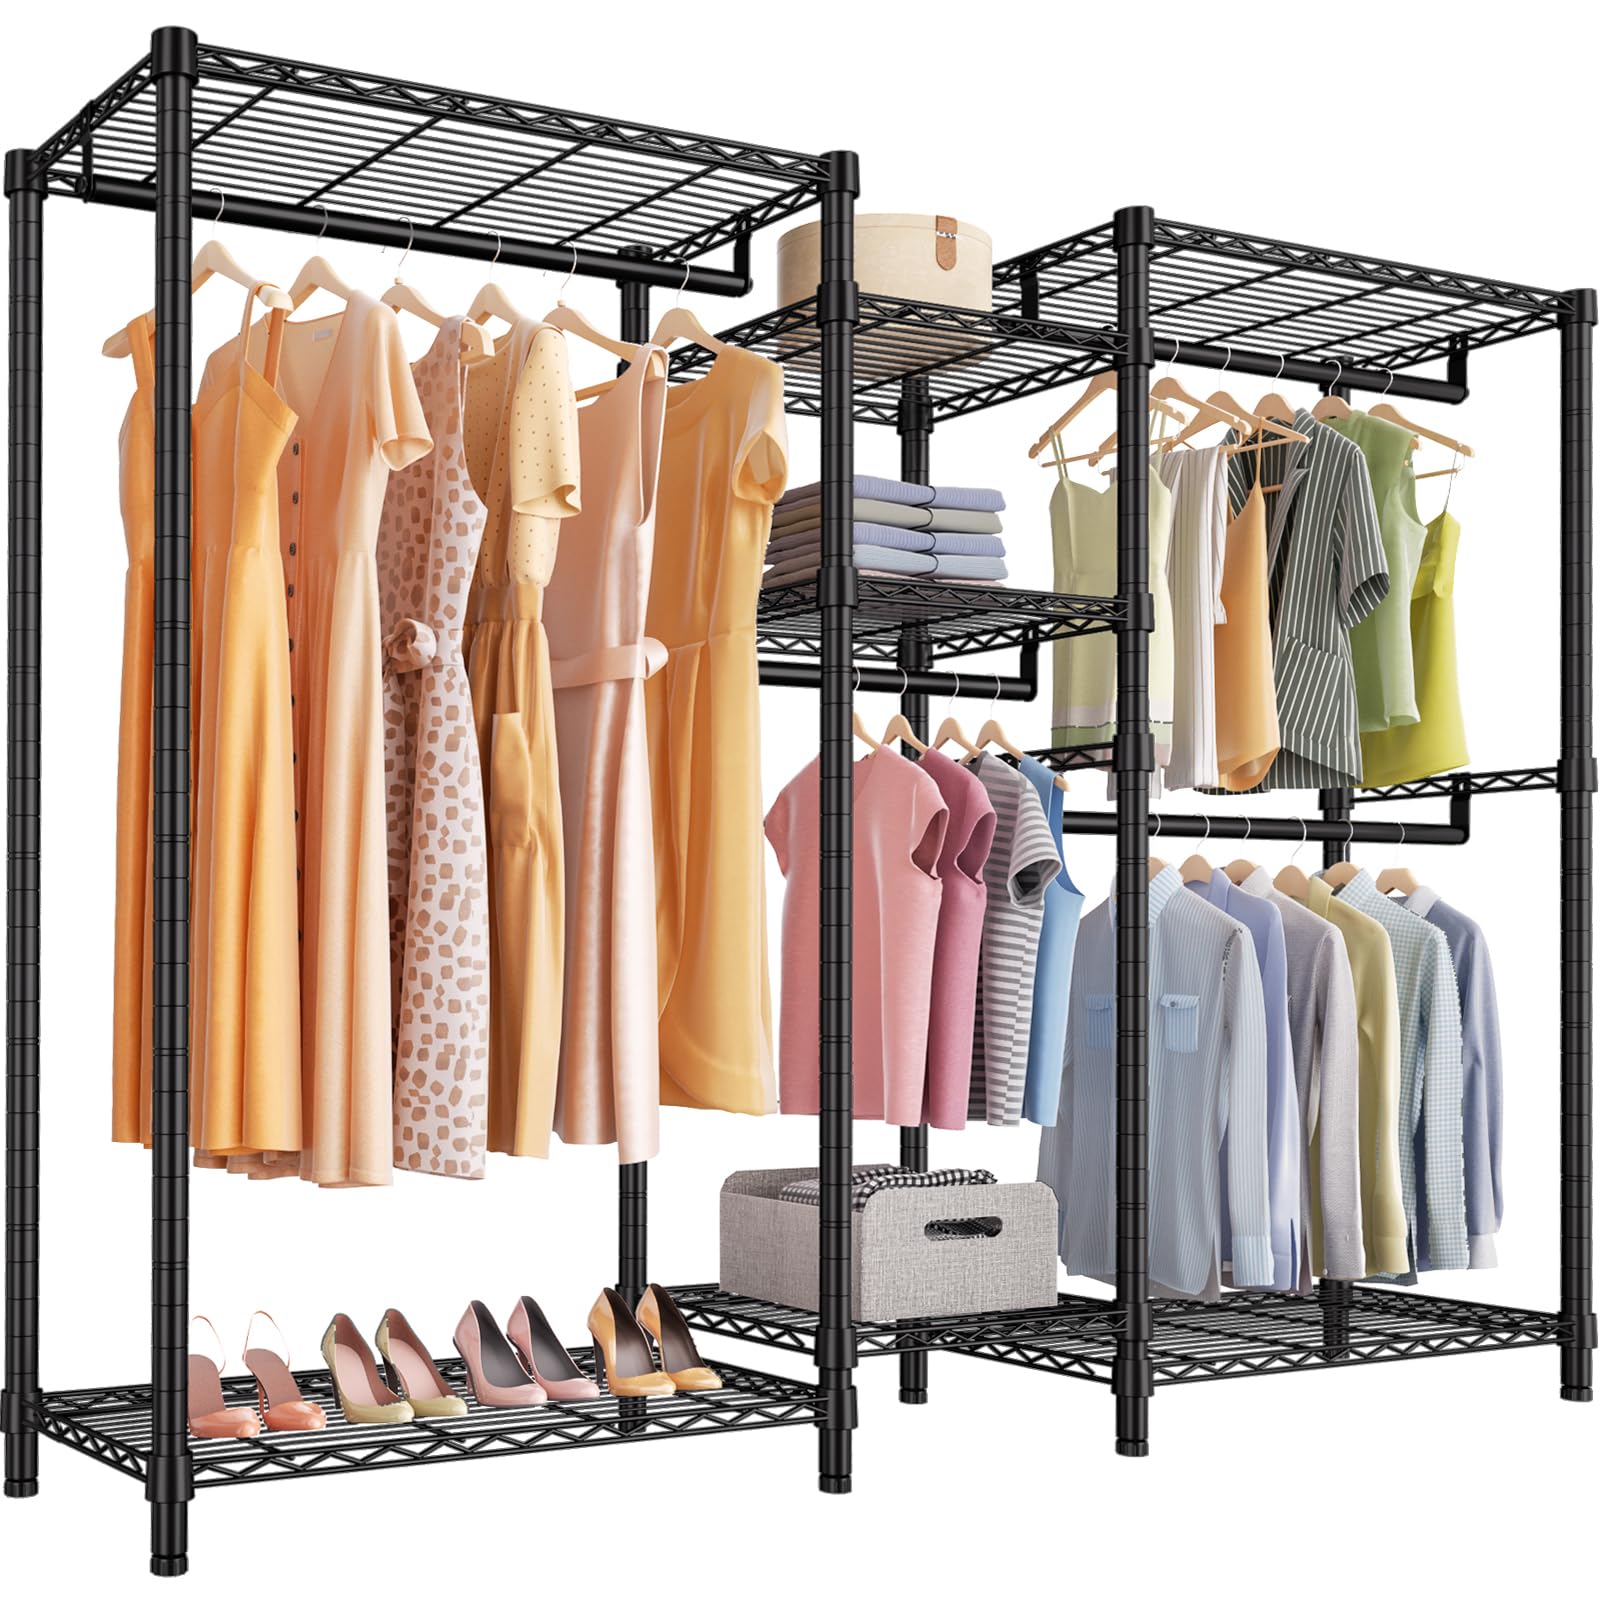
A freestanding, industrial-strength garment rack that handled my full seasonal wardrobe without sagging.
Why I picked it: I needed a freestanding system with very high load capacity and flexible layout options.
Best for: Converting a spare room into a boutique-style walk-in or for storing heavy outerwear.
A solid investment for a visual, durable wardrobe without wall anchors.
Pros
- Very high weight capacity
- Two assembly styles: straight or L-shaped
- Multiple adjustable shelves
- Anti-tip safety device included
Cons
- Takes up room perimeter
- Industrial look may not suit all decor
My take
I used two of these racks to convert a spare room into a functional walk-in setup and I couldn’t be happier with the structural feel. The premium carbon steel parts gave the whole installation a boutique wardrobe look while supporting coats, blazers, and heavy denim without bowing.
Assembly was straightforward and I was able to build a complete unit by myself in about an hour once I got the hang of the steps. The rack offers two layout styles — straight and L-shaped — which helped me use a corner in the room rather than losing space to a single long run.
The adjustable shelving and multiple hanging rods created distinct zones for folded pieces, seasonal gear, and everyday shirts. I also appreciated the anti-tip device: for a freestanding system that carries this much load, that safety piece mattered.
If you want a freestanding, high-capacity closet solution that looks purposeful and survives heavy use, this is the one I recommend.
4. Rubbermaid Configurations Closet Kit (White) – Best in White Finish
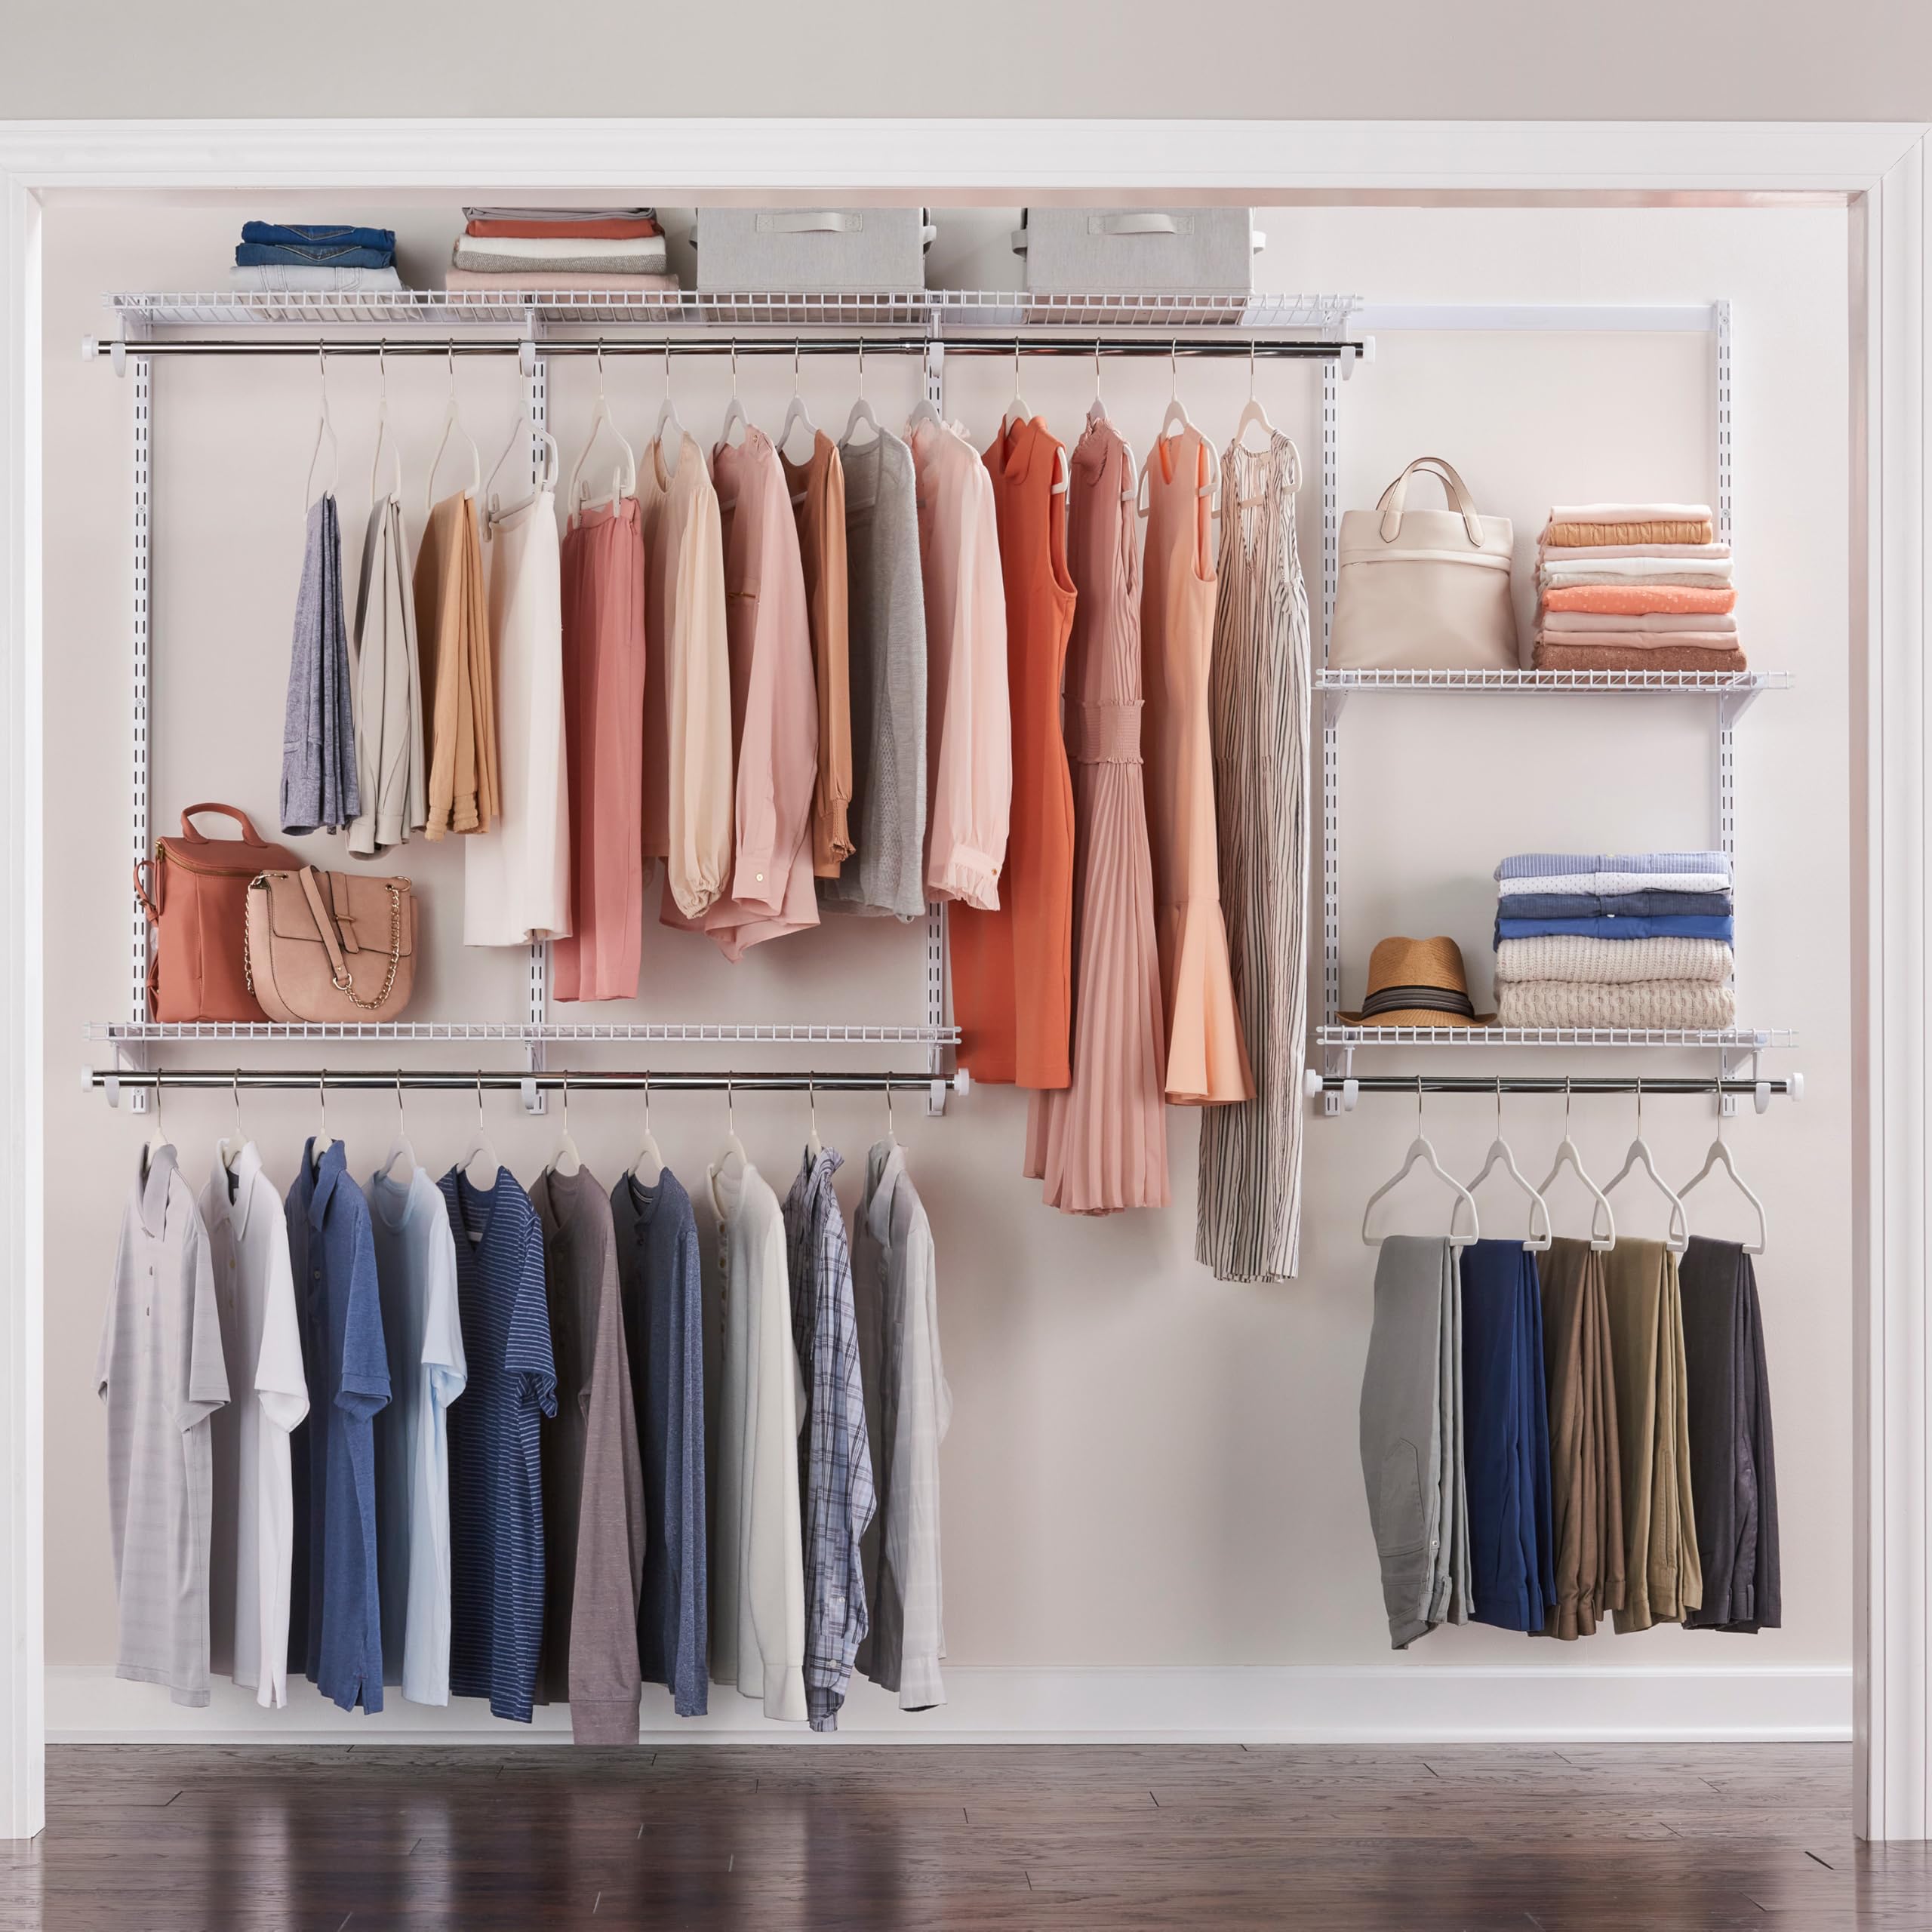
A white-finish Configurations kit that gives a clean, bright look and adjustable shelving for smaller projects.
Why I picked it: I chose this for a lighter aesthetic and for closets where visual brightness matters.
Best for: Closets where a white finish helps brighten space and match trim or shelving.
A similar value to the titanium kit, with a clean white finish for brighter interiors.
Pros
- Bright white epoxy finish
- Fits 4–8 foot closet widths
- Adjustable shelves and rods
- Fast installation with included hardware
Cons
- Plastic end caps can be fragile in shipping
- Less shelving footage than deluxe kit
My take
I installed the white Configurations kit in a bedroom closet and immediately noticed how much brighter the space felt. The epoxy finish resists rust and looks tidy against painted walls.
The kit came tightly packaged — I recommend inspecting the plastic end caps right away after delivery because they can be damaged in transit. That said, once everything was in place the shelves held large loads without sagging and the adjustable brackets made it easy to get the spacing right for sweaters versus shoes.
Installation was manageable by one person with basic tools. If you have unusually wide spans, plan for how you’ll support or trim shelves; otherwise this kit gives a clean, practical white option for most standard closets.
How I Choose Closet Systems
Measure and plan before you buy
I always measure width, depth, and ceiling height and sketch a simple elevation so I know where long garments, shelves, and rods will go.
Think about existing obstructions — light switches, baseboards, and door swings — and plan around them rather than after installation.
- Measure door opening and inside closet width
- Record ceiling height for double-hang options
- Note wall studs for secure anchoring
Match material and capacity to your wardrobe
Wire systems and steel racks are my go-to for heavy outerwear and frequent use because they resist sagging.
If you keep bulky items or heavy boxes on shelves, prioritize the stated shelf load or choose a system with metal uprights and solid brackets.
- Choose sturdier steel racks for heavy loads
- Epoxy finishes reduce snagging and rust
- Freestanding racks work when wall mounting isn’t allowed
Installation tips I use
I keep a stud finder, level, drill, and a selection of anchors on hand. Upgrading to toggle bolts for heavy loads is a small step that pays off.
If a kit requires cutting shelves to fit, an angle grinder or circular saw makes quick work — but plan your cuts before assembly.
- Use toggle bolts for heavy or high-stress points
- Assemble partially on the floor then stand upright
- Check alignment frequently with a level
Design for future flexibility
I prefer modular systems that let me reconfigure without replacing hardware. That keeps options open if needs change.
Consider mixing hanging and shelving for a balanced storage plan: hang daily wear, stack infrequent items.
- Modular brackets let you shift shelf height later
- Telescoping rods extend utility as wardrobe grows
- Think in zones: daily, seasonal, and overflow
Frequently Asked Questions
Can I install these systems in a rental?
Yes. I’ve used freestanding racks when wall-mounted changes weren’t allowed and lighter kit installations where drywall anchors were acceptable. For rentals I avoid irreversible wall cutting and choose systems that either mount with removable anchors or are freestanding.
Do wire shelves sag under heavy loads?
In my experience, good-quality wire shelves and metal uprights resist sagging when installed properly. For heavy items I either used systems rated for high shelf loads or reinforced mounting with stronger wall anchors or additional supports.
How difficult is assembly for these kits?
I assembled each of these systems solo in about an hour once I understood the steps. The Amazon Basics and VIPEK units were very straightforward; Rubbermaid’s modular kits require a bit more planning but are still manageable with basic tools.
Final Take
I chose these four systems because each solved a different closet problem I encountered: expandable freestanding storage, wall-to-wall modular setups, heavy-duty freestanding displays, and a bright white finish option.
Measure first, pick the form factor that fits your walls and wardrobe weight, and expect to spend an hour or two on a solid installation. With the right system, you’ll get more usable space and a calmer daily routine.
")