
I tested five popular sprouts growing kits — from simple mason-jar lids to full two-jar kits and tray systems. This roundup focuses on what worked in my kitchen: drainage, durability, ease of rinsing, and how well seeds/
I grow sprouts year-round and have tried everything from single jar lids to multi-jar kits and tray systems. In this guide I compare the setups I actually used so you can pick the one that fits your counter space, how many sprouts you want, and how much hands-on care you want to give them.
My testing focused on drainage, airflow, build quality, and how easy each system made rinsing and harvesting. I also paid attention to what types of seeds worked best in each setup and any quirks I ran into while keeping continuous batches going.
If you want a no-fuss add-on for a single mason jar, go with the Masontops bean screens. If you want a countertop kit to run two jars at once, I prefer the kits with stainless stands and blackout sleeves. Trays are best if you want quick, soil-free microgreens or to sprout larger seeds in bulk.
1. Masontops Bean Screen Mason Jar Sprouting Lids – Best Simple Mason-Jar Lids
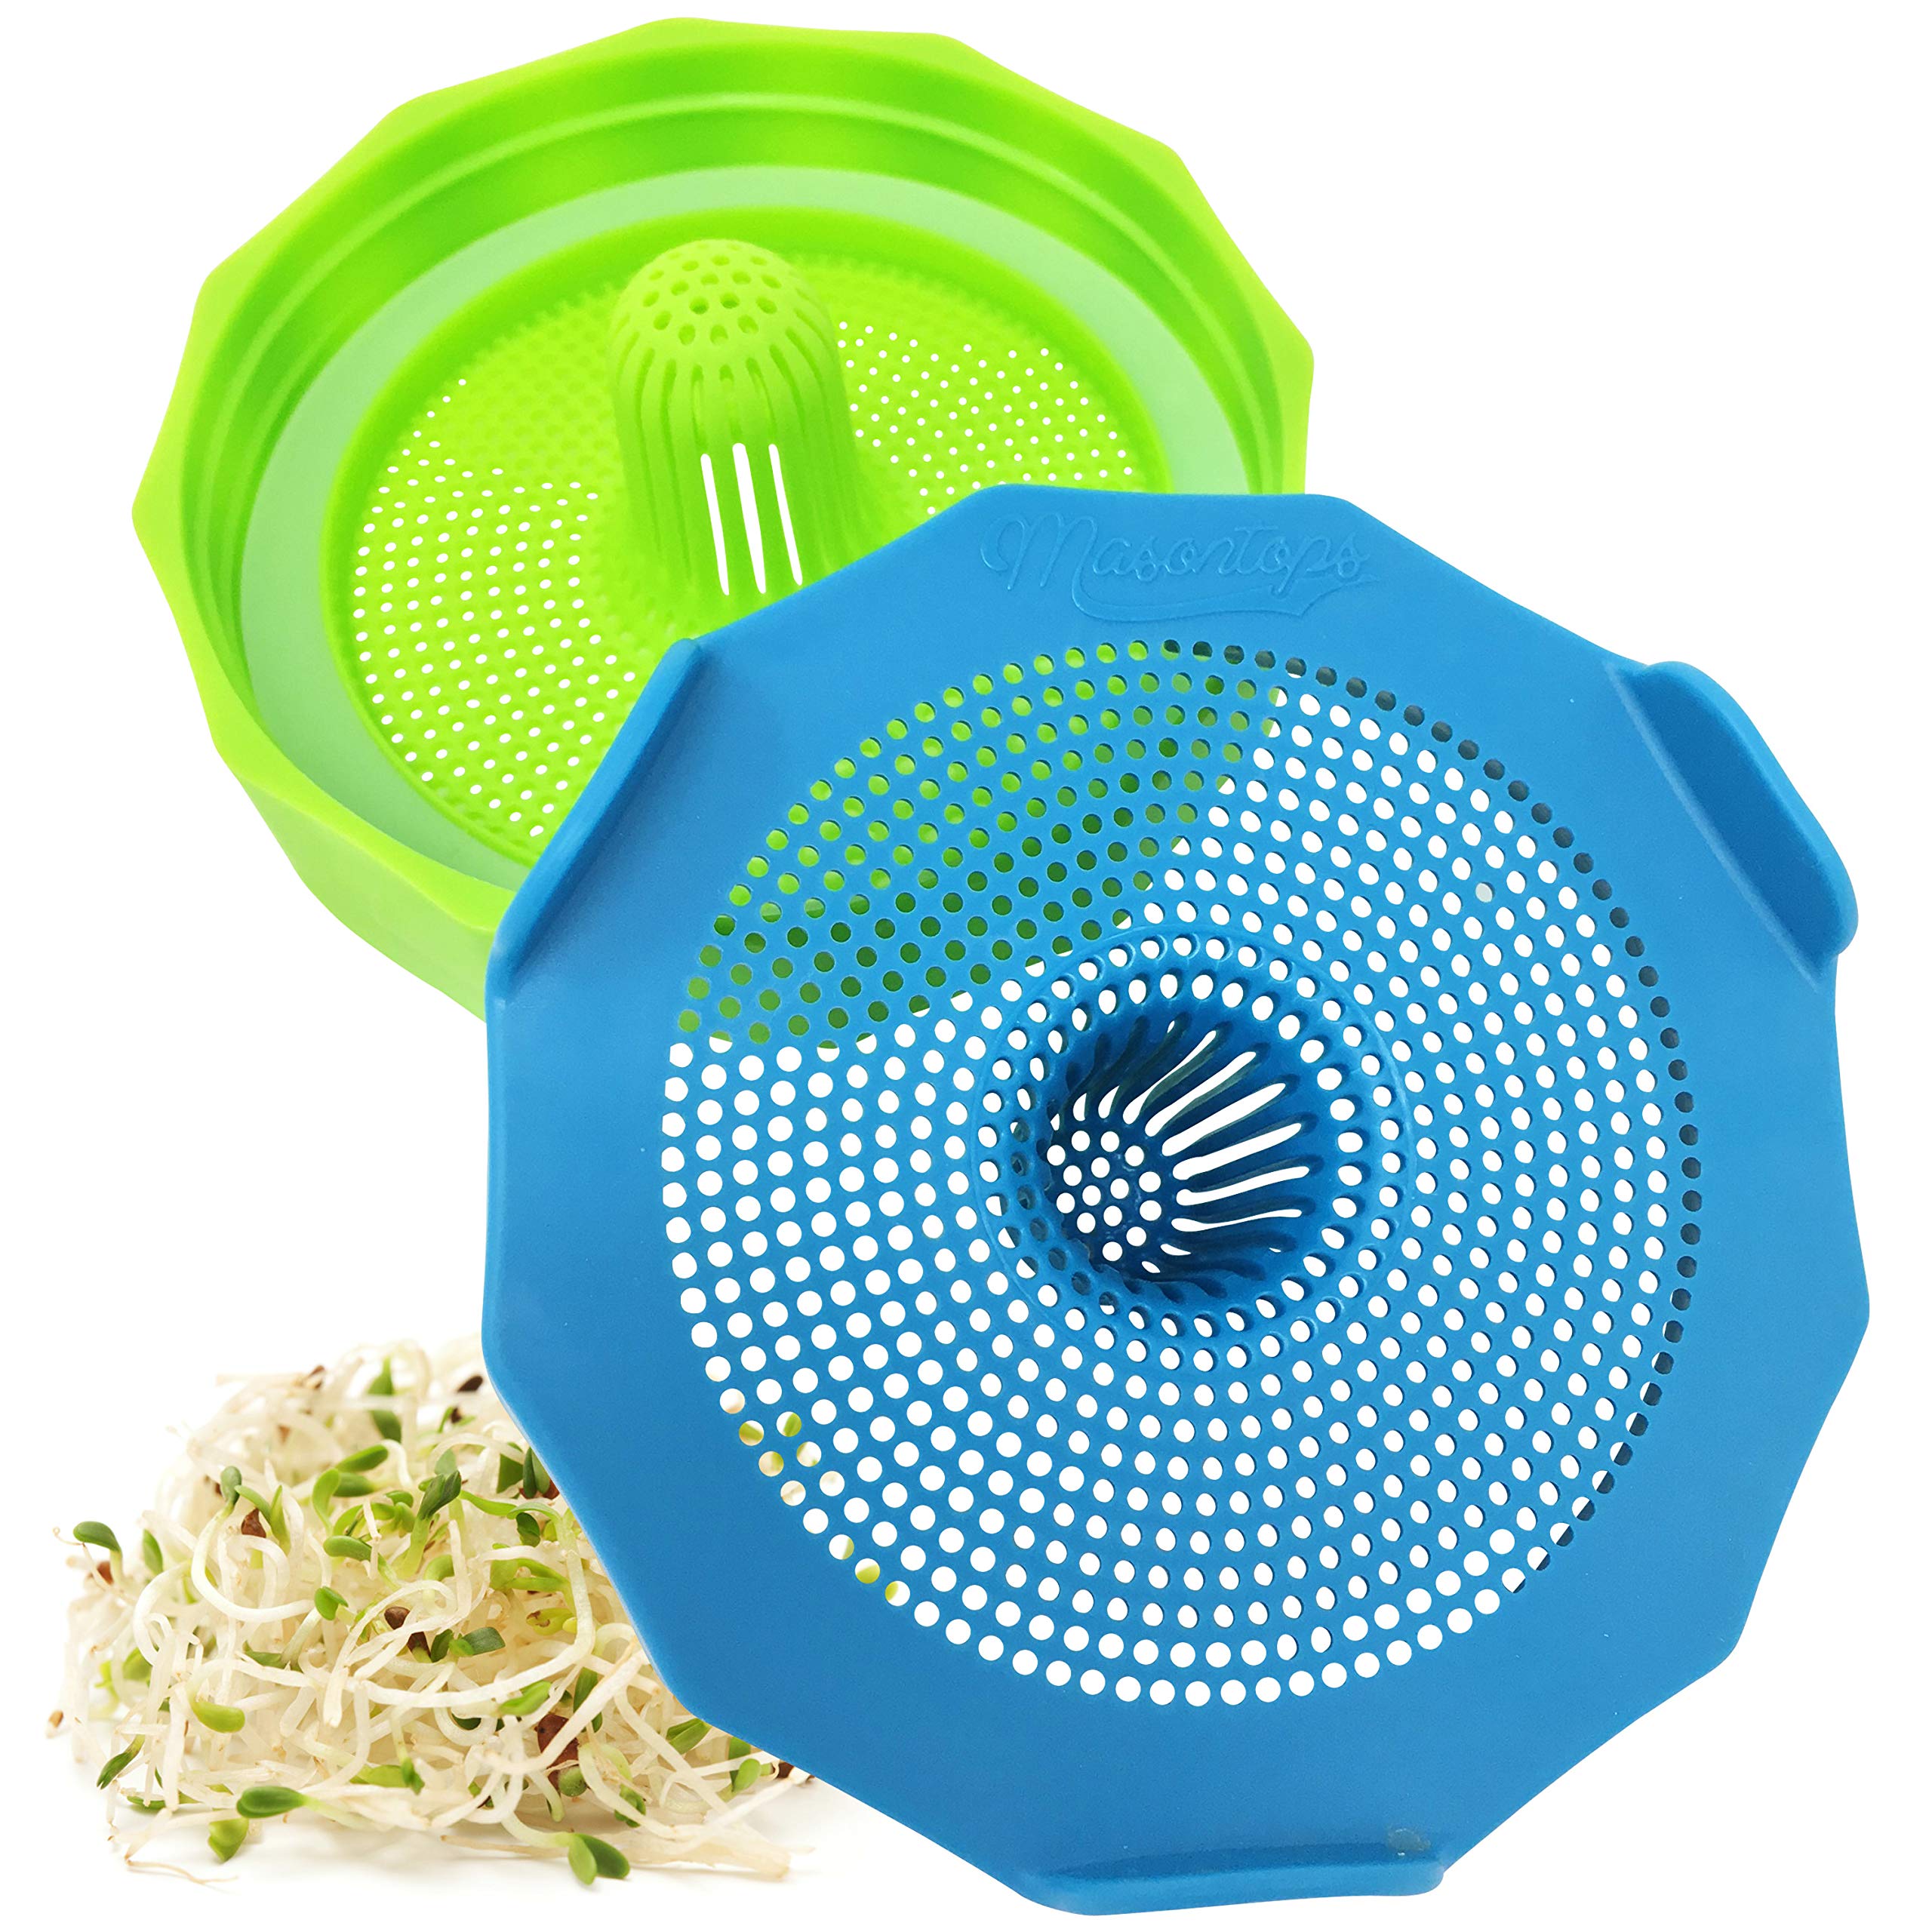
I reached for these plastic bean-screen lids when I wanted an inexpensive, lightweight way to convert a wide-mouth mason jar into a sprouter. The inverted spout and built-in pegs make rinsing and drainage straightforward.
Why I picked it: Simple, effective wide-mouth lids with built-in drainage and easy rinsing.
Best for: Single-jar sprouters who want an easy entry to home sprouting.
Very affordable; a low-cost way to try jar sprouting.
Pros
- Fits wide-mouth mason jars
- Inverted spout for easy rinsing
- Built-in pegs for upright drainage
- BPA-free plastic and silicone
Cons
- Some sprout roots can poke through the holes
- Plastic can stain with heavy use
My take
I used these lids on quart-size wide-mouth jars and appreciated how the inverted spout lets me pour rinse water without splashing. The pegs are small but steady, so I can set jars on end to drain without them rolling.
Because the lids stay on during soaking, I found the rinsing step tidier than removing a metal screen each time. The material feels sturdy and food-safe — the BPA-free plastic and silicone give me confidence when I harvest raw sprouts.
A minor hassle: denser sprout roots occasionally grow through the mesh and need a shake to remove. I solved that by giving the jar a light flick during rinsing. Overall these are the fastest, cheapest way I’ve found to get started sprouting in a mason jar.
2. Two-Jar Sprouting Kit with Stand and Blackout Sleeves – Best Two-Jar Countertop Kit
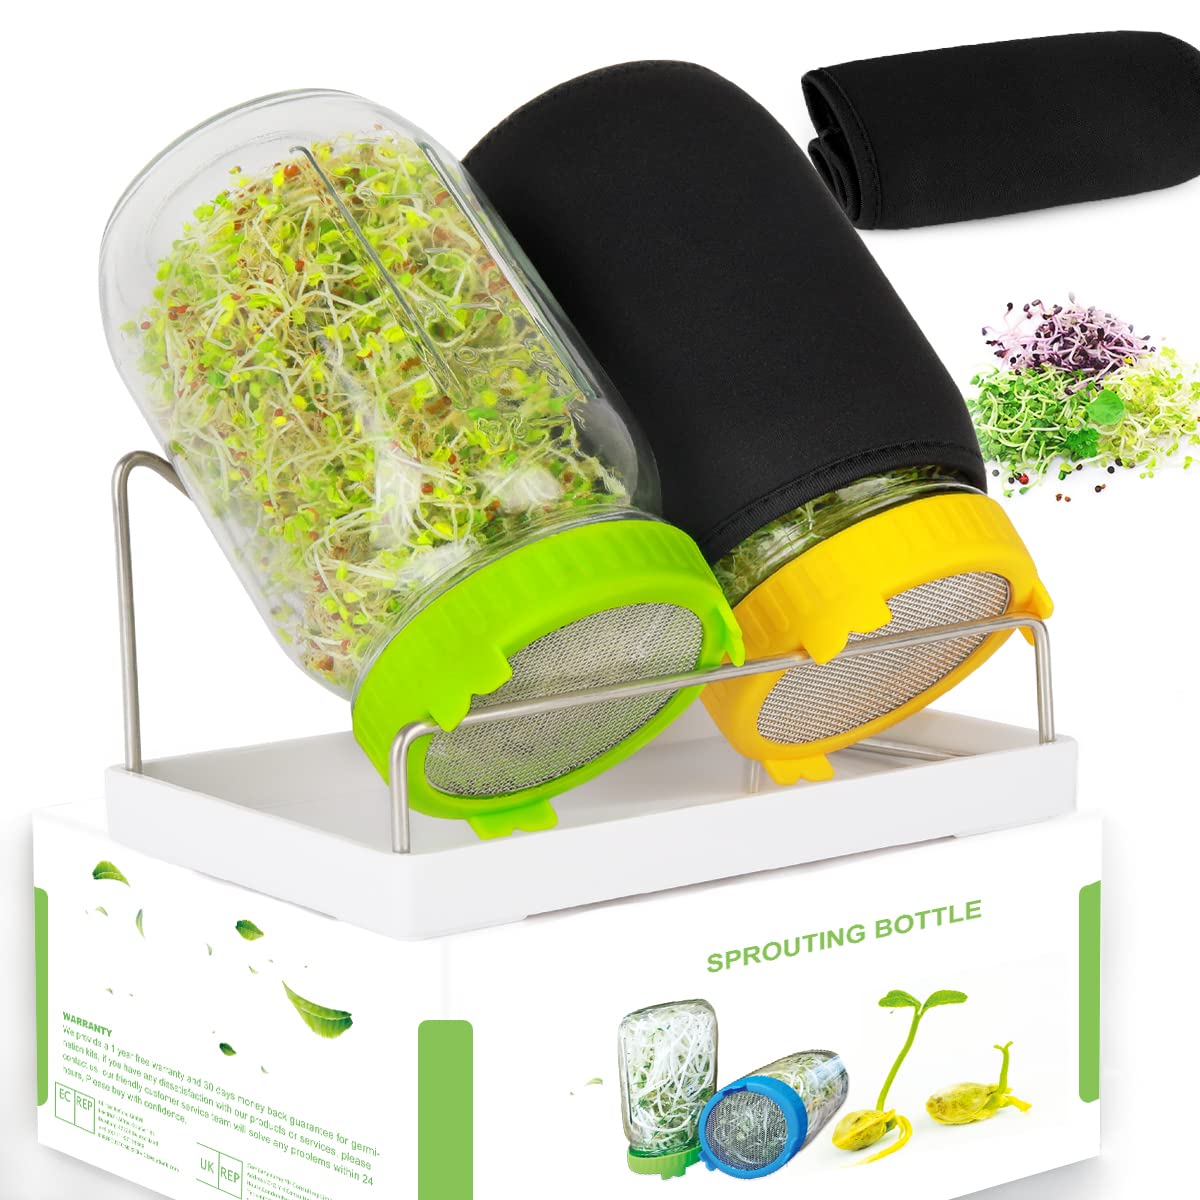
I used this complete kit when I wanted to keep a steady supply of sprouts without juggling single jars. The included stainless stand, drip tray, and blackout sleeves made sequencing two jars simple.
Why I picked it: Complete two-jar setup with a stable stand and light-control sleeves.
Best for: People who want continuous batches and tidy countertop storage.
A midrange kit that replaces multiple separate purchases.
Pros
- Complete kit — jars, lids, stand, tray, sleeves
- 316 stainless mesh won’t rust
- Drip tray collects run-off neatly
- Blackout sleeves control early light exposure
Cons
- Instructions are thin on timing
- Blackout sleeves need occasional adjustment
My take
I liked how the stainless stand angles jars for consistent drainage; the tray underneath collects the runoff, so I could put the kit on a kitchen shelf without making a mess.
The blackout sleeves are useful for the first few days to keep sprouts pale and straight — I used them selectively depending on the seed type. The metal mesh felt durable and never showed signs of rust in my months of use.
The only real downside was the brief instruction leaflet. I ended up relying on my own timing and a simple rotation plan to keep two jars producing continuously, but once I settled into a rhythm the kit saved me time and counter clutter.
3. Organic Seed Sprouting Jar Kit with Stainless Lids – Best Two-Jar Value Kit
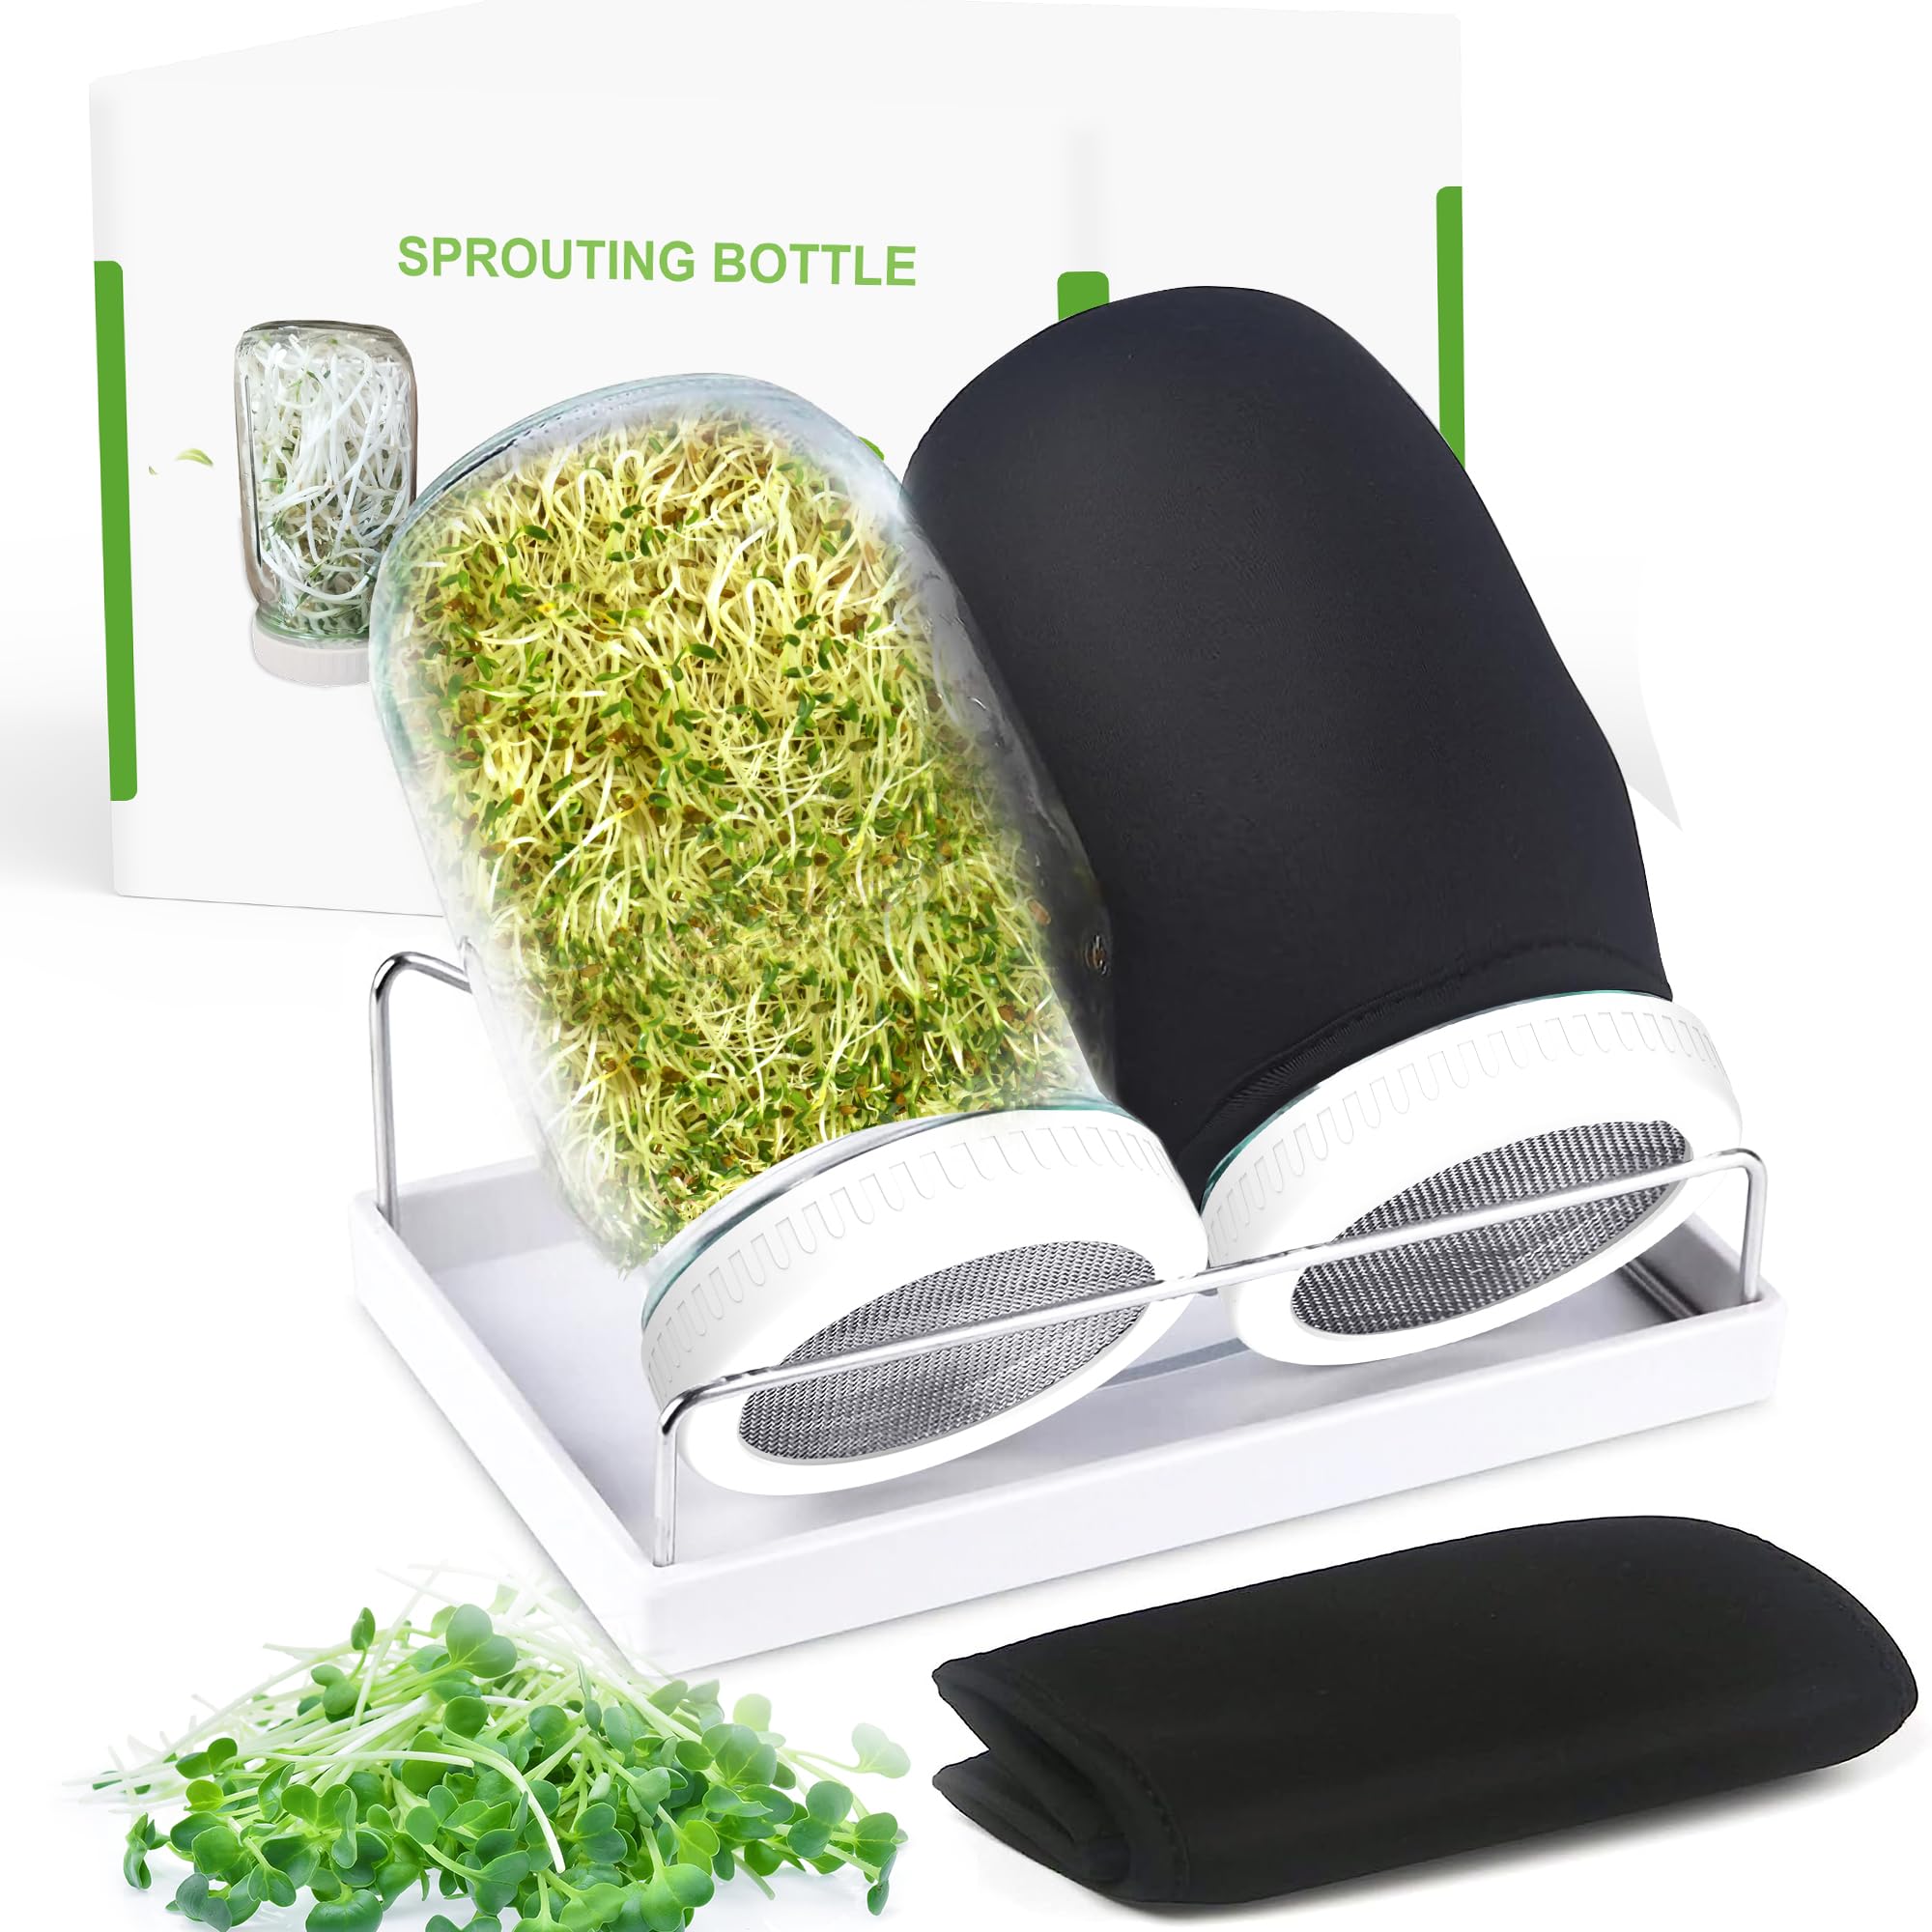
This kit gave me the same essentials as more expensive sets — two wide-mouth jars, stainless mesh lids, a stand, and blackout sleeves — and felt like a practical balance between cost and performance.
Why I picked it: Good balance of durable materials and included accessories.
Best for: Buyers who want a robust two-jar kit without extra bells.
Good value for a complete sprouting kit.
Pros
- 316 stainless mesh resists rust
- Large-capacity wide-mouth jars
- Includes blackout sleeves and tray
Cons
- Seeds are not included
- Instructions could be clearer
My take
I ran parallel jars with this kit and appreciated the rust-proof 316 mesh and solid glass jars. The jars are roomy, which makes harvesting and rinsing less fiddly than smaller jars.
The blackout sleeves are made of swim-sock material and did a fine job controlling light for soy-type sprouts. Drainage and airflow from the stand helped me avoid soggy batches.
Like other kits in this class, the paperwork didn’t teach me a lot. I leaned on experience and a simple schedule — pre-soak, two to three rinses per day, then remove sleeves at the right time — and got reliable sprouts from broccoli, alfalfa, and mung beans.
4. Stainless Steel Sprouting Jar Kit with Drip Tray – Best Durable Stainless Kit
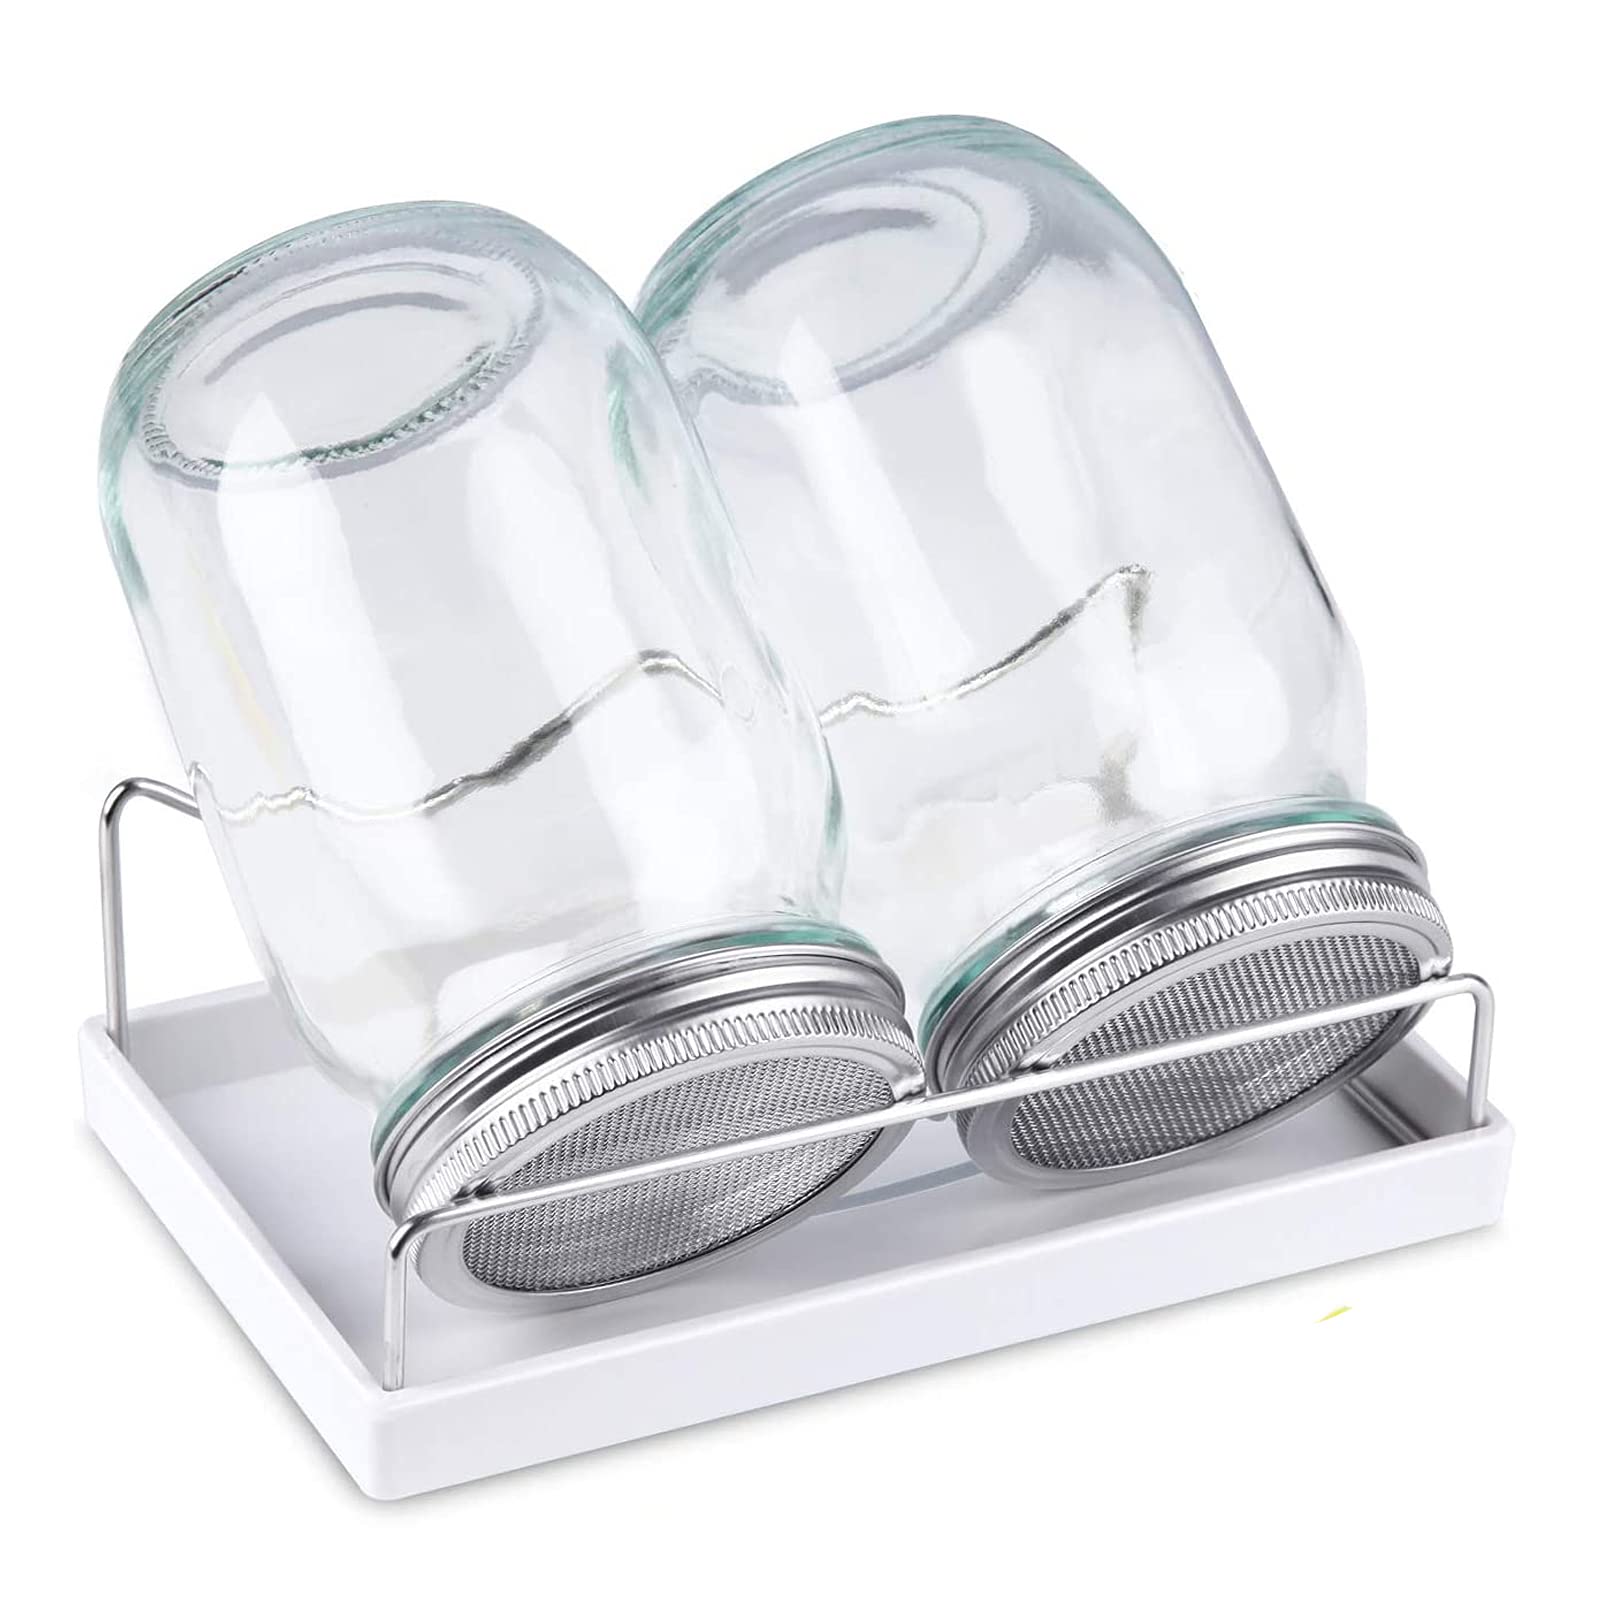
I chose this kit when I wanted rigid, long-lasting materials. The 316 stainless-steel lids and a solid 304 stand gave me a setup that handled daily use and frequent cleaning without degrading.
Why I picked it: Stainless construction and a well-designed stand for long-term use.
Best for: Frequent sprouters who want rust-proof hardware and durability.
A durable choice that justifies a higher upfront cost.
Pros
- Rust-proof 316 stainless lids
- 304 stainless stand for stability
- Dishwasher-safe drip tray
Cons
- Some lids can feel slightly loose
- A small fit tweak may be needed
My take
This kit felt the most solid on my counter. The metal frame snaps together cleanly and the tray lifts out for easy washing — I ran trays through the dishwasher without issue.
I did notice one lid felt a bit loose at first and could pop off if knocked. A gentle squeeze of the collar fixed that for me and it stayed secure after the tweak.
Sprouts grew quickly and the drainage angle from the stand kept moisture from pooling. If you plan to run jars often, I’d pick this kit for its long-term reliability.
5. EBaokuup Seed Sprouter Trays (5-Pack) – Best Tray System
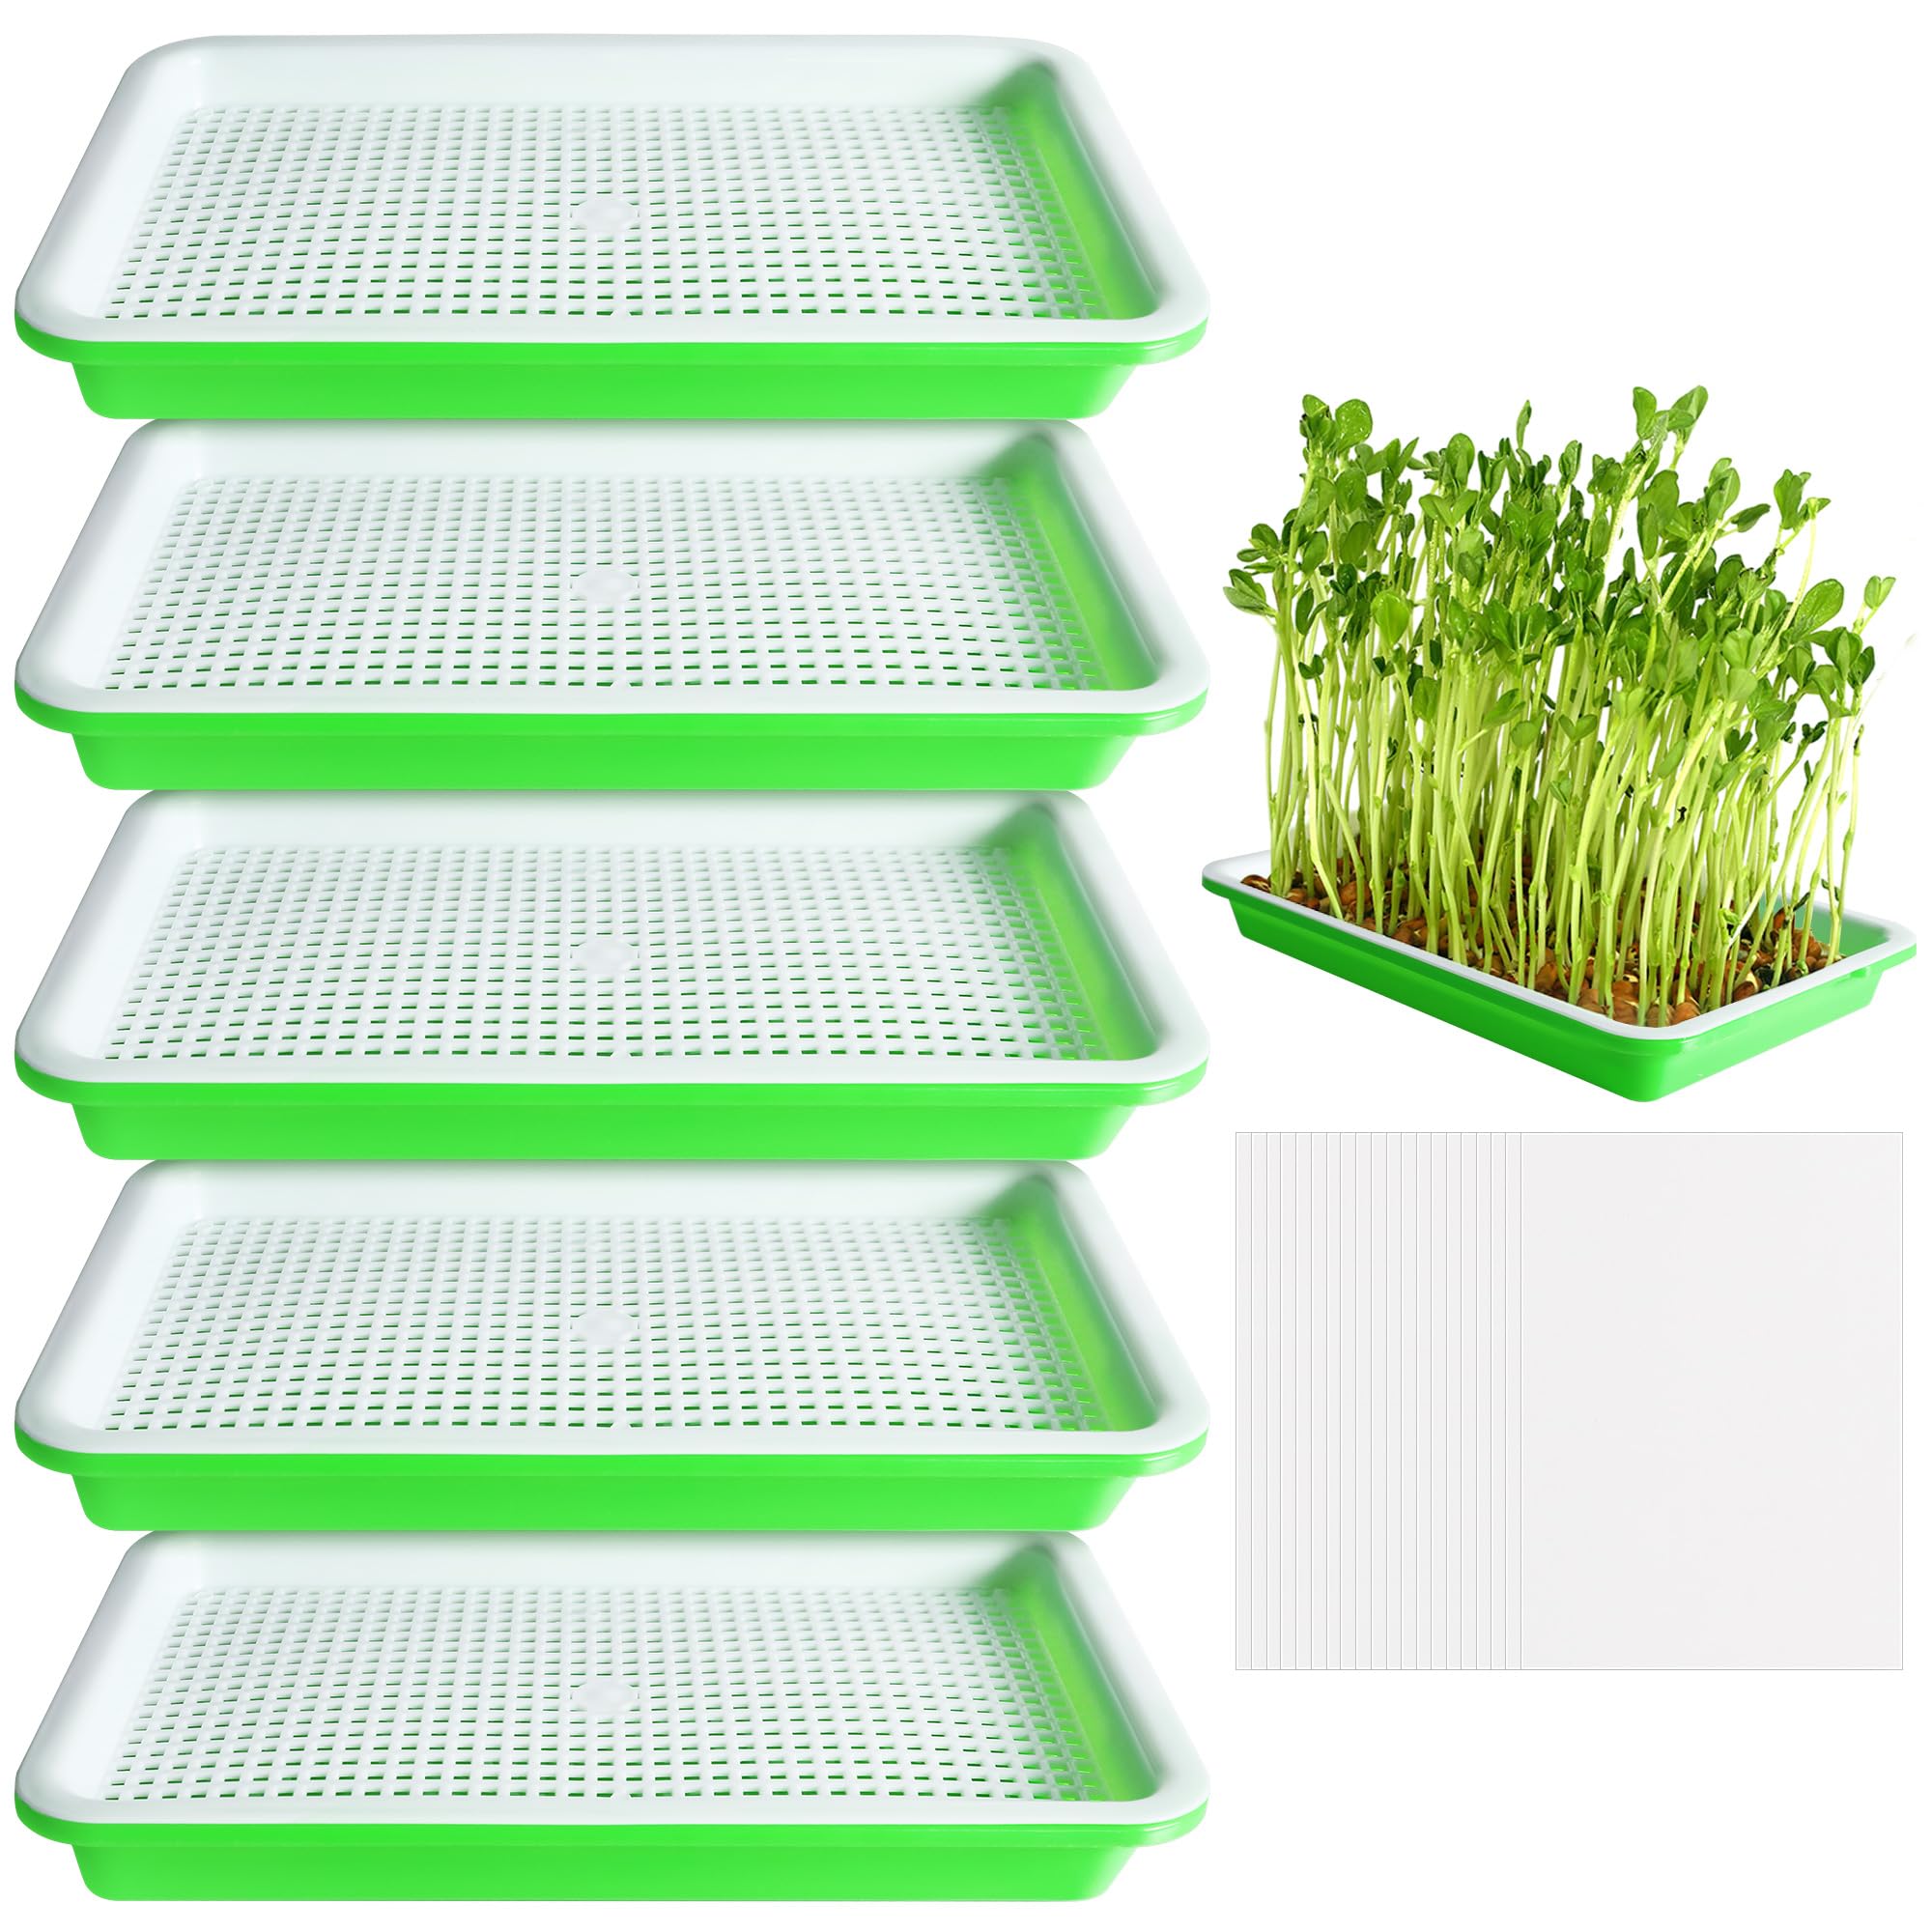
I used these small double-deck trays when I wanted to sprout microgreens or bulk larger seeds without soil. The five-pack makes rotation easy so I could keep a near-continuous supply.
Why I picked it: Small, stackable trays ideal for soil-free sprouting and microgreens.
Best for: People sprouting multiple small batches or larger seeds in rotation.
Affordable multi-pack for frequent sprouting or small-space setups.
Pros
- Five trays for rotation
- Double-deck design saves water
- Includes planting paper
Cons
- Holes too large for tiny seeds
- Often needs a grow mat or paper
My take
I liked having five small trays so I could stagger batches and always have a fresh tray ready. The inner tray lifts out easily for rinsing and the bottom tray collects water neatly.
The included planting papers are handy; I found them essential for tiny seeds that otherwise slip through the holes. For peas, sunflower, and larger seeds the trays worked straight away without extra media.
If you want true soil-free microgreens, expect to use a mat or paper for small-seed varieties. For bulk sprouting for pets or as a prep stage before planting, these trays are a compact, functional solution.
How I Choose a Sprouting Kit
Key features I look for
I focus on drainage, airflow, and materials first. Good drainage and airflow stop rot and mold before they start.
Stainless-steel mesh and stands last longer if you plan to sprout frequently, while BPA-free plastic lids are lighter and often less expensive.
- Drainage: angled stands and drip trays keep water from pooling.
- Airflow: mesh or perforated lids let sprouts breathe.
- Material: 316 stainless mesh resists rust; food-safe plastics are fine for light use.
- Ease of rinsing: inverted spouts or removable trays speed daily care.
Which type suits your routine
If I only ever want a handful of sprouts, a simple mason-jar lid is the fastest option.
If I want continuous batches, I buy a two-jar kit with a stand and sleeves so I can stagger jars.
If I want microgreens or larger-volume sprouting, I choose stackable trays and a grow mat or paper.
- Single-lid: best for casual, low-volume sprouting.
- Two-jar kit: best for steady, countertop production.
- Trays: best for microgreens or bulk sprouts.
Seeds, timing, and care tips I use
I pre-soak most seeds according to type, then rinse two to three times daily. Proper rinsing and drainage are the biggest factors in success.
I remove blackout sleeves or reduce shading once sprouts start to show green so they can develop flavor and color.
- Rinse schedule: 2–3 times daily for most jar sprouting.
- Light control: sleeves for early germination, then expose to light.
- Hygiene: clean lids and trays between batches to avoid cross-contamination.
Frequently Asked Questions
What seeds sprout best in jars versus trays?
I use jars for small seeds like alfalfa, broccoli, mung beans, and trays for larger seeds or microgreens. Tiny seeds often need a mat or paper in trays so they don’t fall through.
How often should I rinse my sprouts?
In my routine I rinse jar sprouts two to three times per day. Trays usually need a daily mist or gentle rinse depending on density.
Do blackout sleeves really help?
Yes — I use sleeves for the first few days to keep sprouts pale and straight, then remove them to develop flavor and color once the shoots appear.
How do I avoid mold and sour smells?
I focus on consistent rinsing and good drainage. If I see off smells or visible mold I discard the batch and sterilize equipment before restarting.
Are stainless lids worth it?
For frequent use I prefer stainless mesh and stands — they resist rust and tolerate repeated cleaning better than cheaper metal or thin plastics.
Final Take
I ended up keeping more than one system: a simple set of Masontops lids for quick single jars and a two-jar stainless kit for steady production. The tray pack rounds out my setup for bulk or microgreen work.
Pick the configuration that matches how many sprouts you want and how often you want to tend them. With decent drainage, regular rinsing, and the right seeds, I’ve found home sprouting to be low-effort and rewarding.
")