
I tested six popular peel-and-stick backsplash options so you don’t have to. Here’s what worked, what didn’t, and which tile I’d reach for depending on the job.
I picked these peel-and-stick backsplashes for hands-on testing because they promise fast, low-mess upgrades. Over multiple kitchen projects I installed, trimmed, and lived with each option so I could compare thickness, adhesion, finish, and ease of installation.
Below I explain which tiles I used for quick refreshes, rental-friendly updates, and higher-end looks—along with practical installation tips I learned on the job.
I evaluated these tiles by how solid they felt, how well they stuck to prepped surfaces, how easy they were to cut and fit, and the finish they delivered in a real kitchen setting.
1. STICKGOO Thicker Design Peel and Stick, Beige & White, 12”×12”, 10 Sheets – Best Overall
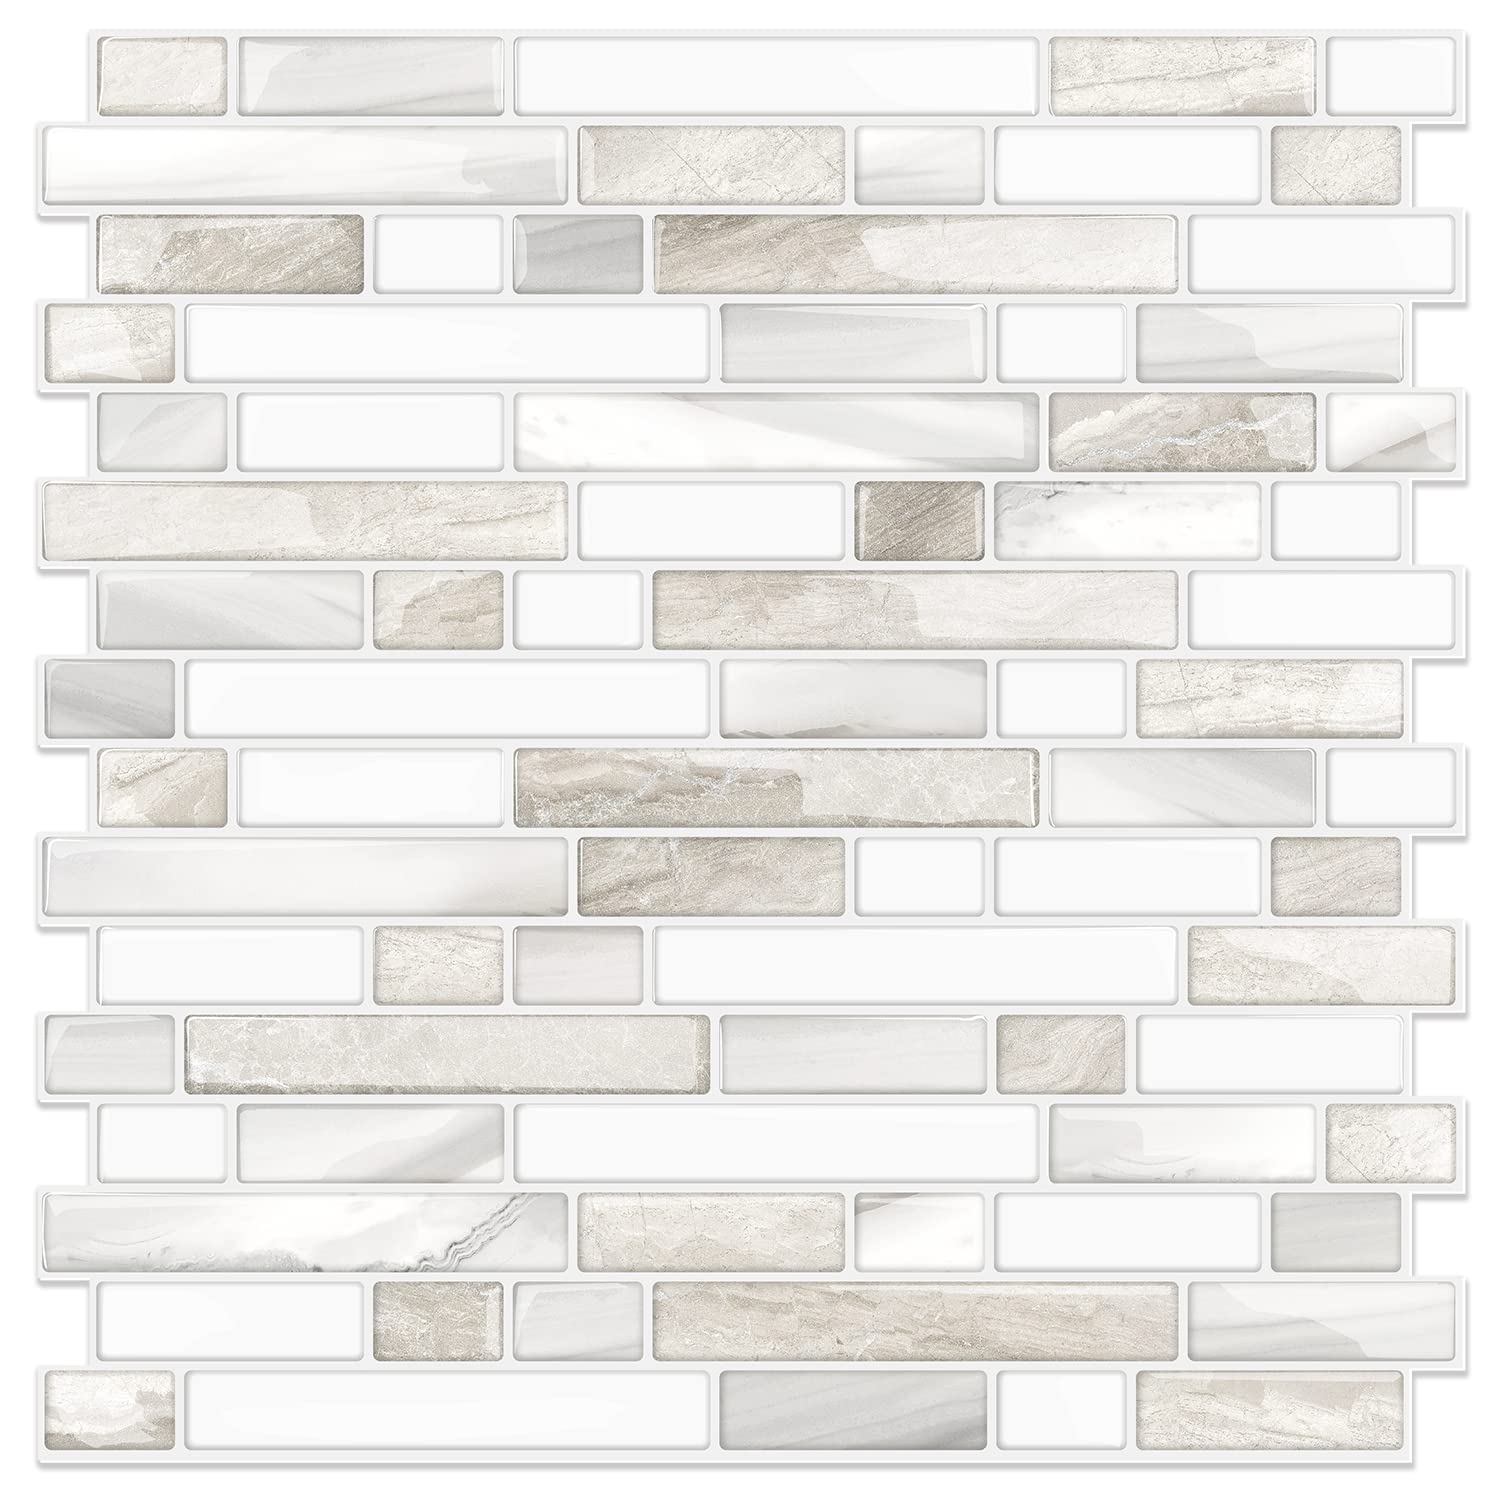
Thicker peel-and-stick tiles that look and feel more like real tile with noticeably strong adhesive.
Why I picked it: Thicker profile and upgraded adhesive make it feel like real tile.
Best for: Quick kitchen refreshes where durability matters.
Affordable mid-range option that balances quality and ease.
Pros
- Thicker, tile-like feel
- 3X stronger backing adhesive
- Larger 12×12 sheets cover more area
- Mess-free, grout-free installation
Cons
- Corners may curl if not prepped
- Requires careful wall prep
My take
I used the STICKGOO thicker peel-and-stick for a rental kitchen refresh and was impressed by how solid the panels felt. The 2–2.5mm thickness gives the finished wall a tile-like presence that other vinyl stickers lack.
Installation was straightforward once I cleaned and dried the wall; the upgraded backing adhesive gripped firmly, even on slightly textured surfaces. Cutting to fit was easy with a utility knife, and the larger 12×12 sheets sped up coverage compared with smaller alternatives.
The finish reads like real tile from a distance, and I appreciated not dealing with grout or thin-set. My one caution: take time on prep—light sanding and cleaning prevented edge lifting and ensured a professional result.
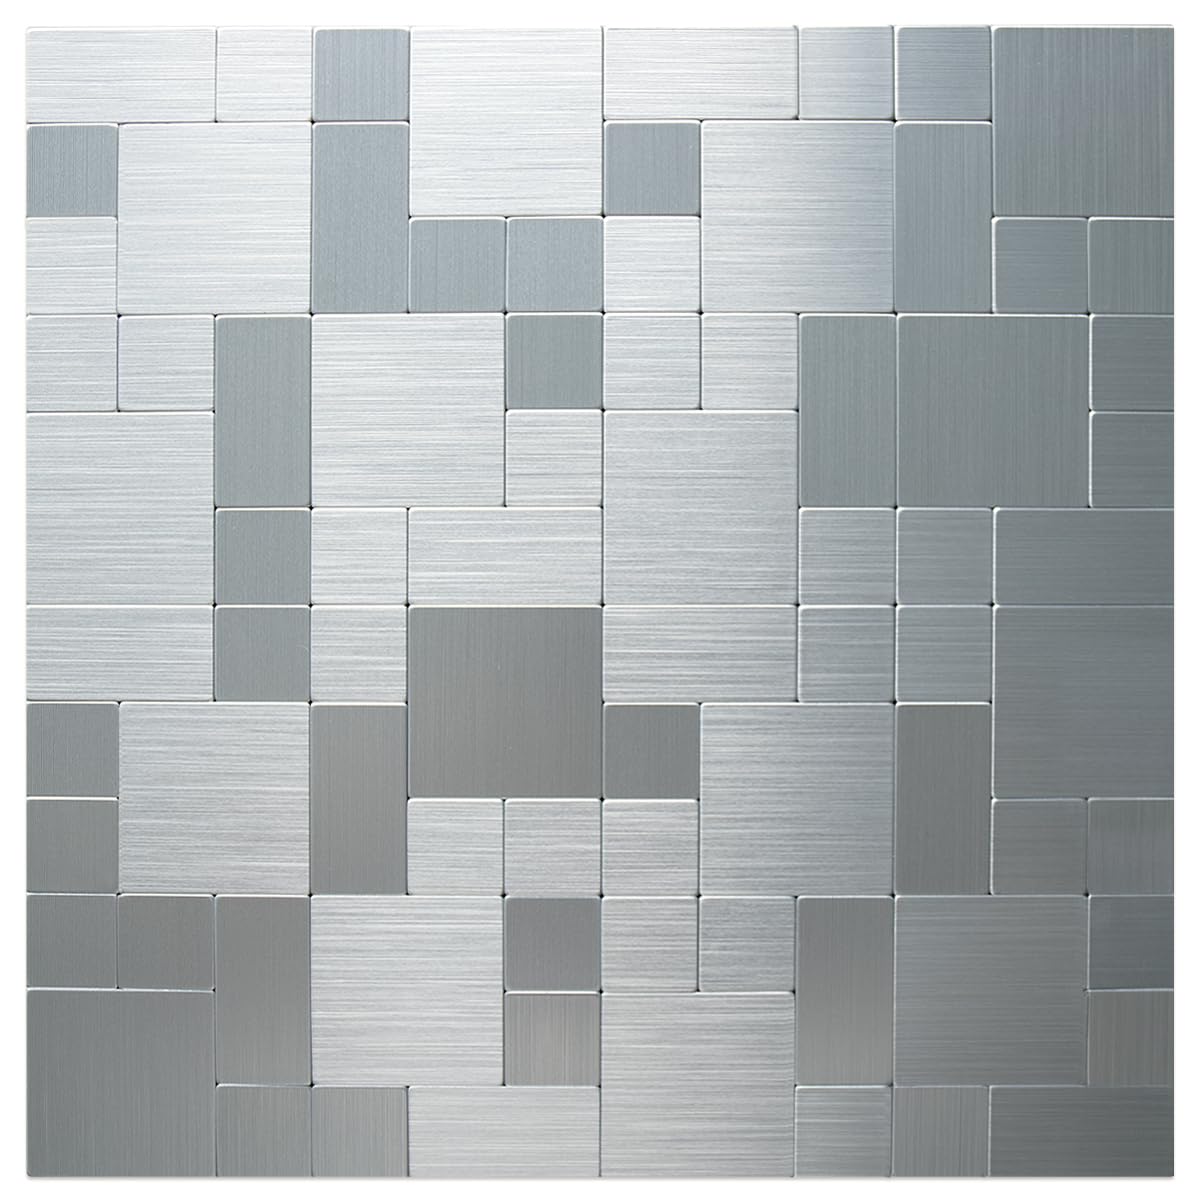
2. Art3d 10-Pack Self-Adhesive Metal Backsplash, 12″ x 12″ Silver Aluminium – Best Metal Look
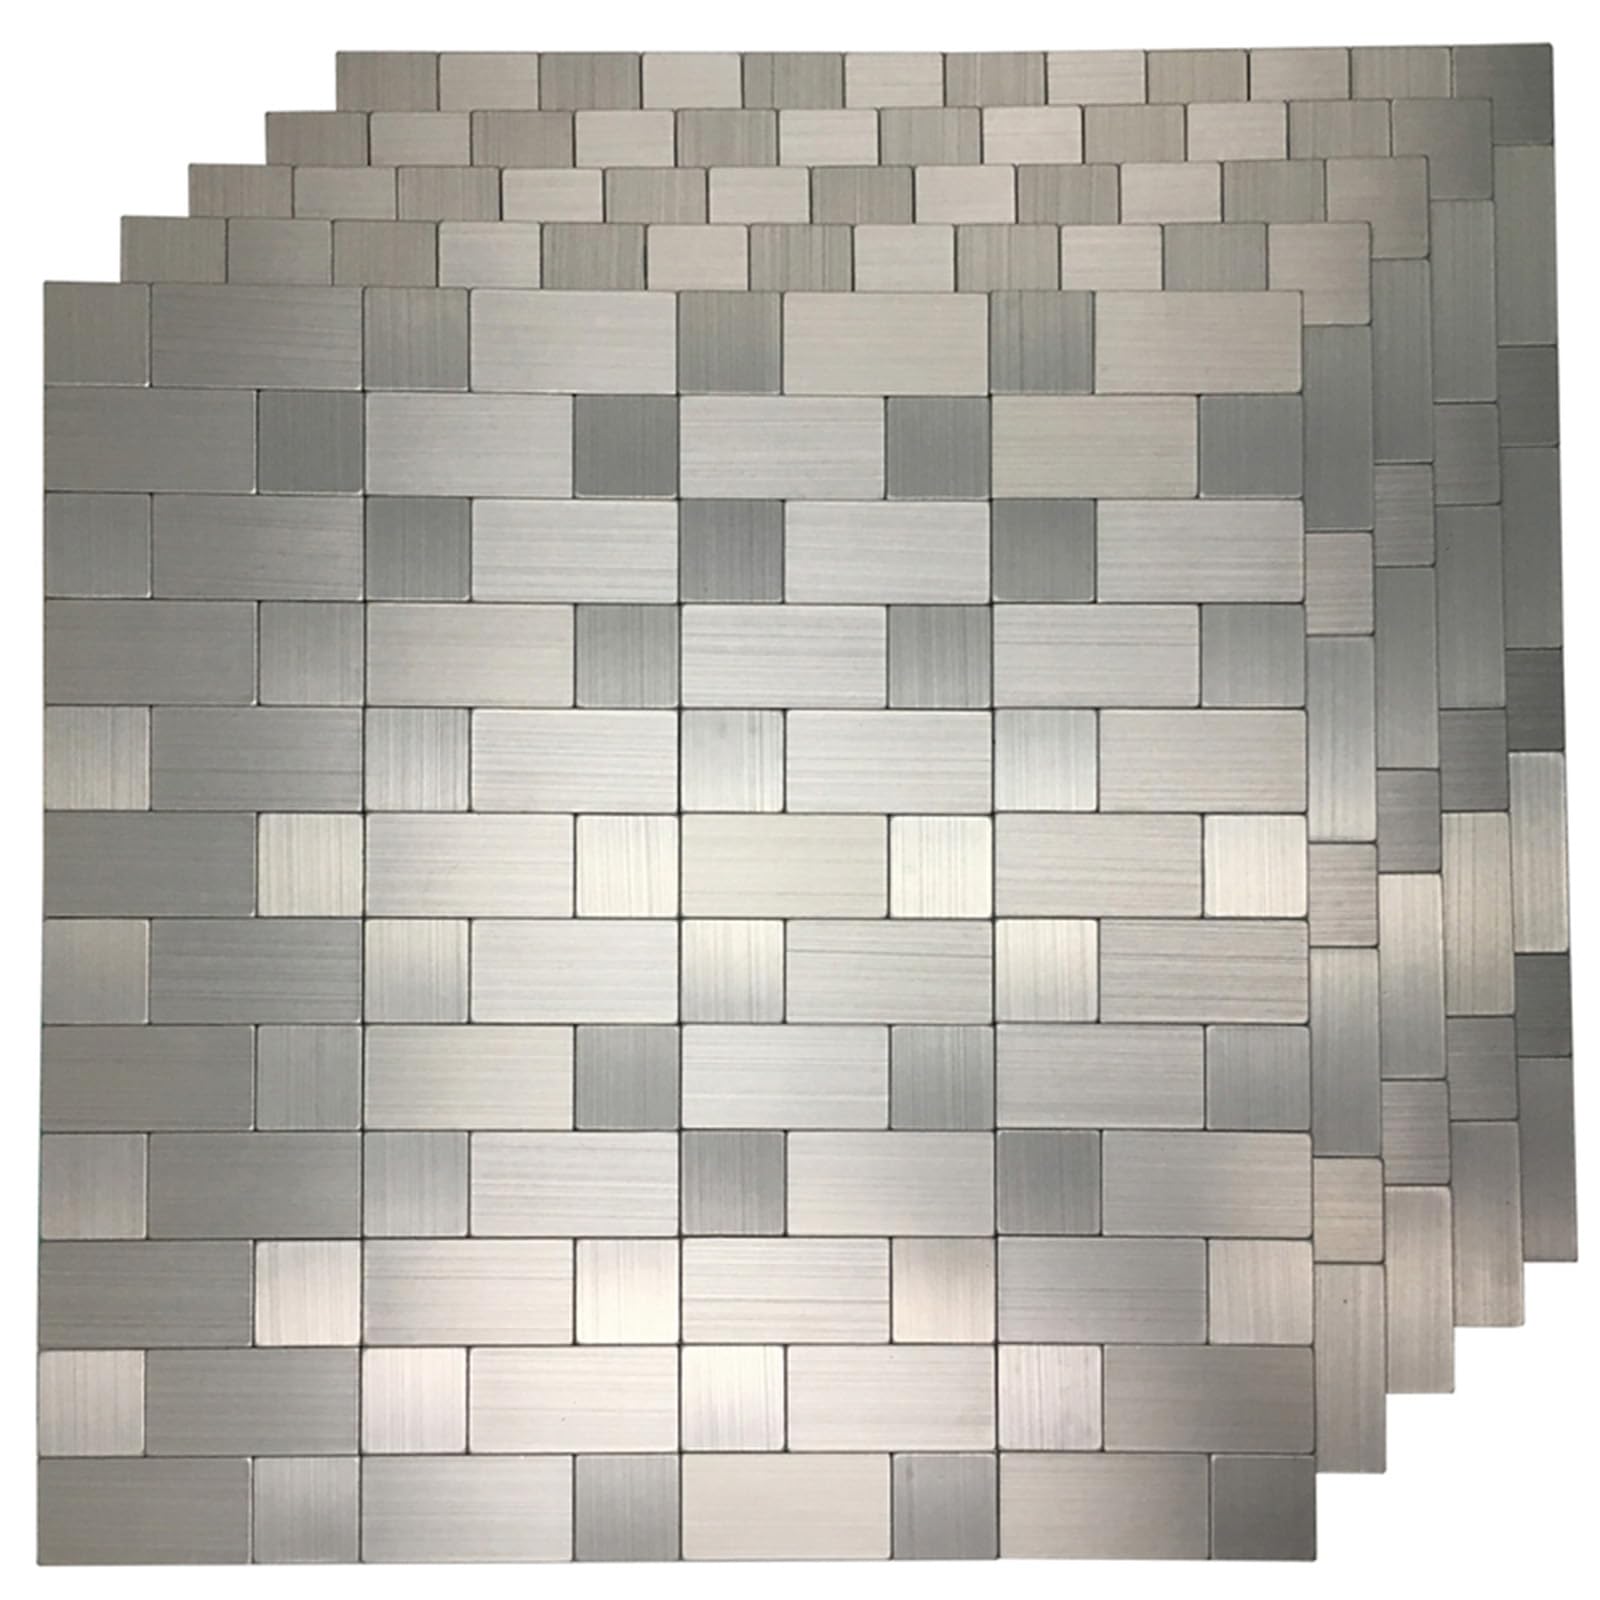
Sleek metal-look panels that reflect light and give a modern, industrial finish.
Why I picked it: Aluminium surface gives a modern, reflective look and feels premium.
Best for: Modern kitchens and accent walls needing a sleek metallic finish.
A solid mid-range pick for a contemporary metal look.
Pros
- Reflective, modern aluminum finish
- Covers about 10 square feet
- Dry, no-grout installation
Cons
- Extremely sticky — hard to reposition
- Not for direct flame contact
My take
I installed the Art3d aluminum panels on an accent wall and the transformation was immediate. The silver surface reflects light well and imparts a clean, modern vibe.
These tiles are very sticky—prepare the layout carefully because repositioning is difficult. When applied to a properly prepped surface they hold firmly and look seamless across multiple sheets.
A practical note: avoid installing these where they’ll meet open flames or be submerged in water. For backsplashes behind stoves I used extra clearance and a heat-resistant trim to be safe.
3. DICOFUN Faux White Marble Peel and Stick, Mixed Metal Accents, 12’’x12’’ – Best for High-End Look
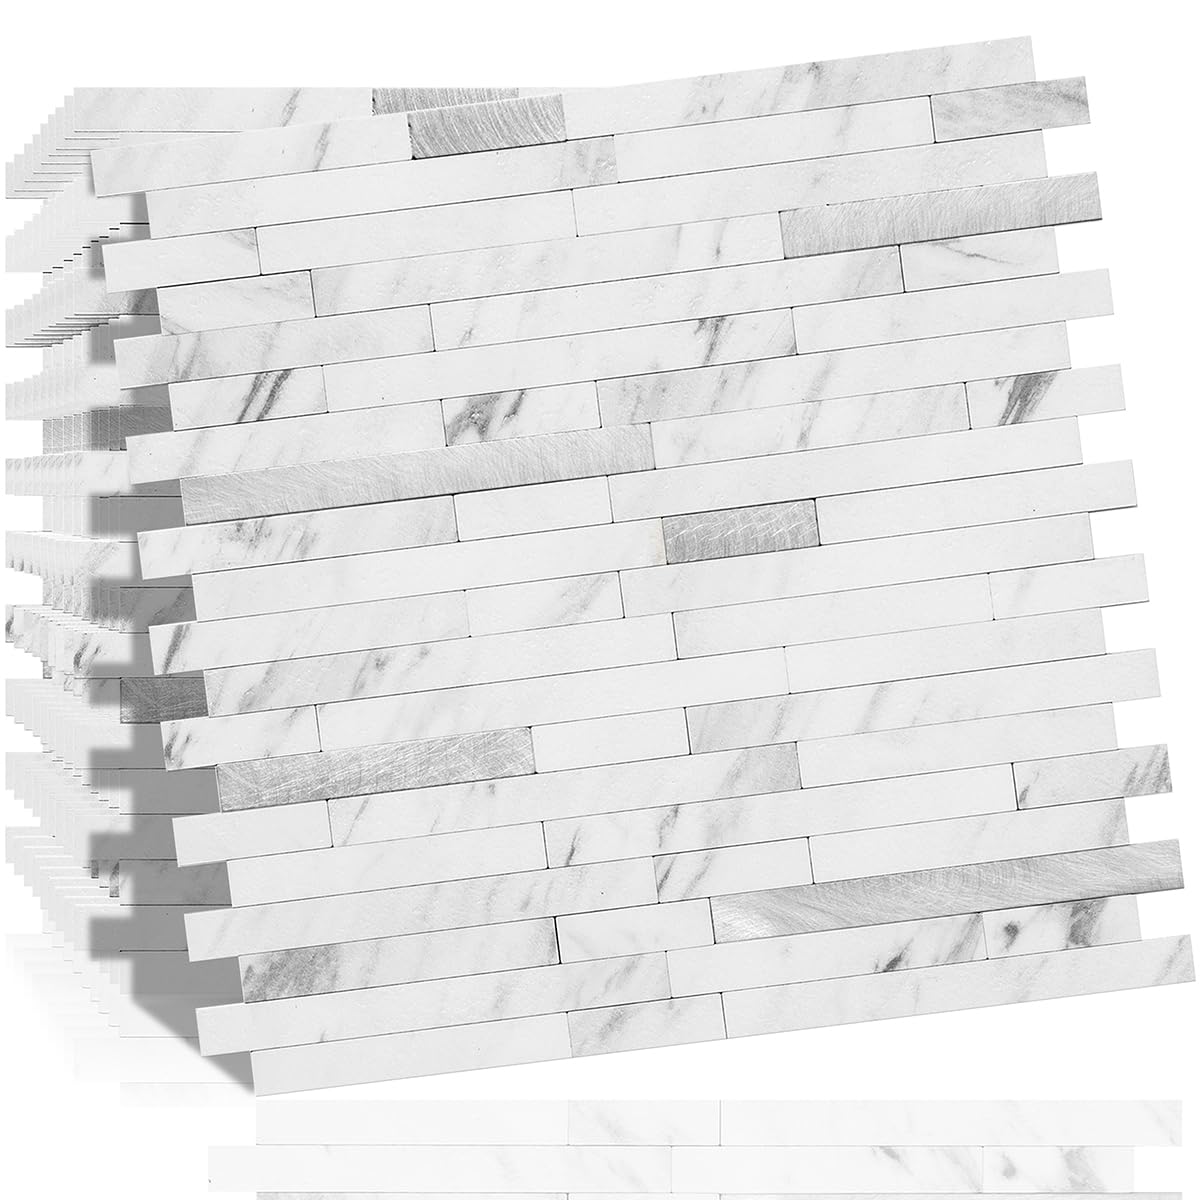
Faux marble panels with metallic accents that create an upscale look without the mess of real stone.
Why I picked it: Faux marble texture and metal accents deliver a high-end appearance.
Best for: Kitchens that need a marble look without the cost or installation mess.
A pricier-feeling option that mimics stone and metal detailing.
Pros
- High-end faux marble look
- 3M-formulated adhesive
- Waterproof and heat-resistant
Cons
- Metal accents can be tougher to cut
- Stubborn to reposition once stuck
My take
I used the DICOFUN marble-and-metal panels on a full kitchen remodel where I wanted a luxe look but not the cost or disruption of real marble. Visually, they delivered—brightening the space and pairing beautifully with white cabinetry.
The backing uses a 3M-formulated adhesive that stuck reliably; after nearly three years in my test area the tiles showed no peeling or fading. Cutting required more effort where the metallic pieces ran through the tile, so I worked slowly around outlets and edges.
I recommend ordering about 10% extra for cuts and alignment. Once these panels are in place they read like stone, but be deliberate during placement since repositioning is difficult.
4. 20 Sheets Peel and Stick Backsplash, White Marble with Metal Silver Look – Best Value Pack
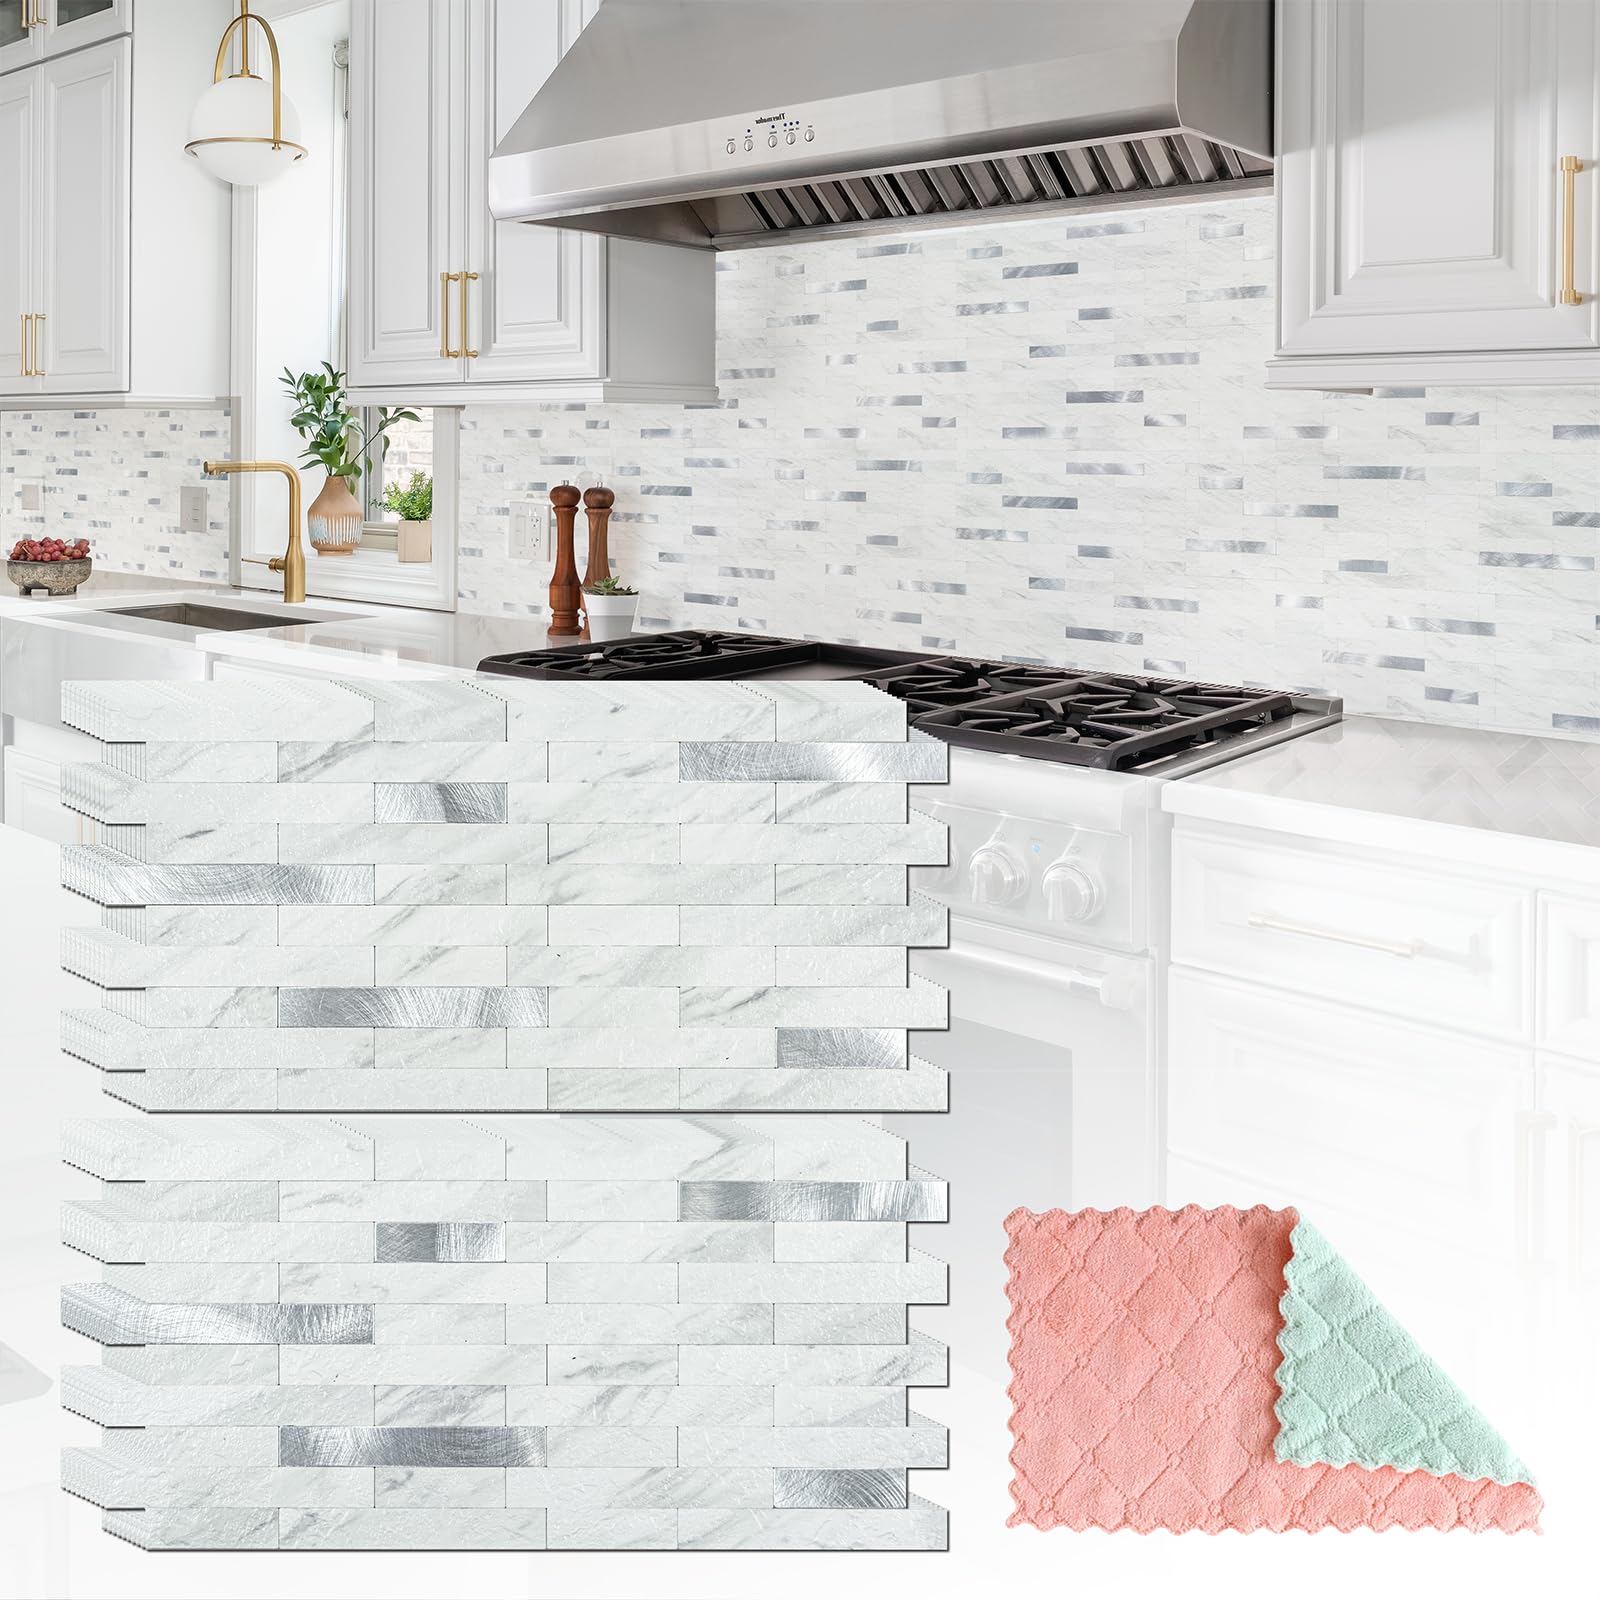
Large pack of small-size sheets that makes covering a backsplash fast and budget-friendly.
Why I picked it: 20 half-sheets reduce cutting and speed installation for larger areas.
Best for: Full backsplash projects and larger makeover jobs.
Cost-effective for covering larger surfaces without extra fuss.
Pros
- Large 20-sheet quantity
- Realistic marble texture
- Easy to trim and fit
Cons
- Very sticky — plan layout
- Corners need patient cutting
My take
I bought multiple boxes of the StyloVue 20-sheet pack to cover a dated backsplash and was impressed by how much coverage the kit delivers. The smaller sheet format made it easier to manage cuts around cabinets and outlets.
These tiles are made from PVC polymer and feel waterproof and heat-resistant in everyday use. I used a primer on older tile before applying, which helped adhesion and resulted in a seamless look once caulked for hairline gaps.
They stick permanently once applied, so I moved deliberately and kept small cut-off pieces for tight spots. The final result read as professional and gave the kitchen the full refresh I wanted without major renovation.
5. 20 Sheets Peel and Stick Backsplash, White Marble with Metal Silver Look (extra listing) – Best for Large Projects
Same StyloVue sheets presented again—great when you need multiple boxes for big spaces.
Why I picked it: Same reliable material in a pack that’s easy to scale for big jobs.
Best for: Homeowners tackling entire kitchens or multiple rooms.
Buying extra packs makes large installations simpler and consistent.
Pros
- Good for covering big areas
- Professional-looking finish
- Includes cleaning cloth
Cons
- Very permanent once applied
- Requires careful measurement
My take
I included this listing again because the 20-sheet format is my go-to when I’m tiling an entire kitchen—one box often isn’t enough and consistency across boxes matters.
Installation follows the same pattern: clean thoroughly, optionally use a primer, peel and stick, then caulk hairline gaps. The material bends and trims well, and small-cut pieces come in handy for edges.
Overall these sheets let me achieve a high-impact look quickly and affordably when I’m tackling large surfaces.
6. DICOFUN Metal Peel and Stick Tile, Brushed Silver, 12″x12″ (1 Sheet) – Best Single-Sheet Option
Single-sheet metal-look tile ideal for accents, small repairs, or testing a finish first.
Why I picked it: Single-sheet purchase makes testing or small applications low-commitment.
Best for: Accent areas, small gaps, or trying a metal finish first.
Single-sheet format keeps upfront cost low for trials.
Pros
- Quality metal-like finish
- Easy to cut and shape
- Strong 3M adhesive backing
Cons
- One sheet covers only one square foot
- Can be hard to remove once set
My take
I used the DICOFUN brushed-silver single sheet to patch a small gap and to test a metal accent before committing to a full purchase. The sheet cuts and bends like thin metal rather than vinyl, which I liked for that industrial look.
The 3M-style adhesive is strong—once it was on the wall it stayed. For precision cuts I reached for tin snips and a sharp utility knife between patterns; this made trimming around outlets and trim much easier.
If you only need an accent or want to experiment with a finish, buying single sheets first saved time and money while delivering a high-quality result.
How I Choose Peel-and-Stick Backsplashes
Key features I test
Thickness: Thicker panels look and feel more like real tile and resist curling at edges.
Adhesive: I prefer 3M-style or upgraded backing adhesives for long-term hold.
Material & finish: PVC, metal-look, and composite panels each wear differently and suit different styles.
- Pick thicker panels for durability and realism
- Choose strong adhesive for slightly textured walls
- Match finish (matte, glossy, brushed metal) to your kitchen lighting
Installation tips I rely on
Prep is everything: clean, degrease, and dry the surface before sticking tiles.
Measure twice, cut once: mark and test-fit panels before removing backing.
Use primer on older tile or painted surfaces to improve adhesion.
- Keep a utility knife, tin snips, and metal ruler handy
- Apply caulk to hairline gaps for a finished look
- Work from one corner and maintain direction for consistent seams
Durability and care
Most peel-and-stick tiles are waterproof and heat-resistant for typical backsplash use, but I avoid placing thin vinyl directly where flames touch.
Strong adhesives make removal difficult; plan for permanence or test with a single sheet first.
- Wipe spills promptly with a soft cloth
- Avoid abrasive cleaners that could dull finishes
- Keep spare tiles for repairs or tricky cuts
Frequently Asked Questions
Can I install peel-and-stick tiles behind my stove?
I will install them behind a stove only if there’s no direct open flame contact. Many of these tiles are heat-resistant, but I still maintain clearance and use trim or sheet metal around cooktops for extra protection.
How hard is removal if I change my mind later?
From my experience, the better the adhesive, the harder the removal. Strong-backed tiles can be stubborn and may pull paint or surface paper off drywall. I test with a single sheet first and use a heat gun and a gentle adhesive remover when necessary.
Do I need special tools to cut these tiles?
I typically use a sharp utility knife for PVC sheets and tin snips or metal shears for metal-look panels. A straightedge and patience make complex cuts around outlets much easier.
Final Take
I rely on thicker panels with strong backing for most kitchen updates because they read like real tile and stand up better over time.
For a modern, reflective finish I reach for aluminum-look options; for a high-end marble aesthetic the faux marble with metal accents delivers great value.
If you’re covering a large area, buy multiple boxes up front for consistency; if you’re unsure, start with single sheets to test adhesion and appearance.
")