
I tested a range of basil seeds and starter kits—edible basil seeds, Genovese, Thai, and multi-herb kits—to find reliable options for eating, cooking, and growing on a windowsill or in a garden.
I grow a lot of basil—Genovese for pesto, Thai for stir-fries, and holy basil seeds for pantry use—so I tested seed packets and kits that promised easy germination, strong flavor, or culinary versatility.
Across single-variety packets and starter kits I focused on real-world results: germination speed, plant vigor, flavor in the kitchen, and the practical extras (pots, coir pellets, markers) that make starting seeds easier. Below are the basil picks I rely on depending on whether I want nutrition, a specific flavor profile, or a simple windowsill garden.
I grouped these picks by what I personally needed: pantry-friendly edible basil seeds for nutrition; paired seed packs for immediate cooking synergy; single-variety heirloom Genovese for classic Italian flavor; a full starter kit when I wanted everything included; and a Thai basil packet when I needed authentic Southeast Asian aroma.
1. Carrington Farms Holy Basil Seeds – Best for Nutrition
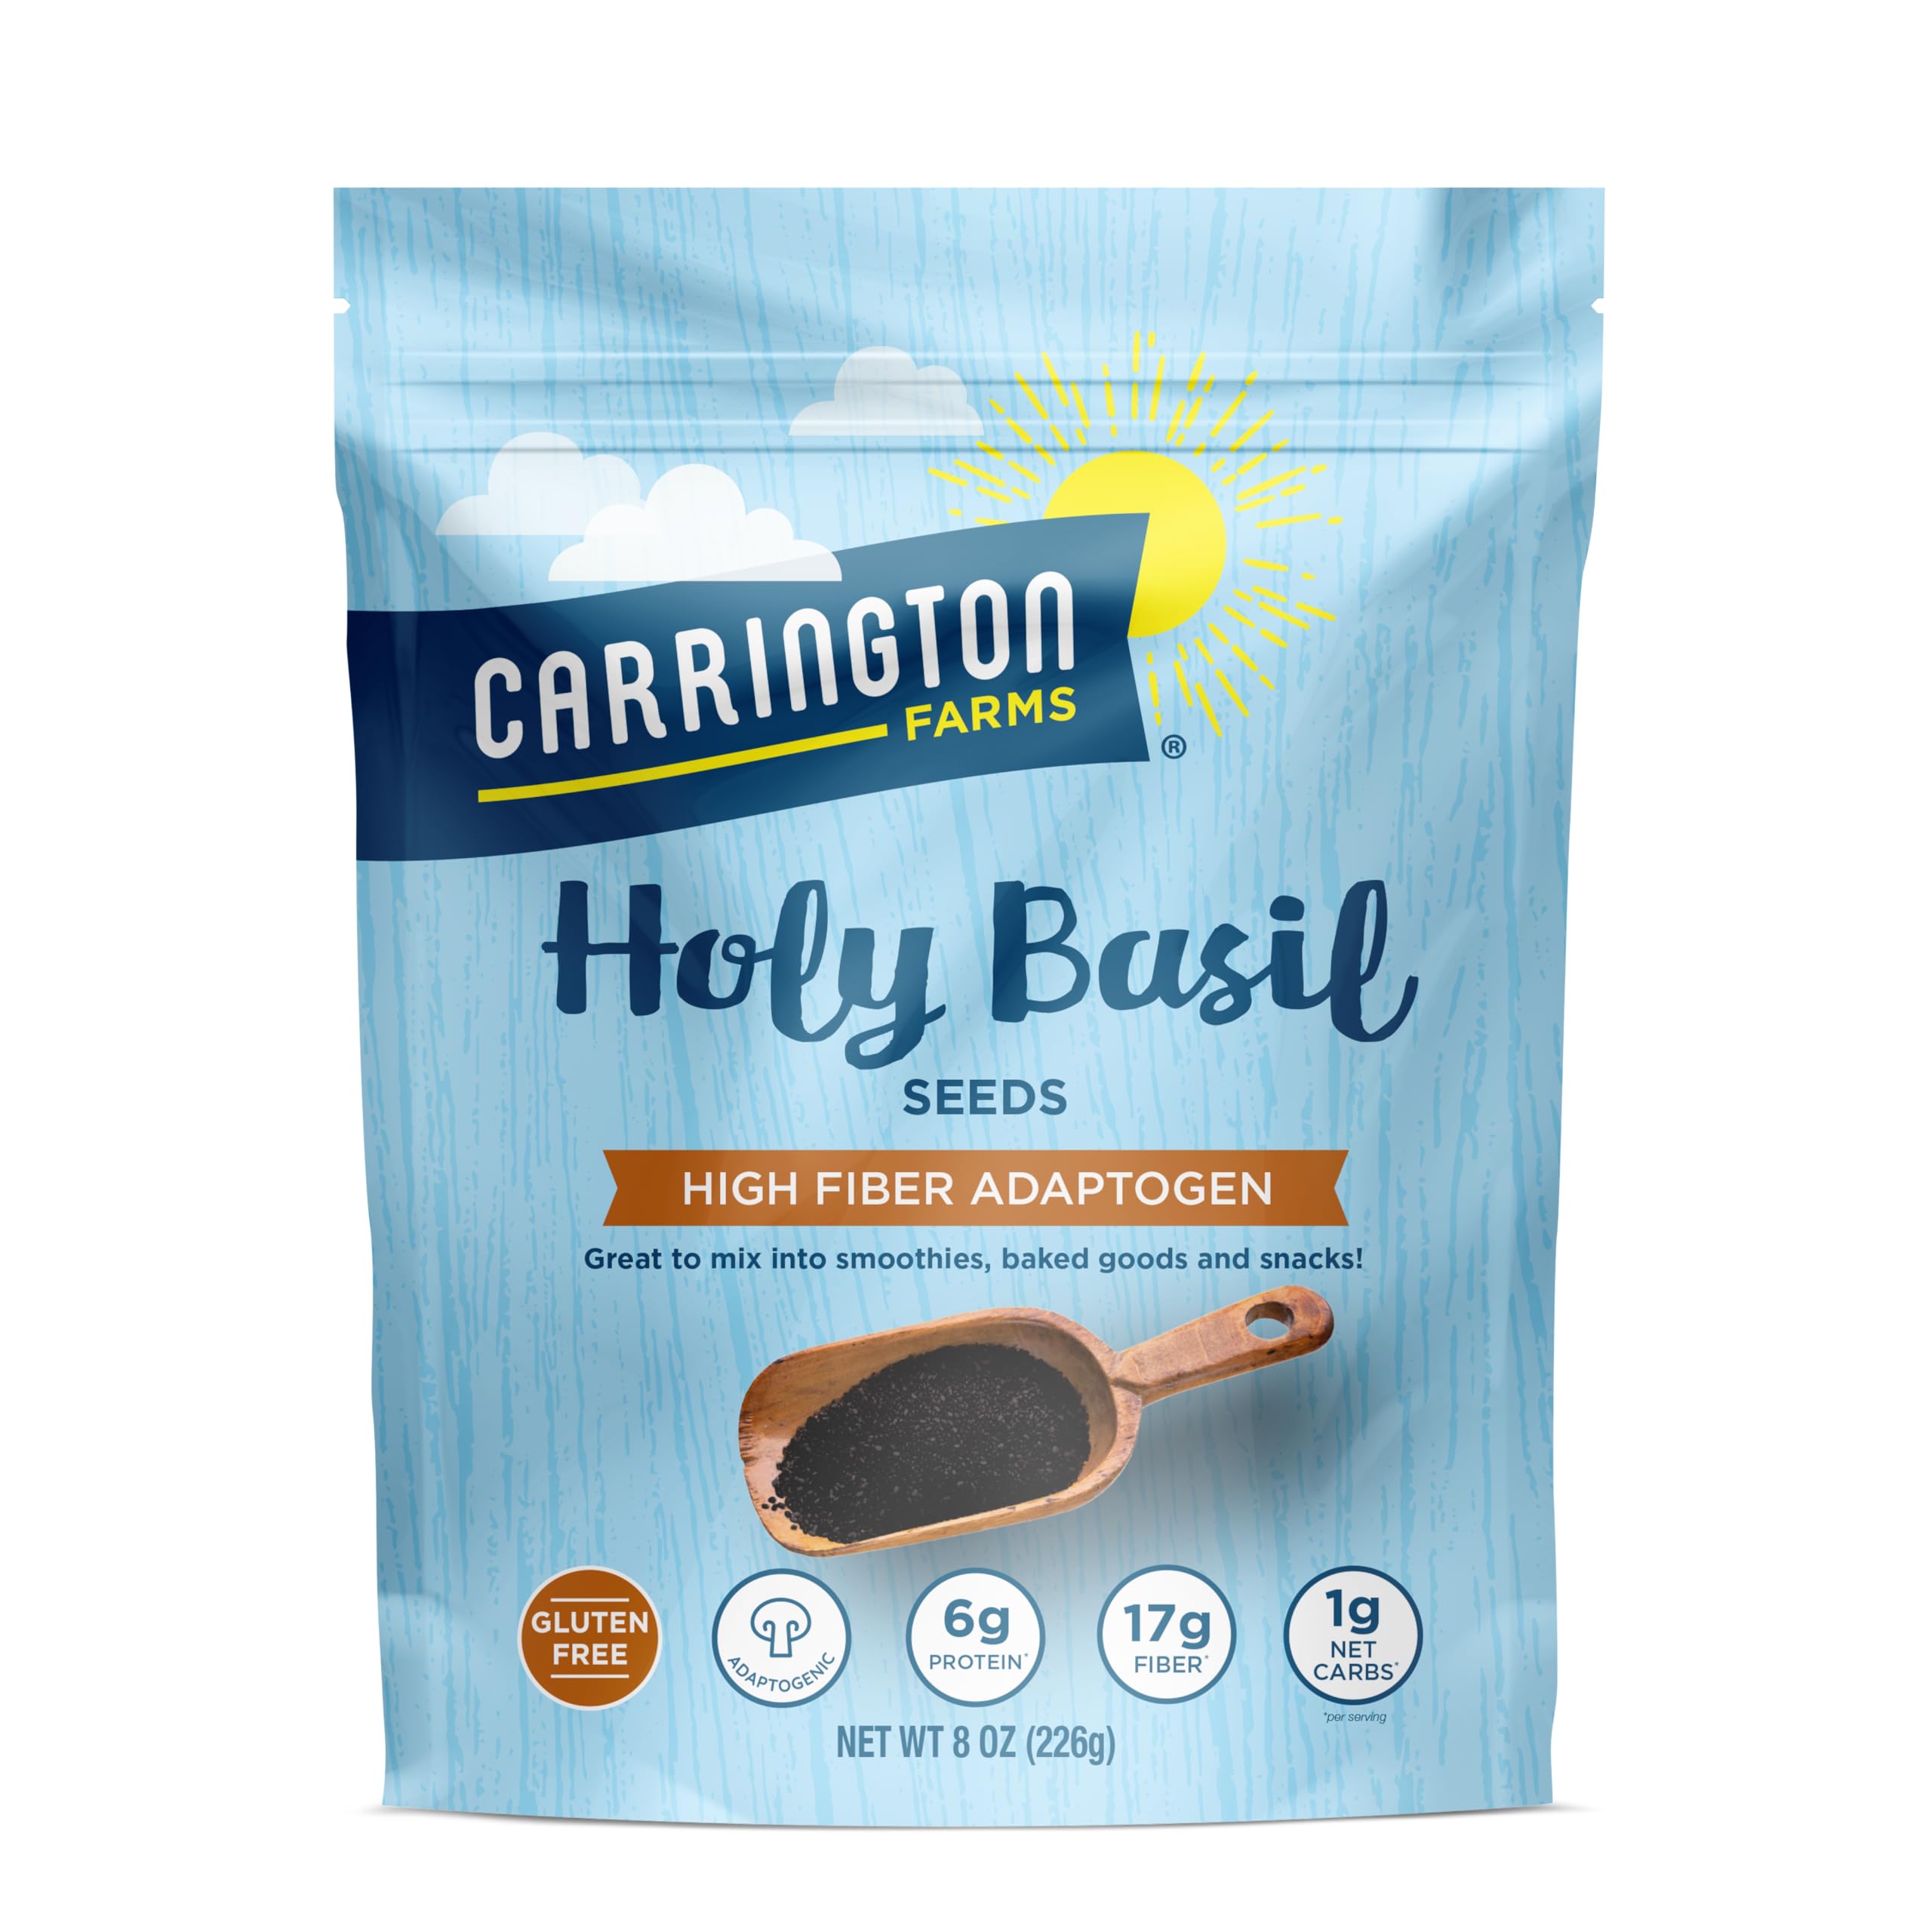
Holy basil seeds I use as a high-fiber, plant-based pantry booster and light-textured add-in for puddings, smoothies, and yogurt.
Why I picked it: I picked these for their adaptogen claims and for being an easy, neutral-flavored way to add fiber and calcium to meals.
Best for: People who want edible basil seeds for fiber, calcium, and culinary textures.
An affordable pantry staple for regular use.
Pros
- High prebiotic fiber per serving
- Neutral flavor, easy to mix
- Good calcium and protein content
Cons
- Not a planting seed (for eating)
- Requires soaking for best texture
My take
I keep a bag of these holy basil seeds in my pantry and use them the way the package suggests—mixed into overnight oats, stirred into yogurt, or hydrated for a bubble-style drink. The seeds expand and give a soft, slightly gelled texture that plays well in sweet and savory dishes, and I appreciate the neutral, light herbaceous aroma that doesn’t overpower recipes. The label lists substantial prebiotic fiber and calcium, so I treat them as a nutritional boost rather than a flavoring herb. When I want a quick, health-forward pudding, I hydrate the seeds in milk or a plant-based alternative and flavor them with a little sweetener and citrus. They’re convenient to store and versatile enough that
I use them regularly as part of my breakfast rotation.
2. Seed Needs Sweet Basil & Italian Oregano Seeds – Best Flavor Pairing
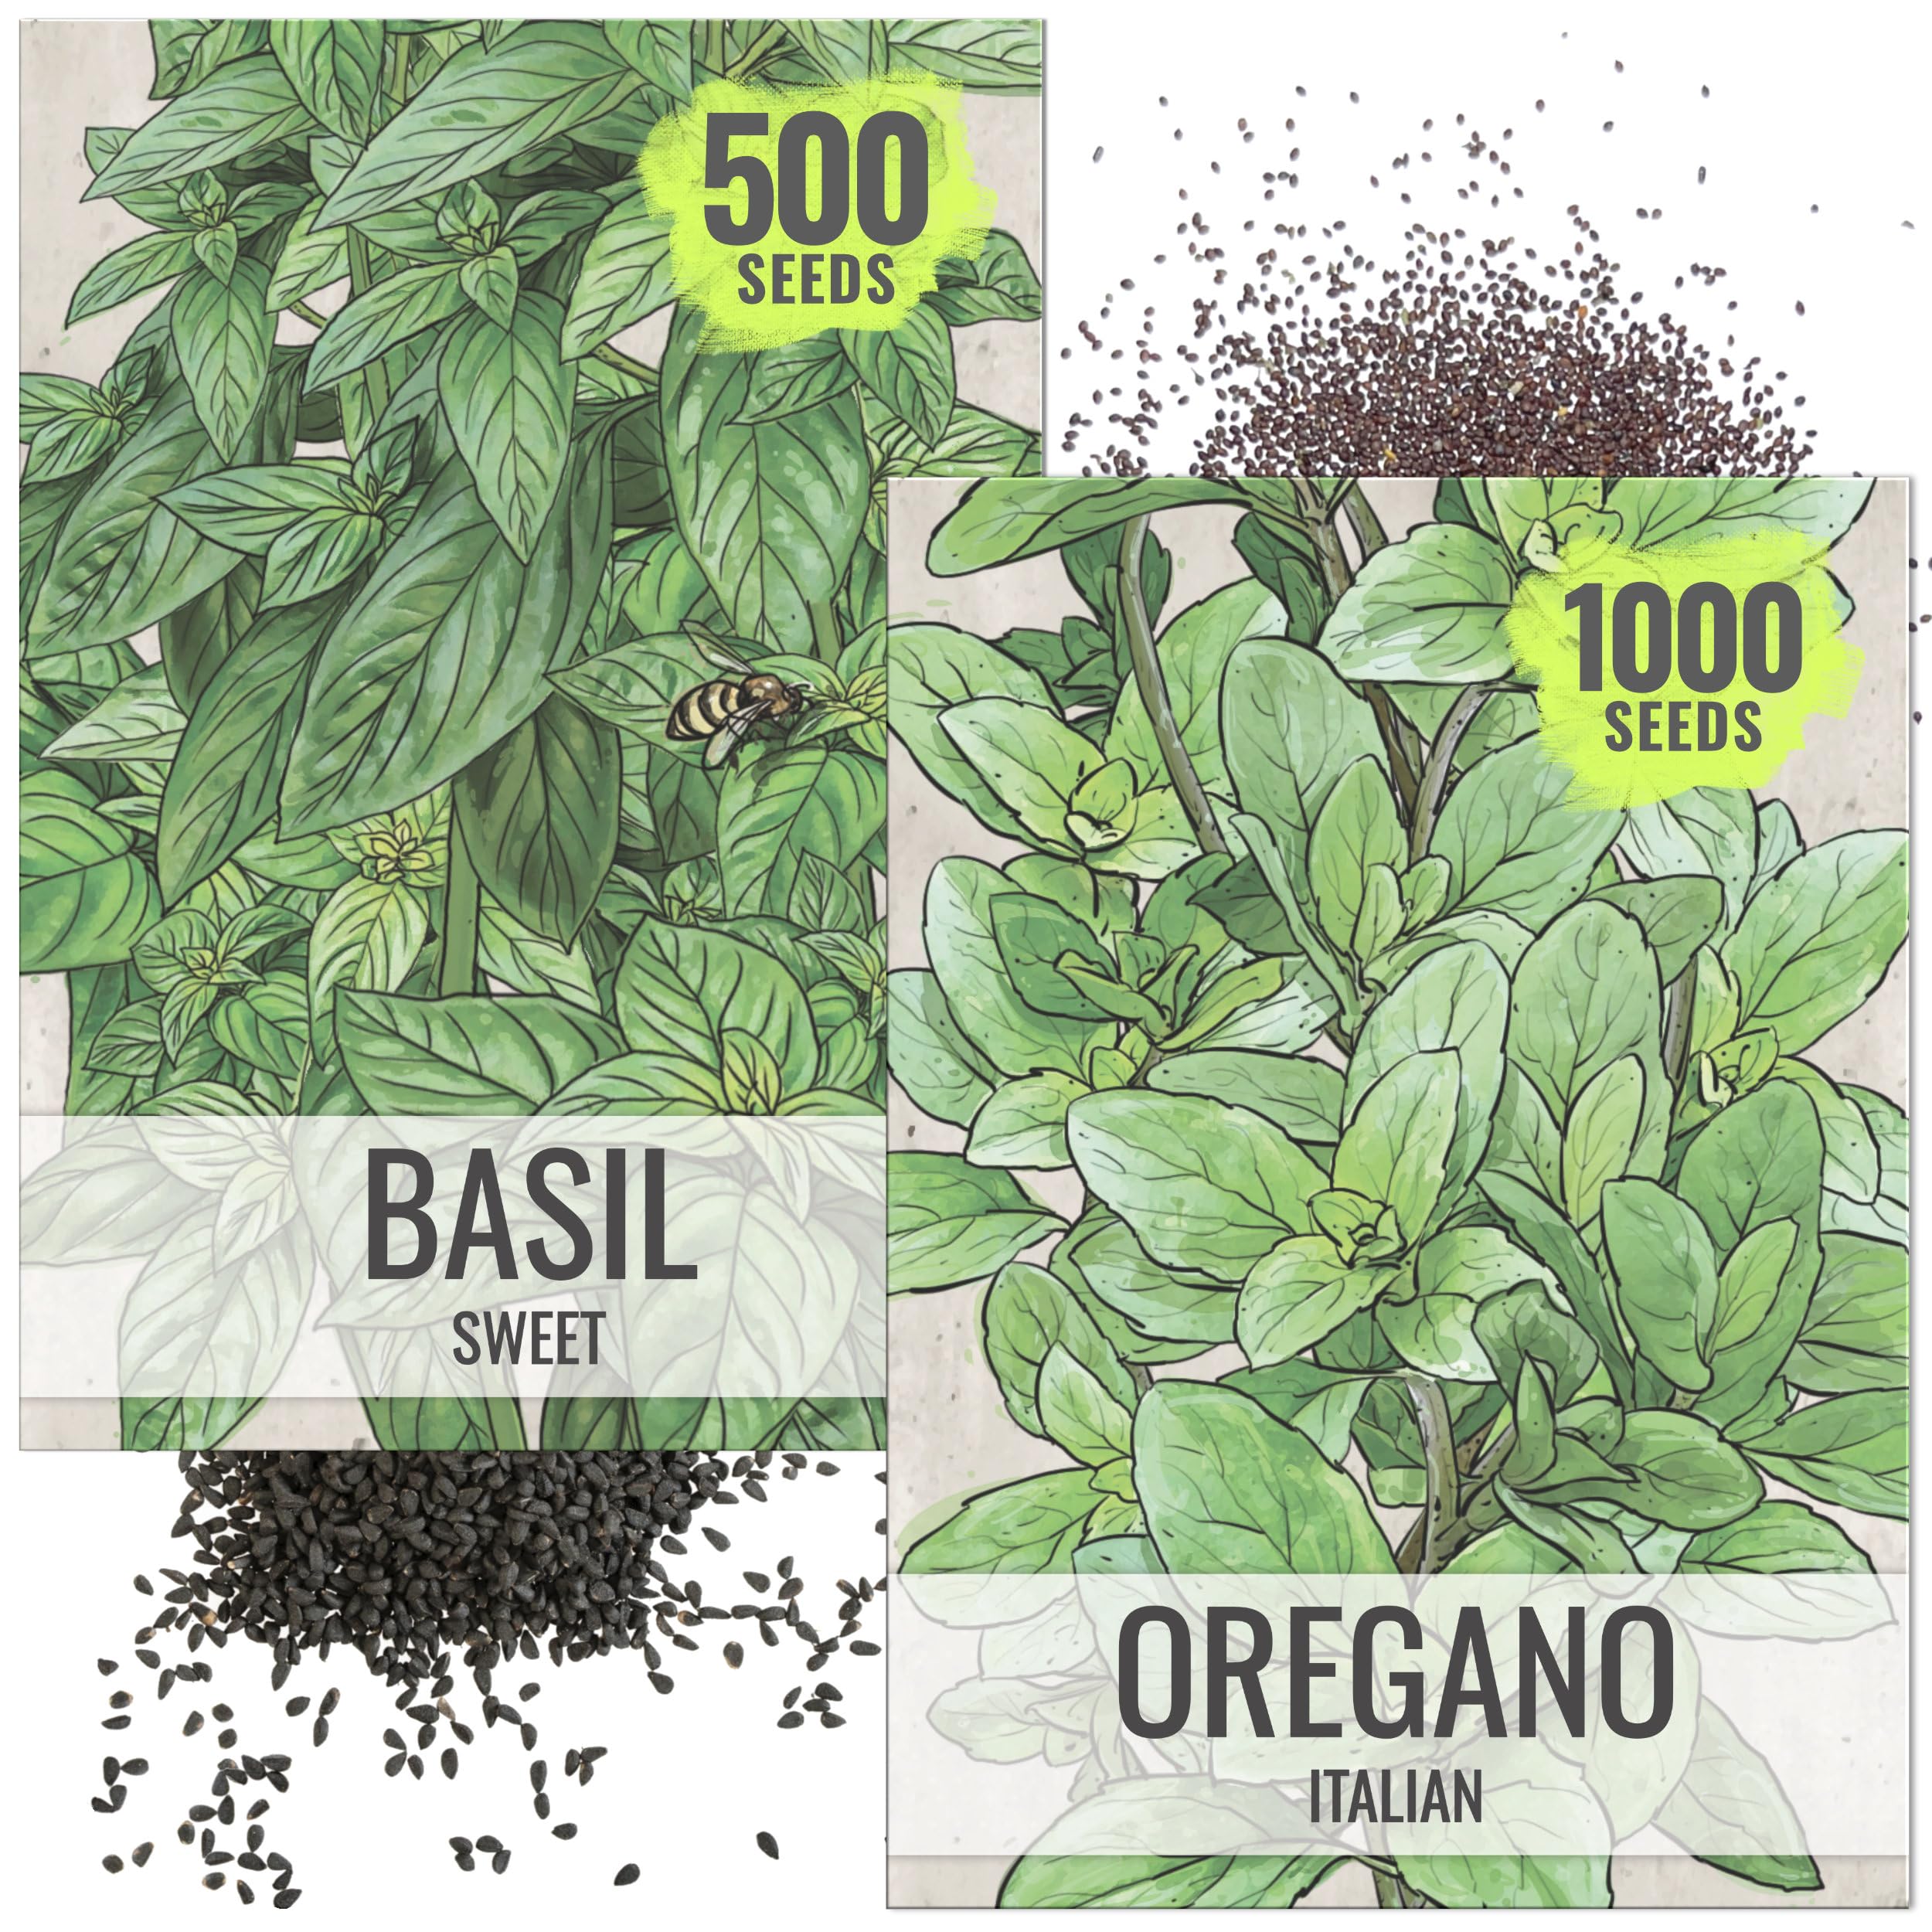
A paired basil+oregano seed kit for pizza, marinara, and kitchen-ready Italian flavors.
Why I picked it: I chose this kit because basil and oregano grow and cook beautifully together, giving both fresh brightness and lasting savory depth.
Best for: Home cooks who want complementary herbs for tomato-based dishes.
Generous seed quantities make this a budget-friendly option.
Pros
- Flavor pair made for Italian dishes
- Seeds stored for next season
- Generous seed quantities
Cons
- Basil is annual; needs warm season
- Some seeds may underperform in low light
My take
I like having basil and oregano in the same packet because they solve two cooking needs at once: basil for late-finish brightness and oregano for deep, slow-cooked flavor. I started these indoors and found the basil germinates reliably when kept warm; pinching basil early helped me get bushier plants. The packet is generous, so I can plant several pots and still save seeds for the next season if I store them properly. In my kitchen garden they produced the most usable leaves for bruschetta and fresh sauce, and the oregano held up well in longer simmers. If you want immediate culinary payoff, I plant both in adjacent containers so I can snip the exact leaf combination I need.
Overall, this pair is the fastest route from seed to a pair of herbs I actually use weekly.
3. Seed Needs Rosemary & Basil Seeds – Best Rosemary + Basil Combo
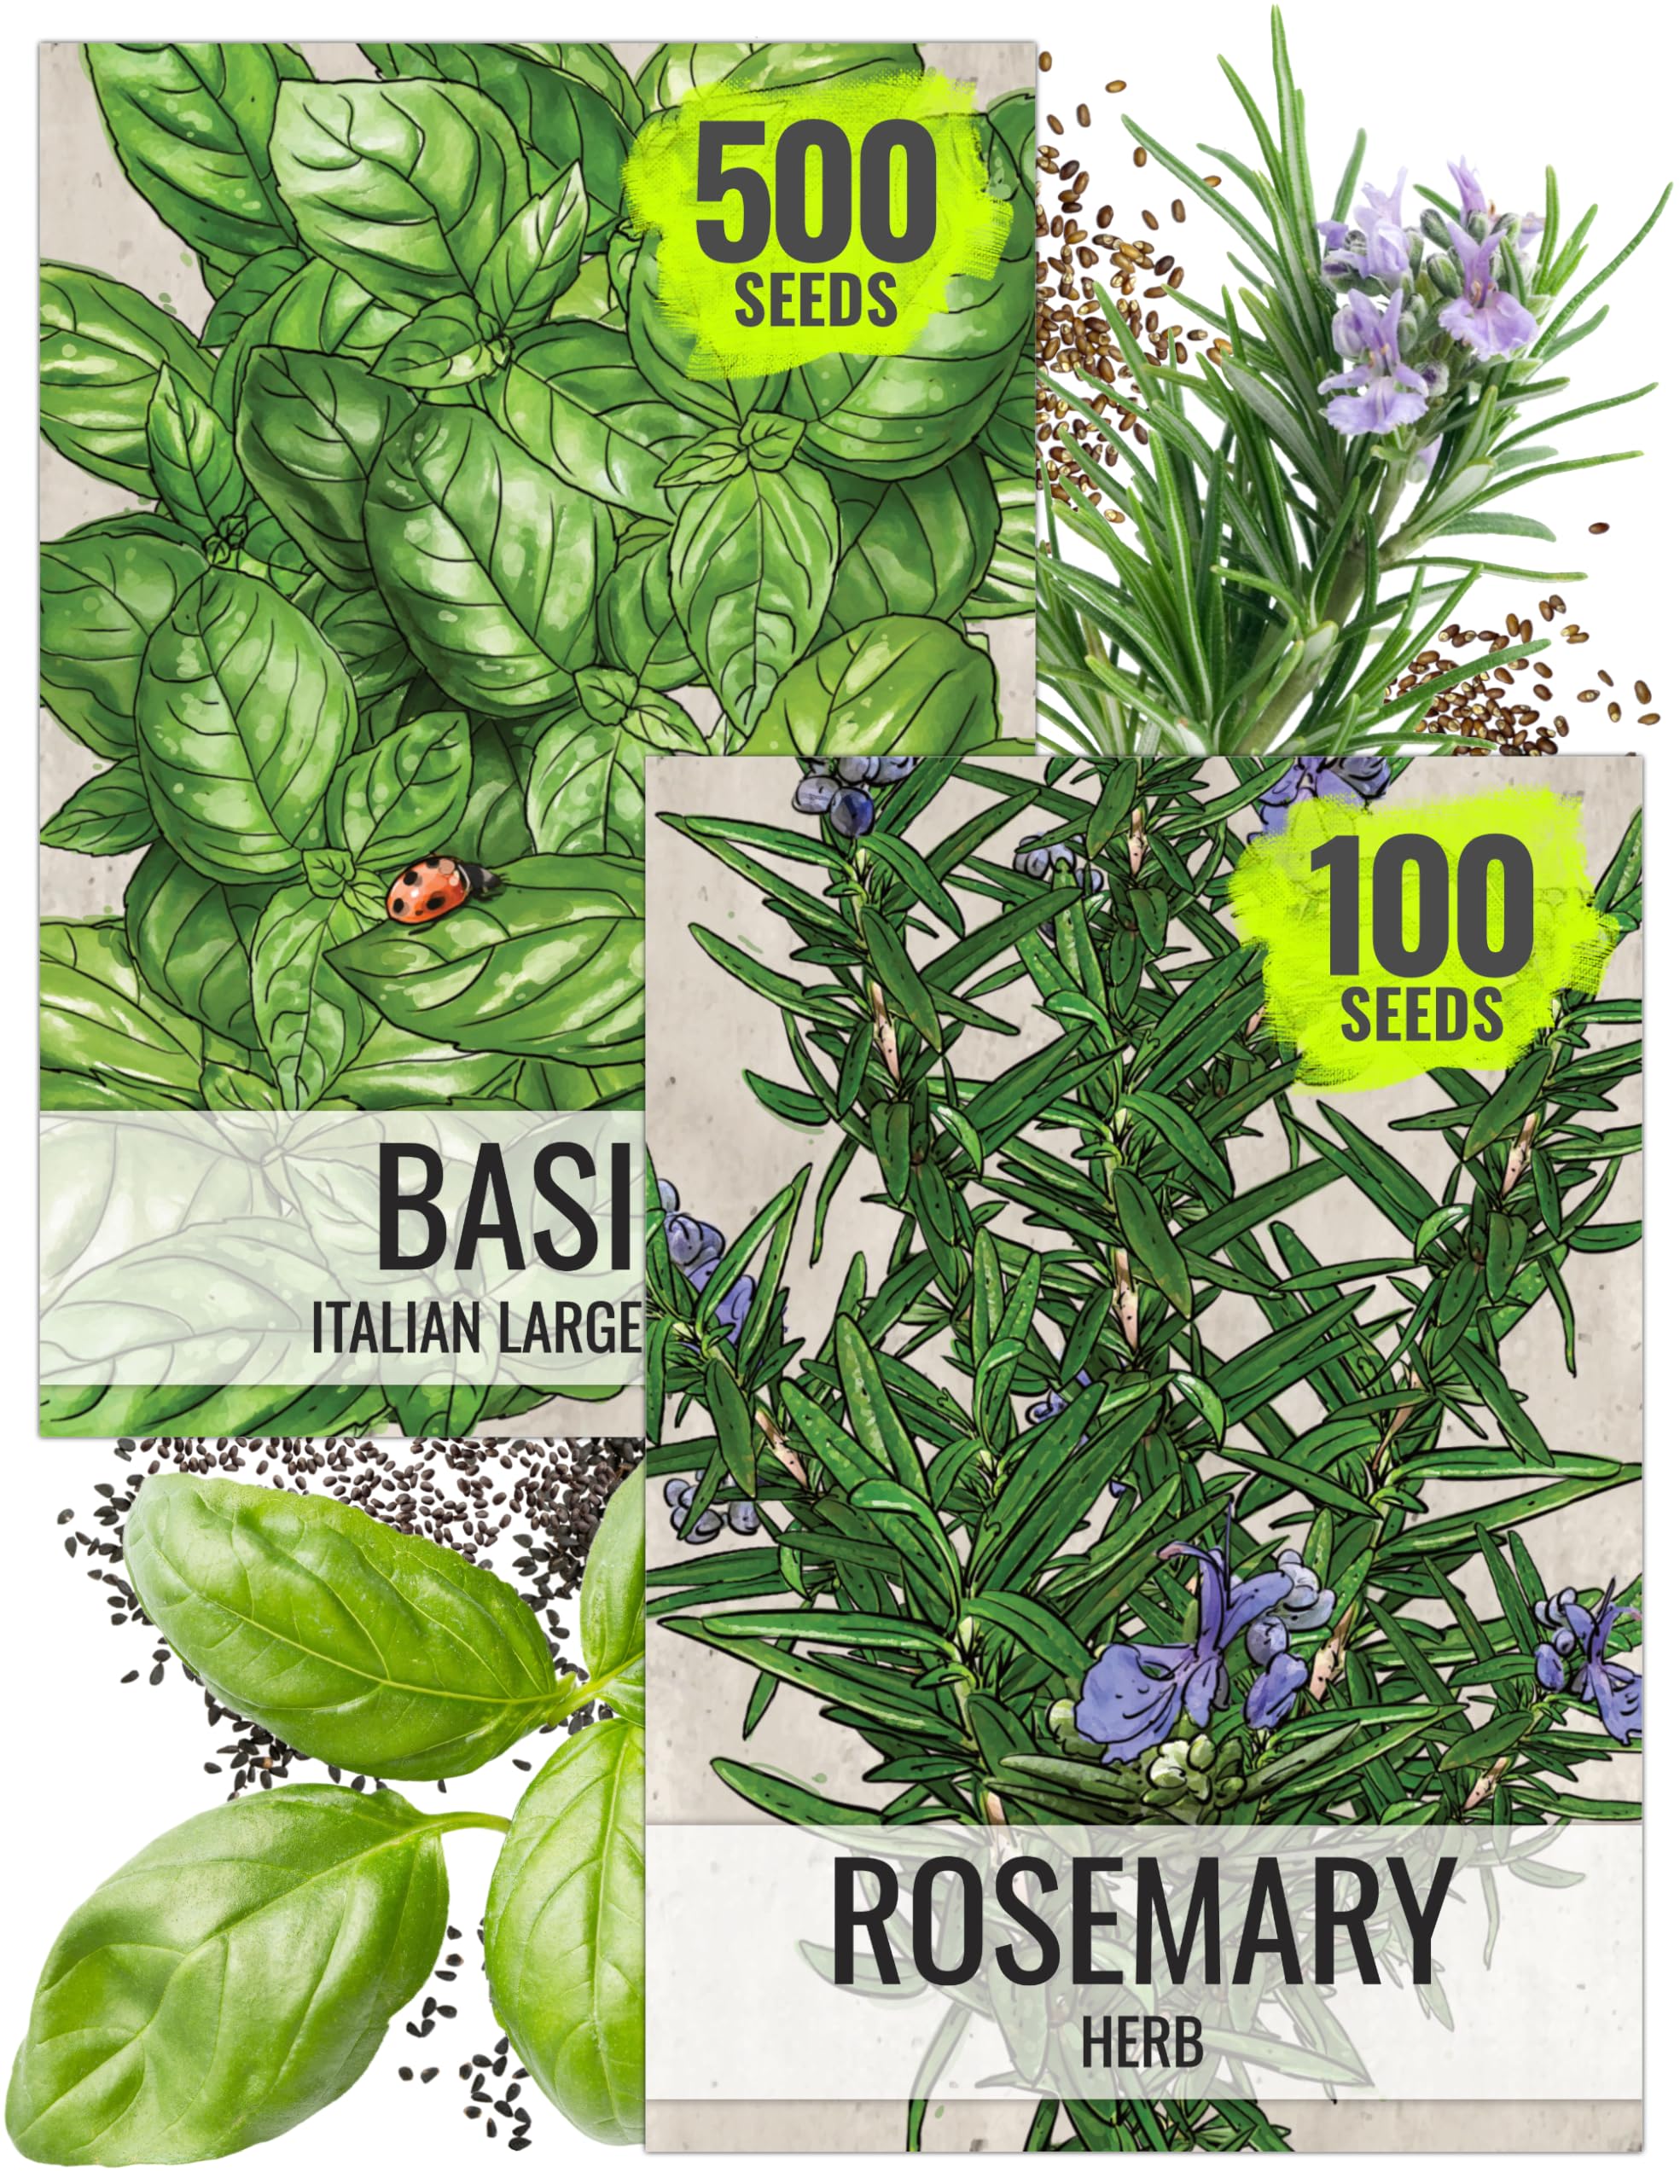
A two-packet collection pairing woody rosemary with sweet large-leaf basil for Mediterranean cooking and aromatherapy uses.
Why I picked it: I grabbed this pack when I wanted a savory, evergreen herb alongside classic Genovese-style basil for roasting, grilling, and pesto experiments.
Best for: People who want both rosemary’s pine-like aroma and sweet basil’s broad leaves.
Low-cost way to add two complementary herbs.
Pros
- Rosemary’s robust flavor
- Large-leaf basil for pesto
- Good seed storage quality
Cons
- Rosemary is slow to establish
- Different watering needs for each herb
My take
I used this combination to seed a sunny border and container pots; rosemary and basil want different things, but when I separate them into their own containers they both thrive. Rosemary produced the aromatic, needle-like leaves I use on roasted meats, while the Italian large-leaf basil grew the soft leaves I turn into pesto and caprese. I liked that the seed supplier stores seeds in controlled conditions, which gave me confidence before I planted. Germination and early care matter—basil responded quickly to consistent warmth, while rosemary was slower but steady once established. When I’m prepping a Mediterranean weeknight meal, having both herbs on hand saves me a trip to the store.
This pack is a practical double-duty choice for cooking and aromatherapy experiments.
4. Sow Right Seeds Genovese Sweet Basil – Best Heirloom Genovese
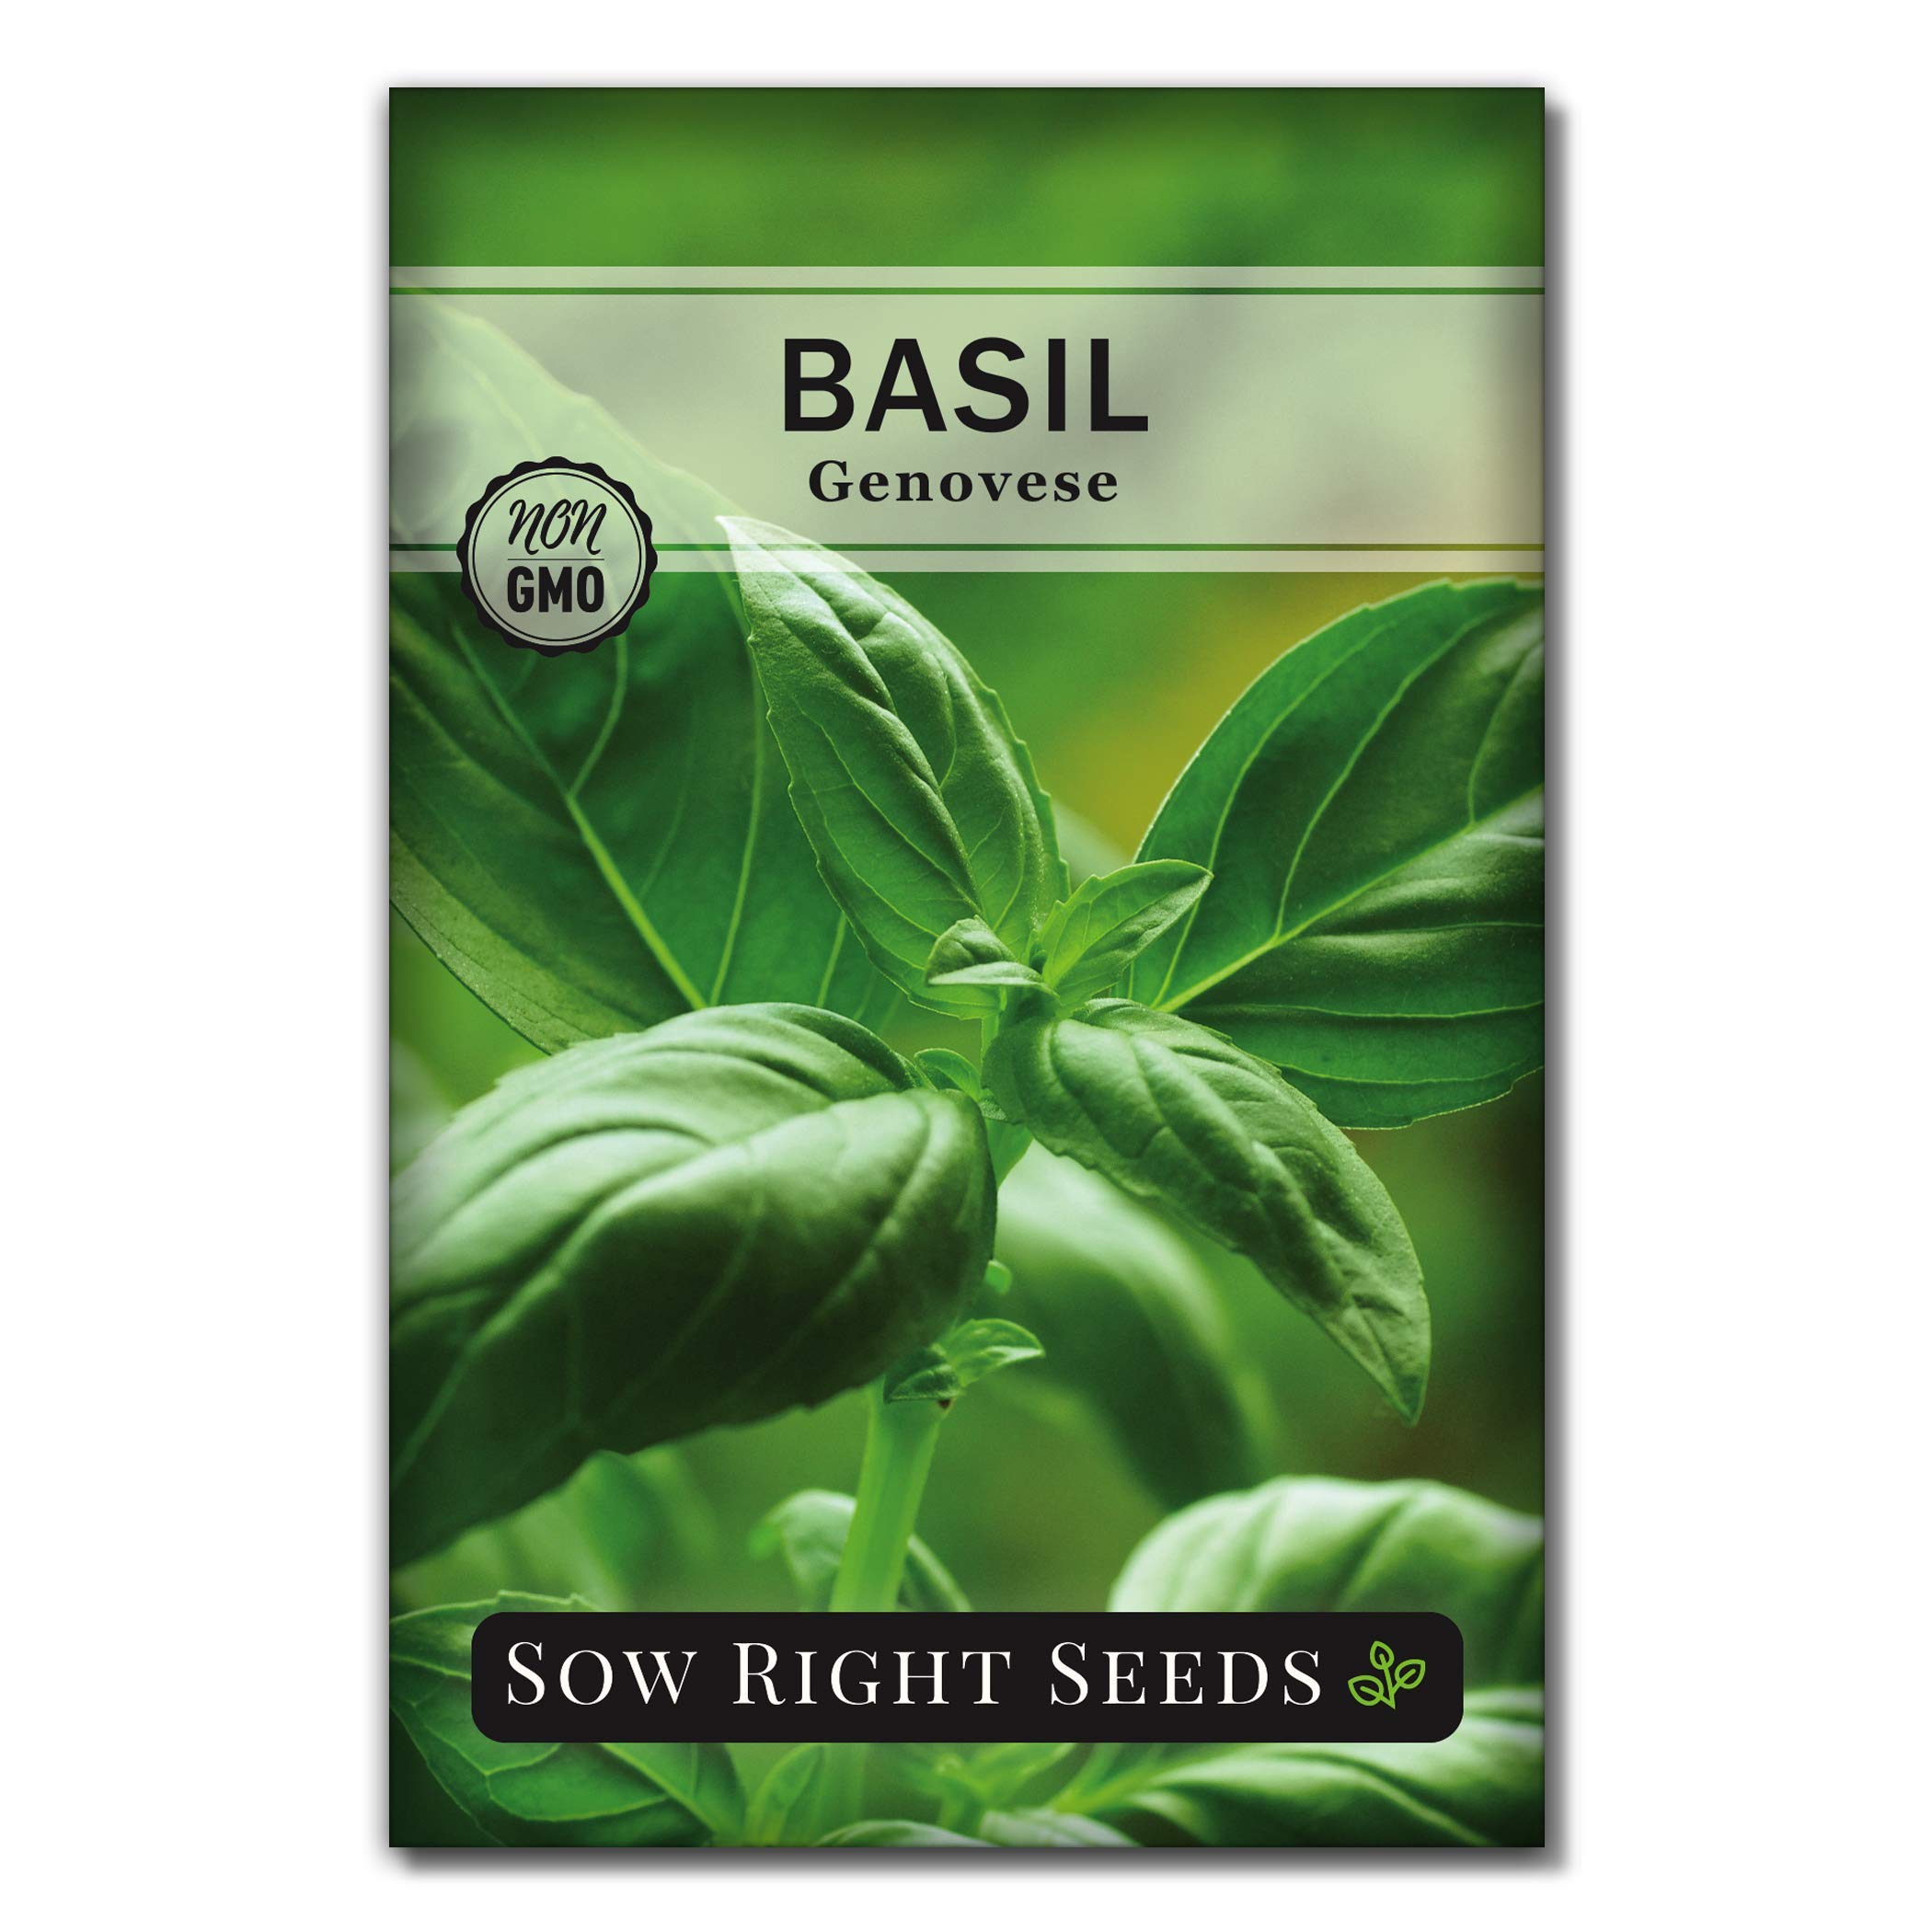
Classic Genovese basil seeds that germinate quickly and grow into large plants I harvest for pesto and fresh uses.
Why I picked it: I go to Genovese when I want classic pesto flavor and fast germination for frequent harvests.
Best for: Growers wanting authentic Genovese basil for pesto and Italian dishes.
Small packet, heirloom quality—great value for home cooks.
Pros
- Heirloom Genovese flavor
- Fast germination in warm soil
- Enough seeds for multiple pots
Cons
- Can bolt early in heat
- Needs full sun and regular pinching
My take
I plant this Genovese basil when I want that classic sweet, peppery flavor for pesto and fresh tomato dishes. In my experience the seeds sprouted in as little as a few days under the right soil temperature (70–80°F), and plants reached productive size quickly—harvests are possible once the plant has a few sets of leaves. I keep seedlings spaced so leaves get airflow and pinch the tops routinely to prevent early flowering and promote bushiness. These seeds are non-GMO heirloom, and I like that there’s enough quantity to plant indoors and still start a second outdoor batch. When I want a reliable, restaurant-style basil, this is my go-to packet.
The packet’s germination and straightforward instructions make it an easy choice for beginners and seasoned growers alike.
5. Burpee Culinary Herb Starter Kit – Best Starter Kit
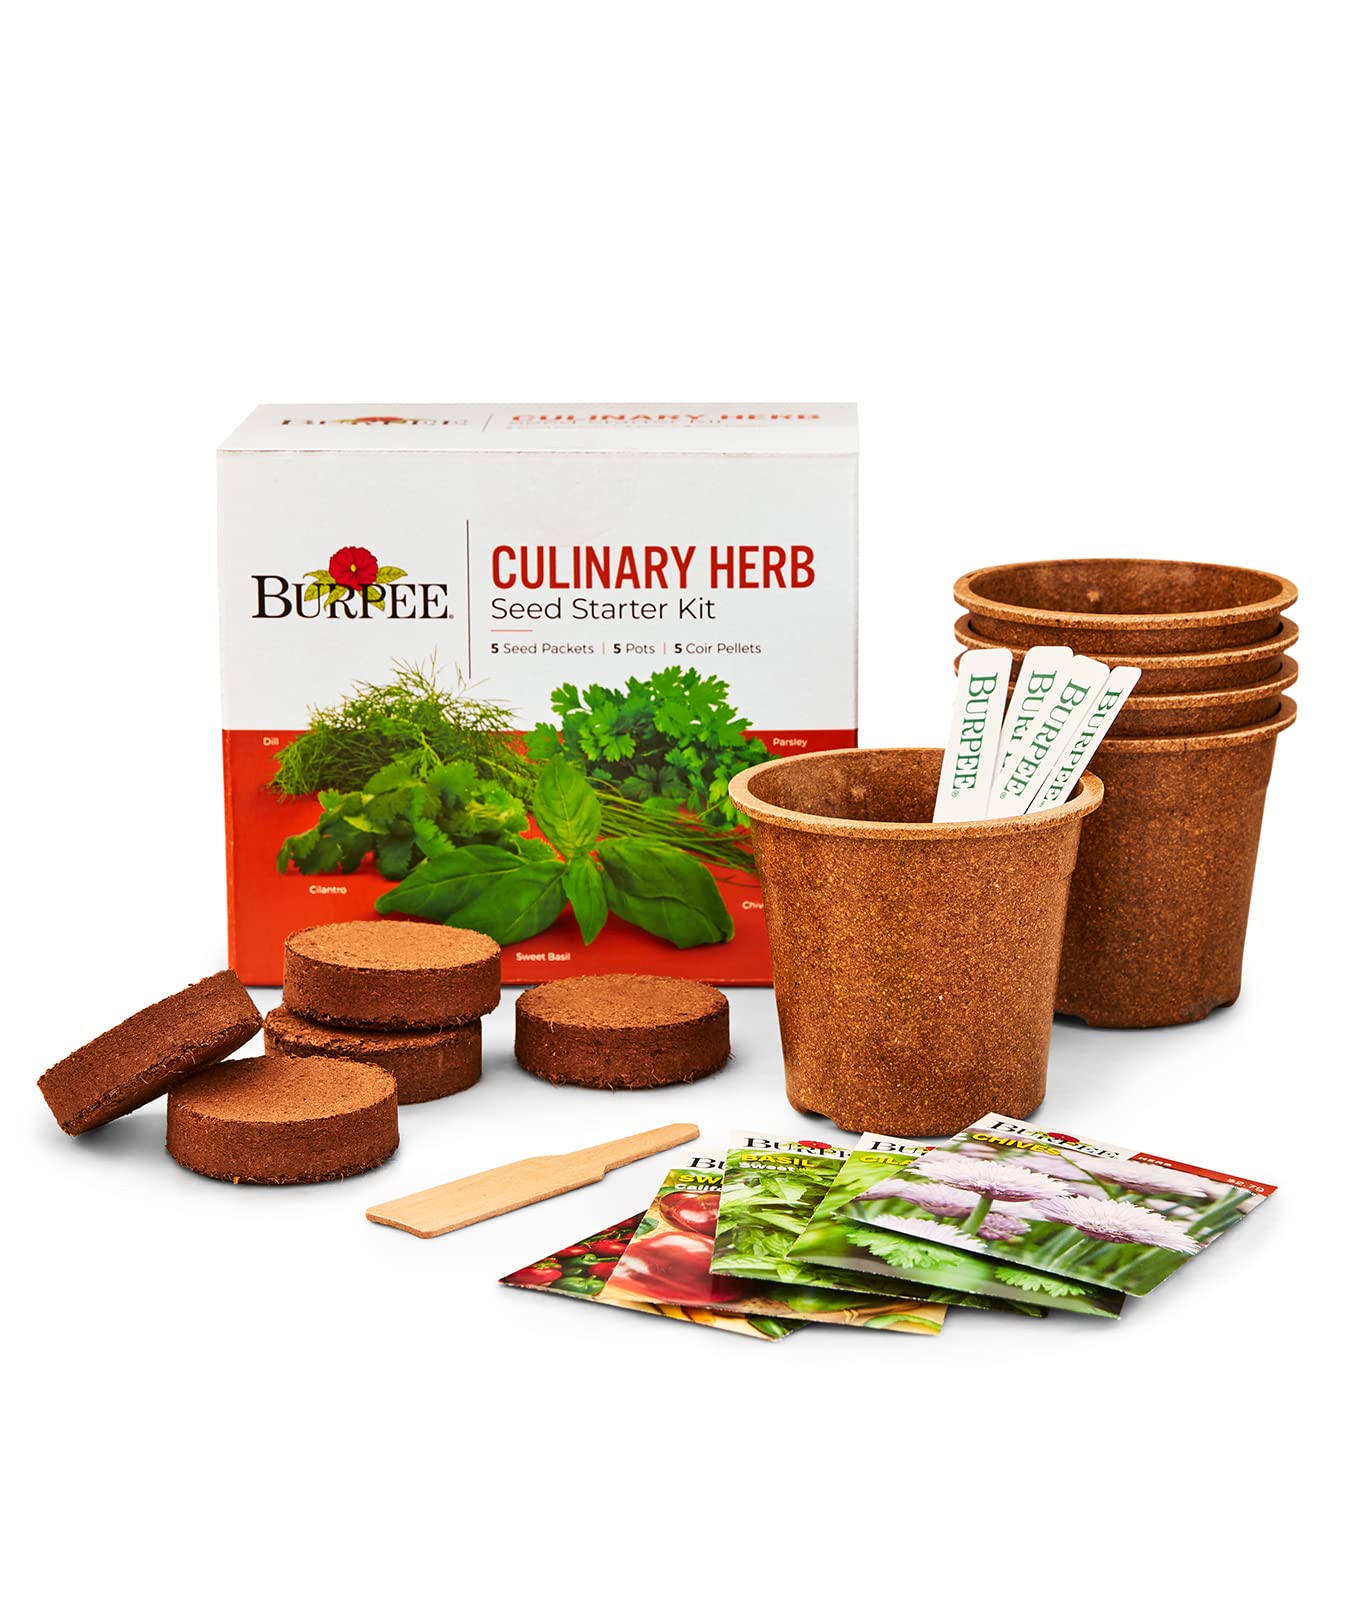
A complete starter kit with five herb seed packets, coir pellets, pots, and markers—ideal for starting herbs indoors.
Why I picked it: I reach for this kit when I want everything included for a windowsill herb garden—no extra shopping needed.
Best for: New growers and gift-givers who want a ready-to-start herb kit.
A bit more upfront but includes useful starter materials.
Pros
- All-in-one kit with pots and coir
- Includes five popular herb packets
- Good for windowsill gardens
Cons
- Limited to included herb varieties
- Coir pellets need careful watering
My take
When I want a low-effort project or a gift for someone learning to grow herbs, this Burpee kit covers the essentials: basil, cilantro, dill, parsley, chives, plus biodegradable pots, coir pellets, and markers. I expanded the pellets with water and started seeds on my windowsill; the included pots make initial transplanting straightforward. The variety is useful—basil for pesto, cilantro for tacos, parsley for soups—so I get a mini culinary rotation from one kit. I treat the kit as a springboard: once seedlings are established I transplant them to larger containers or the garden. The convenience of having markers and pots in the box is what keeps this kit in my rotation when I want herbs with
almost zero planning required.
6. Sow Right Seeds Thai Basil (Large Leaf) – Best for Asian Cooking
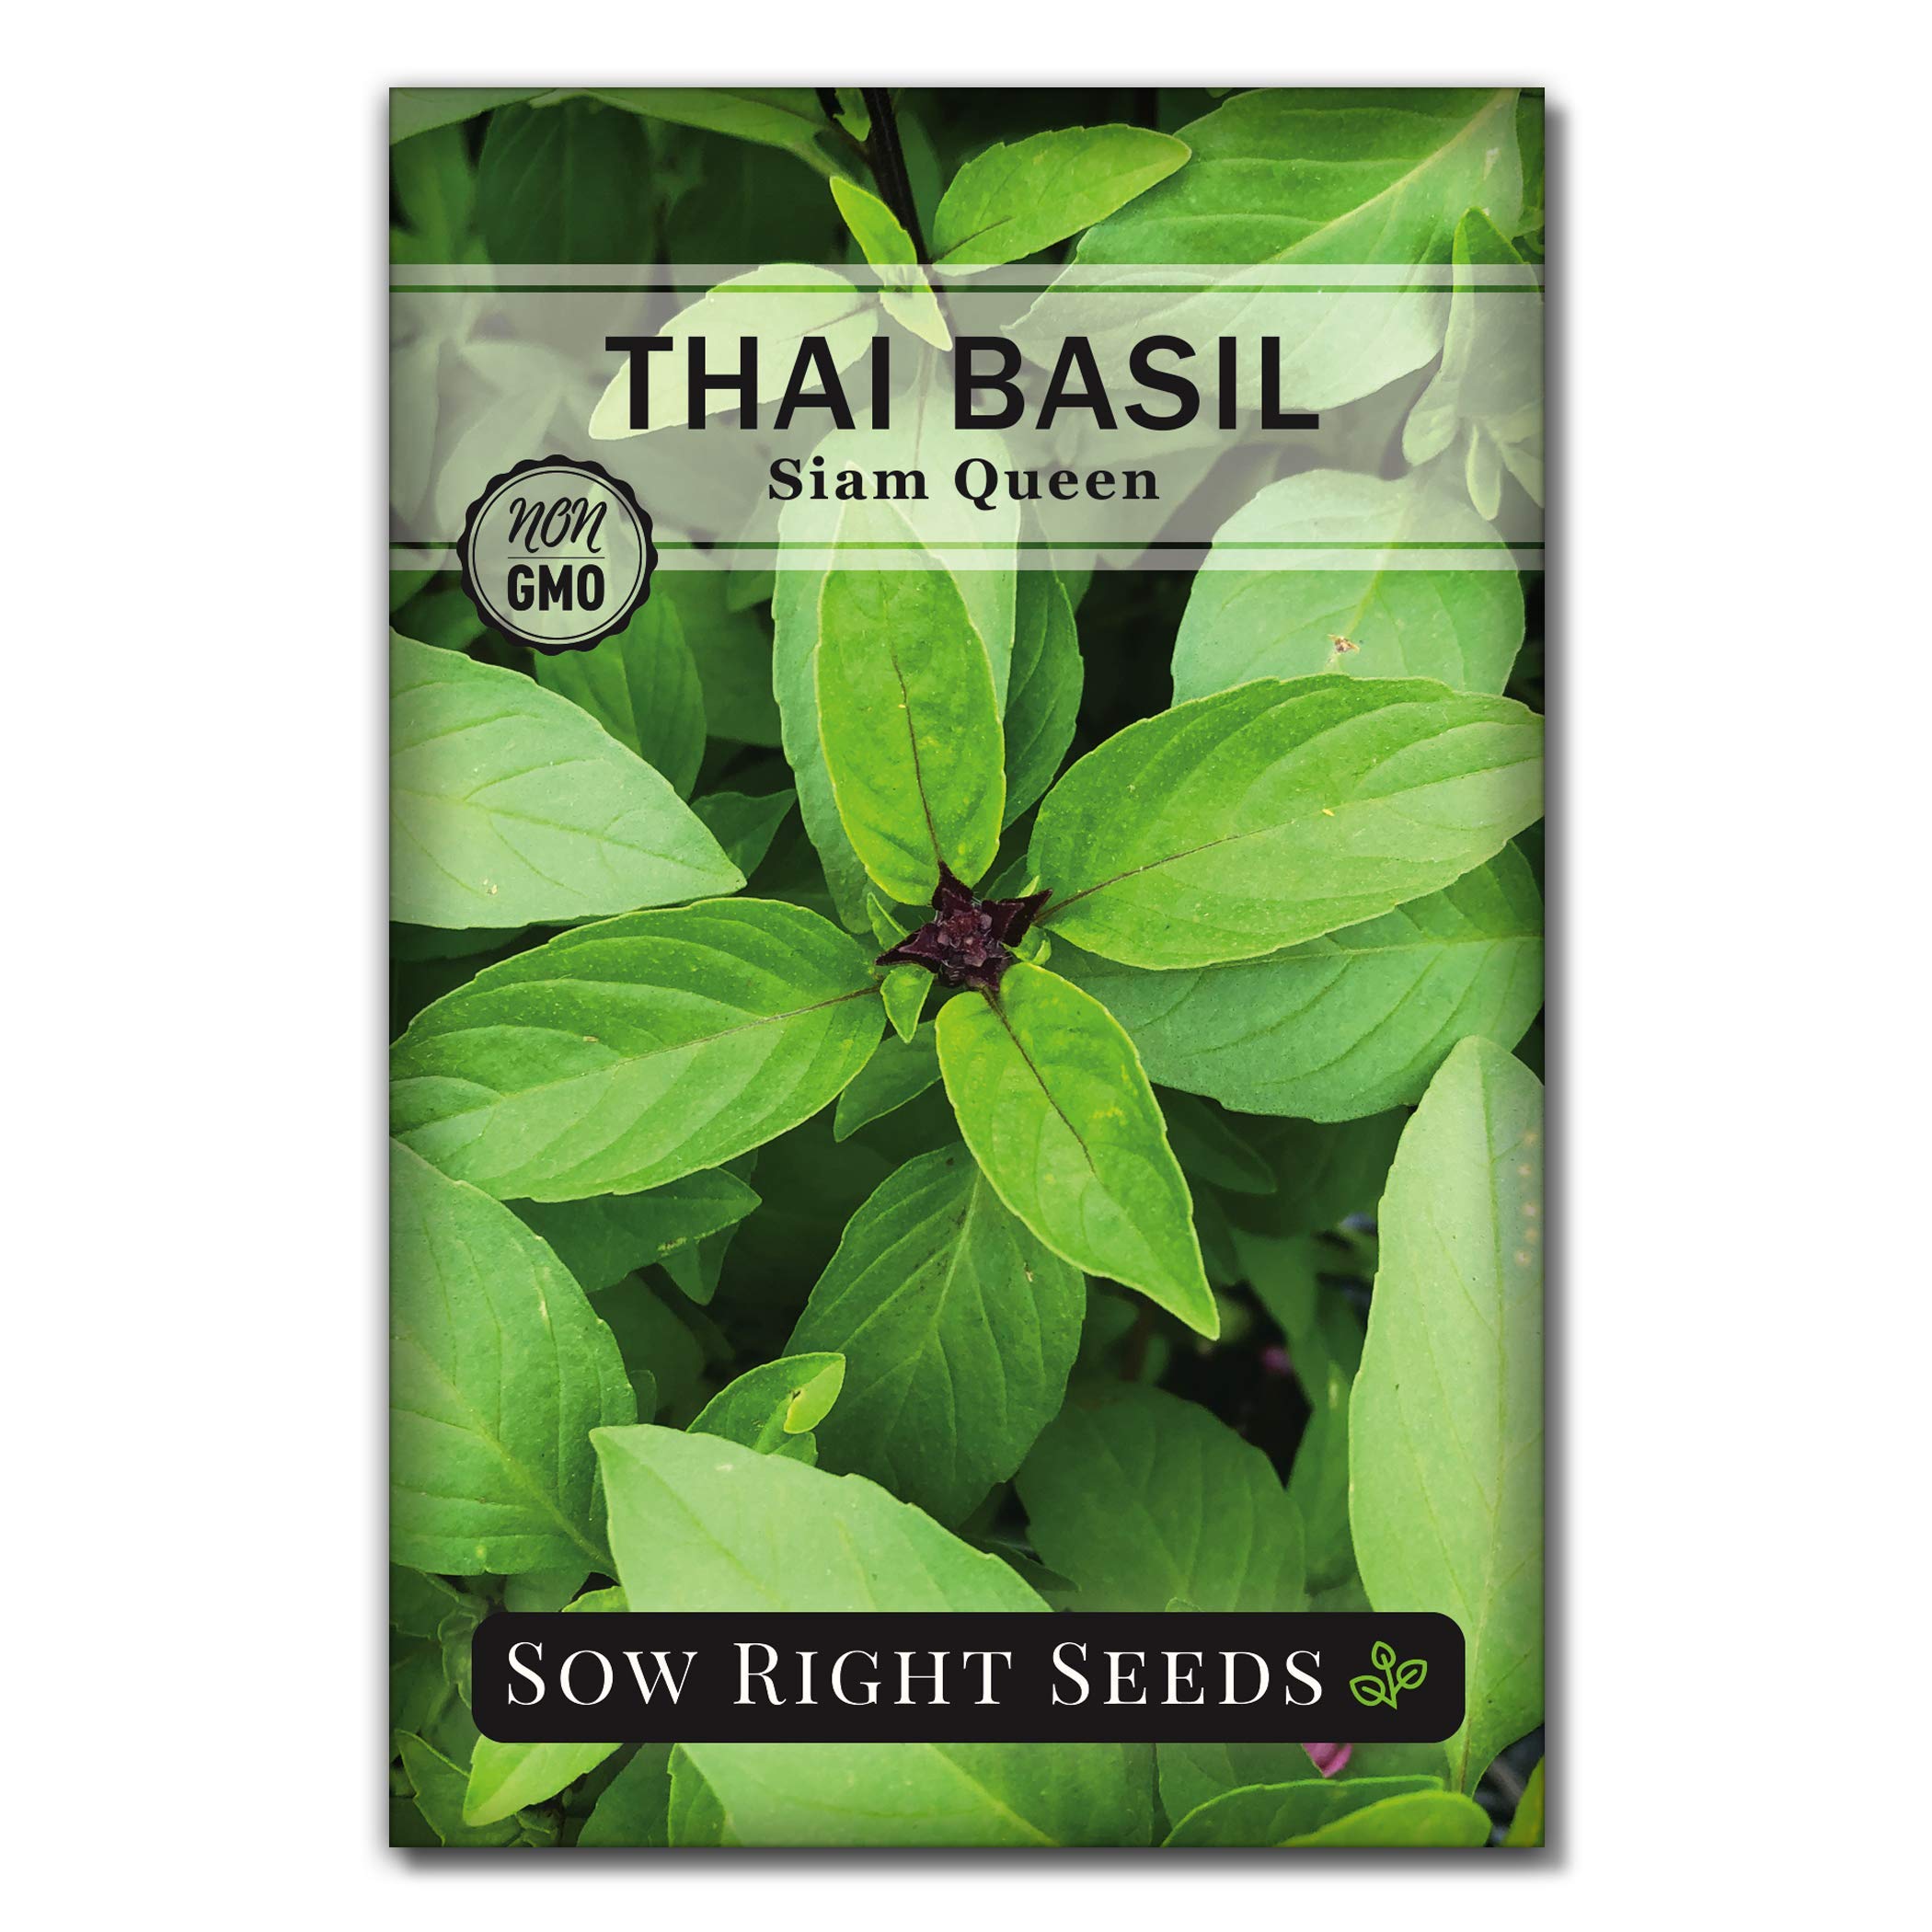
Large-leaf Thai basil seeds with the anise-like, slightly sweet aroma I use in stir-fries and pad Thai.
Why I picked it: I use this when I want an authentic Thai basil aroma and larger leaves for cooking.
Best for: Home cooks who need Thai basil for Southeast Asian dishes.
Heirloom seed packet—good value for frequent use.
Pros
- Distinct anise-like flavor
- Large tender leaves
- Suitable for indoor or outdoor growing
Cons
- May need warm zone to thrive
- Some packets vary in germination speed
My take
I plant this Thai basil when I want the profile that truly belongs in pad Thai and Vietnamese dishes—the leaves have a strong, sweet aroma with anise notes that lift stir-fries and curries. In warm, sunny spots the seeds germinate in about a week and produce large, tender leaves ready for snipping. For hydroponic setups I’ve had fast turnarounds and steady harvests; in cooler zones I start them indoors and harden them off before moving them outside. A couple of packets took longer to pop for me, so I keep a few extra seeds on hand; overall, when these plants hit their stride they reward me with reliable flavor that supermarket basil doesn’t match. I reserve this packet for meals where Thai
authenticity matters.
How I Choose Basil Seeds and Kits
Variety and Use
I pick basil varieties based on the cuisine I plan to cook: Genovese for pesto and Italian dishes, Thai for Southeast Asian recipes, and holy basil seeds when I want an edible seed product for texture and nutrition.
- Match variety to cooking: Genovese = pesto, Thai = stir-fries, Sweet basil = caprese
- Choose edible basil seeds only for eating, not planting
Starting Seeds
My indoor-start routine is simple: use a seed-starting mix, keep soil warm (70–80°F where listed), and maintain even moisture. I cover trays or use a humidity dome until seedlings emerge, then provide strong light and airflow to prevent legginess.
- Follow packet germination temps and depths
- Pinch early to promote bushier plants
- Transplant after hardening off
Sun, Soil, and Water
Basil wants full sun and well-drained soil. I use pots with drainage for container plants and avoid waterlogged media—overwatering is the most common mistake I see in my own garden.
- Full sun or strong grow light for at least 6 hours
- Use well-drained soil or coir-based mixes
- Water at the soil level; let the top inch dry between waterings
Pests, Bolting, and Harvest
I watch for aphids and slugs and remove flower buds to keep leaves tender. Harvest from the top down to encourage new growth and clip frequently for the best flavor and bushiness.
- Pinch flower buds to delay bolting
- Clip stems above leaf nodes for continuous harvest
- Inspect regularly for pests and snip affected leaves
Frequently Asked Questions
Can I grow basil from these seed packets indoors?
Yes—I frequently start basil indoors. Keep soil warm, provide strong light, and transplant after hardening off; many packets list germination windows (often 5–14 days).
How soon can I harvest basil after planting?
I begin harvesting once plants have three or four sets of true leaves; in ideal warmth some varieties produce harvestable leaves within a few weeks.
Are holy basil seeds meant for planting?
No—the holy basil seeds in this roundup are sold as an edible pantry item for hydration, puddings, and nutrition, not for sowing as garden plants.
Final Take
I keep different basil packets on hand depending on the job: Genovese for Italian cooking, Thai for Southeast Asian flavor, paired seed packs when I want convenient coverage, and a starter kit when I want everything included.
If you want quick wins, choose a Genovese or the Burpee kit for easy indoor starts; if you want pantry nutrition reach for the holy basil seeds. Either way, consistent warmth, good light, and regular pinching are the small habits that deliver the biggest results in flavor and yield.
")