
I tested six popular candle dye kits—wax chips and liquid drops—so you can pick the right formula for soy, paraffin, beeswax and creative projects.
I experiment with dyes every time I make a new candle line, and I know the difference between a muddy pour and a vivid finished piece. In this roundup I compared dye chips and liquid dyes across pigment strength, ease of use, compatibility with different waxes, and how well each dye blends or holds up in large pours.
My goal was practical: recommend options that deliver reliable, repeatable color without fuss—whether you make small test batches, marbled melts, or higher-volume candles.
I evaluated each set by how concentrated the colors are, how easy the product is to dose and mix, and whether the dye stayed even in soy and beeswax pours.
1. 16-Color Wax Dye Chips – Best Overall
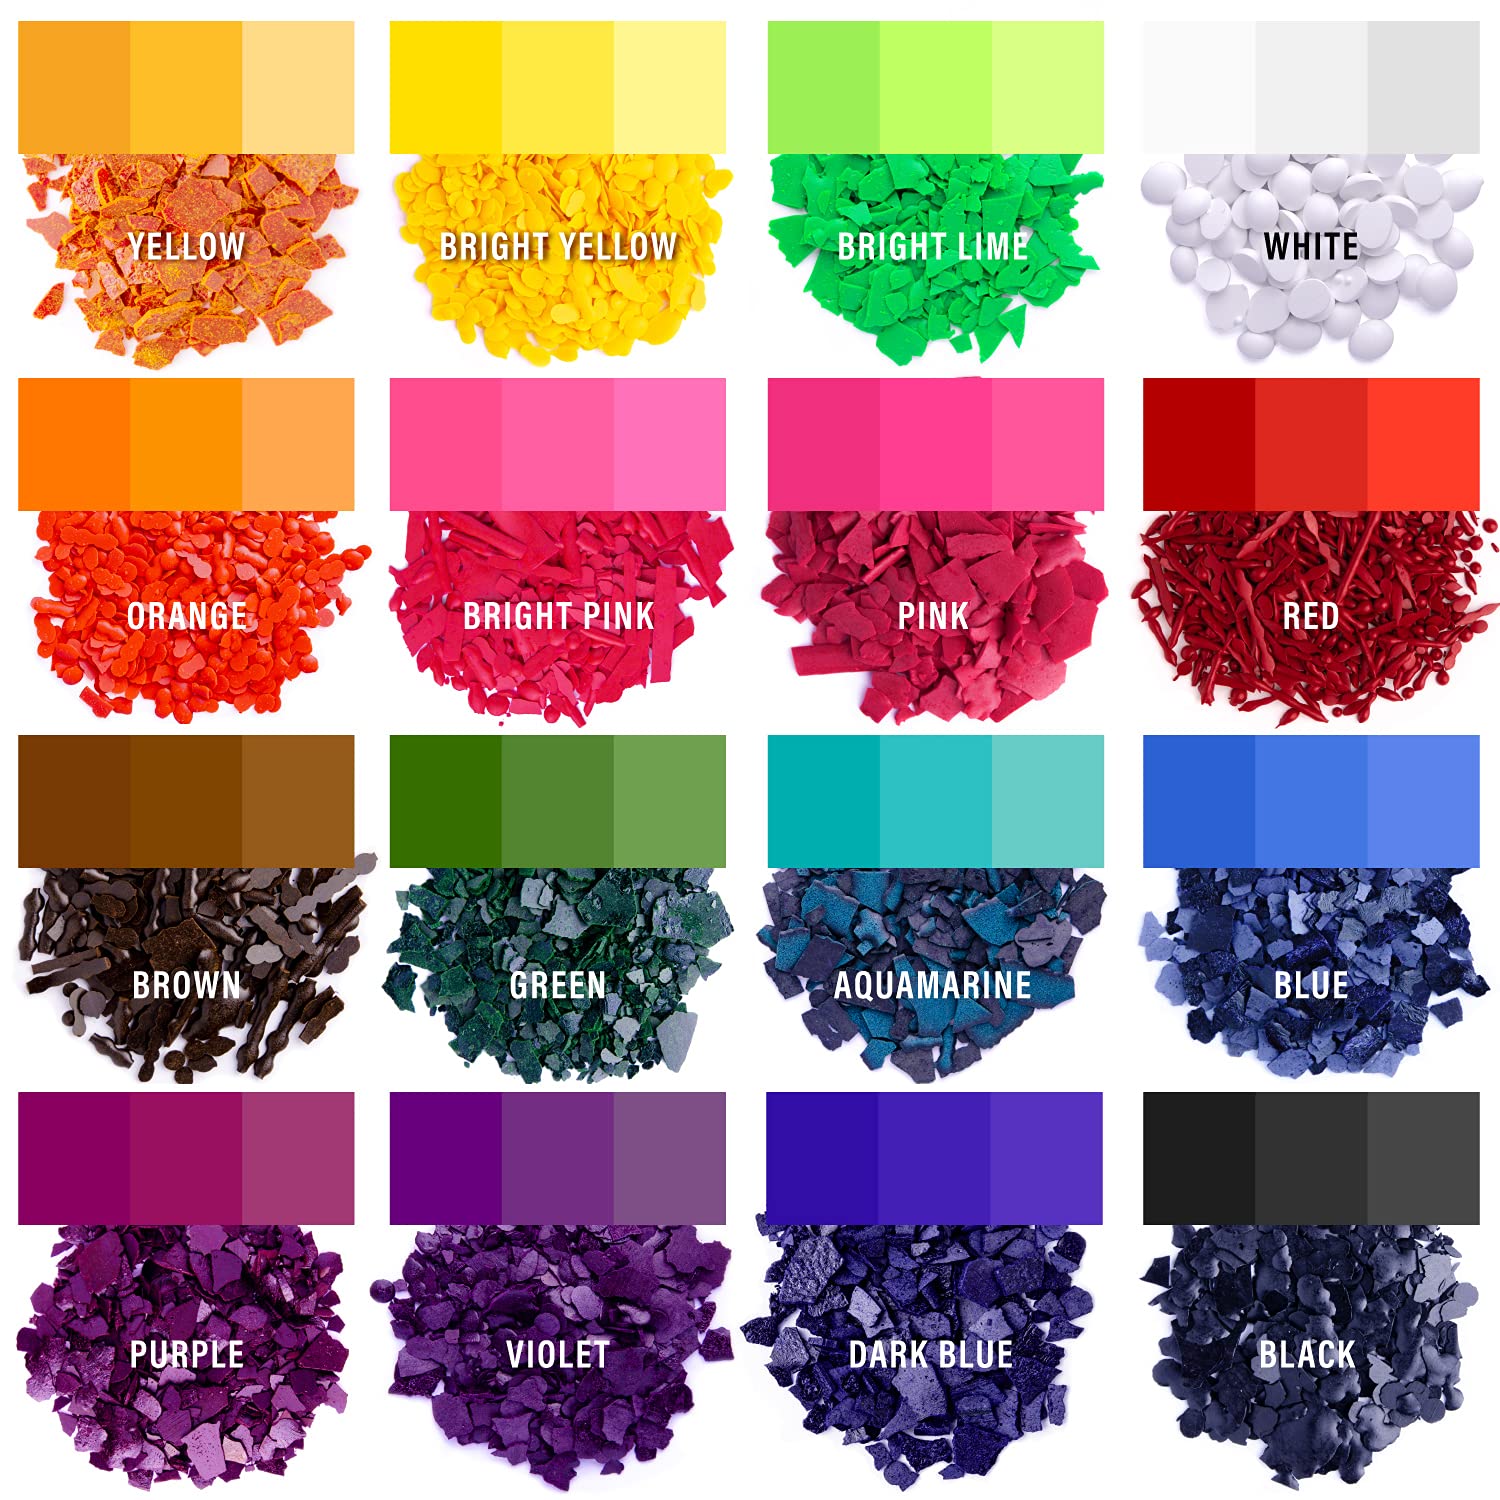
I reached for this 16-chip set when I wanted bright, even color with minimal effort—the chips melt cleanly and blend well into soy, paraffin and beeswax.
Why I picked it: Vivid, highly concentrated chips that melt cleanly and blend without streaks.
Best for: Makers who want bright, professional-looking candles and marbling effects.
Affordable option for frequent use.
Pros
- Very pigmented — a little goes far
- Works with soy, paraffin, beeswax
- Melts quickly at recommended temps
- Vegan and cruelty-free
Cons
- One or two colors (red) can be inconsistent
- Chips can pour out of the bag too fast
My take
I used these dye chips across several soy and paraffin batches and appreciated how little product I needed to hit a mid-tone. The manufacturer’s suggested range (very small amounts per pound of wax) matches my experience—start light and build up for deeper tones.
They melt around the 150–160°F range and I avoid going beyond 194°F to keep color brightness. Stir until fully dissolved; when mixed properly the finish is smooth and streak-free.
I did find one or two colors less reliable—red was the trickiest in my runs and occasionally required extra heat or time to fully integrate. Also, the individually loose chips can spill if you’re not careful when opening the bag, which can waste product if you’re measuring by eye.
Overall these chips are my go-to when I want bold, consistent color without buying specialty single-tones.
2. 16-Color Wax Dye Chips (Value Pack) – Best Budget
I recommend this set when you want lots of color options for practice pours and seasonal runs—good pigmentation and fast melting make it an economical choice.
Why I picked it: Large color selection and concentrated chips at a budget-friendly value.
Best for: Beginners and crafters who need variety without a big investment.
Budget-friendly for experimenting and practice batches.
Pros
- Wide range of bright colors
- Quick melting and easy to stir
- Good value for everyday projects
Cons
- Packaging makes chips spill easily
- Some shades need extra dosage
My take
I used this same 16-chip formula in multiple quick projects where I didn’t want to waste expensive single-color dyes. The chips melted cleanly and integrated smoothly into soy wax for most colors.
Because of the packaging design, I had to be careful when pouring chips into my measuring spoon—otherwise I’d dump out more than needed. That said, these are economical enough that I didn’t worry about small spills during busy crafting sessions.
Color pay-off is strong for many hues, though deeper reds and very dark tones occasionally required more chip than I expected to match my swatch. For the price and the color spread, this set is a reliable daily driver.
3. YRYM HT Liquid Candle Dye (16 Colors) – Best for Precision
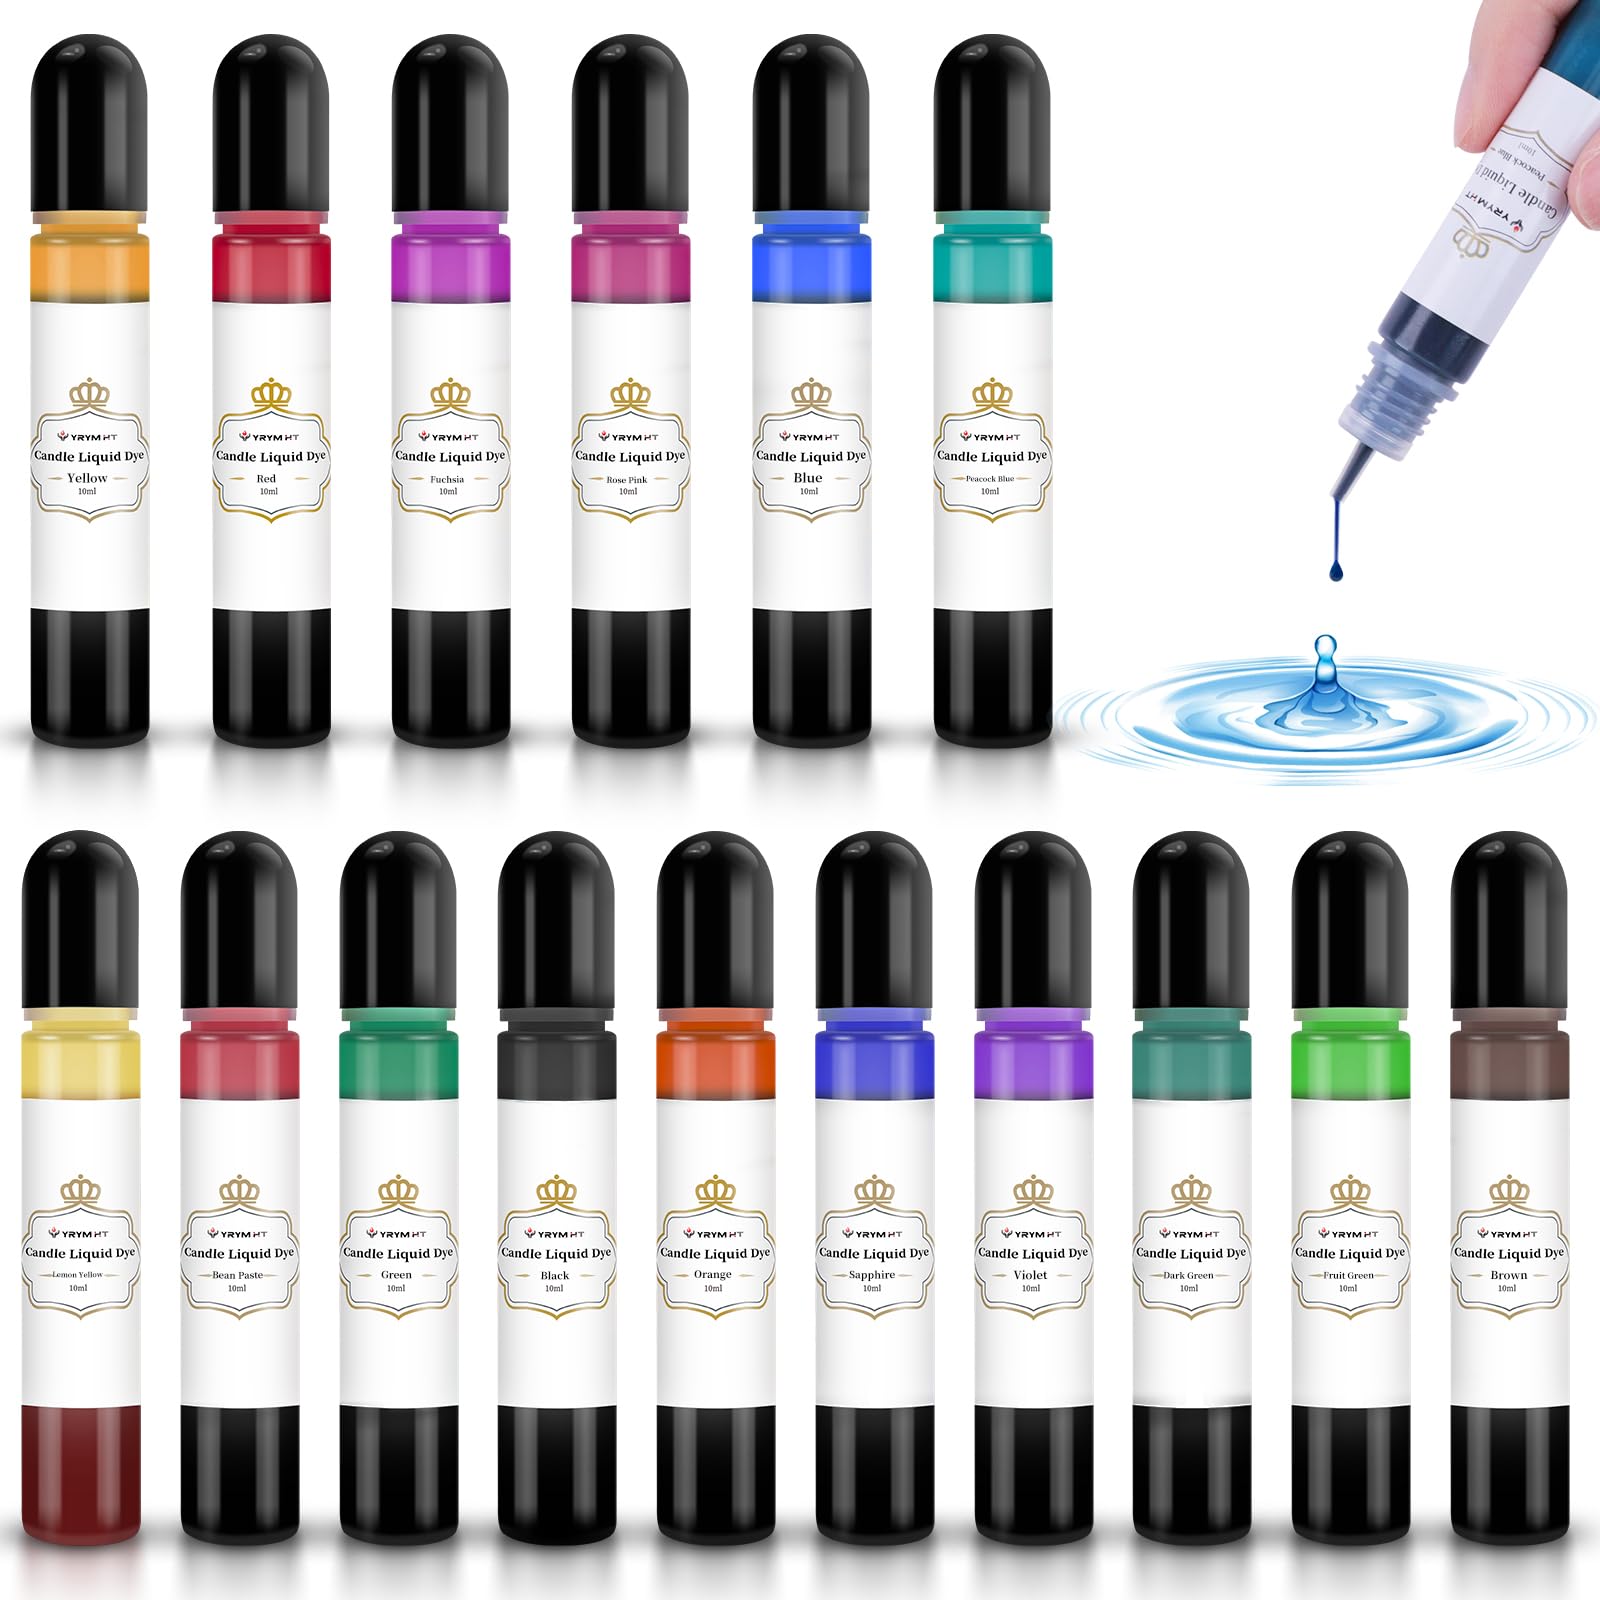
I chose the YRYM HT liquid set when I needed precise dosing and repeatable shades—the dropper bottles make small-batch color control simple.
Why I picked it: Dropper bottles let me dial in exact color with minimal waste.
Best for: Crafters who prefer controlled dosing and quick mixing without melting chips.
Moderately priced for a precision liquid set.
Pros
- Dropper control for exact dosing
- No melting required — mix directly
- Generally odorless when added to wax
Cons
- Some colors lack deep pigmentation
- Tip can leak if handled on its side
My take
I like working with these small dropper bottles for test pours and layered candles. The liquid format eliminates the wait time needed for chips to melt, so I can add a few drops, stir, and pour right away.
In practice I often used around ten drops for the depth I wanted in a small votive; a little goes a long way for many shades, but I found that very dark reds and deep blues needed more drops than I expected to reach richness.
Be careful when opening and trimming the tip—laying the bottles on their sides led to a leak in my kit. Overall the control is excellent and the set has become my go-to for small, precise projects, though I always test paraffin pours first since the listing has mixed compatibility notes.
4. FansArriche Liquid Candle Dye (18 Colors) – Best Color Range
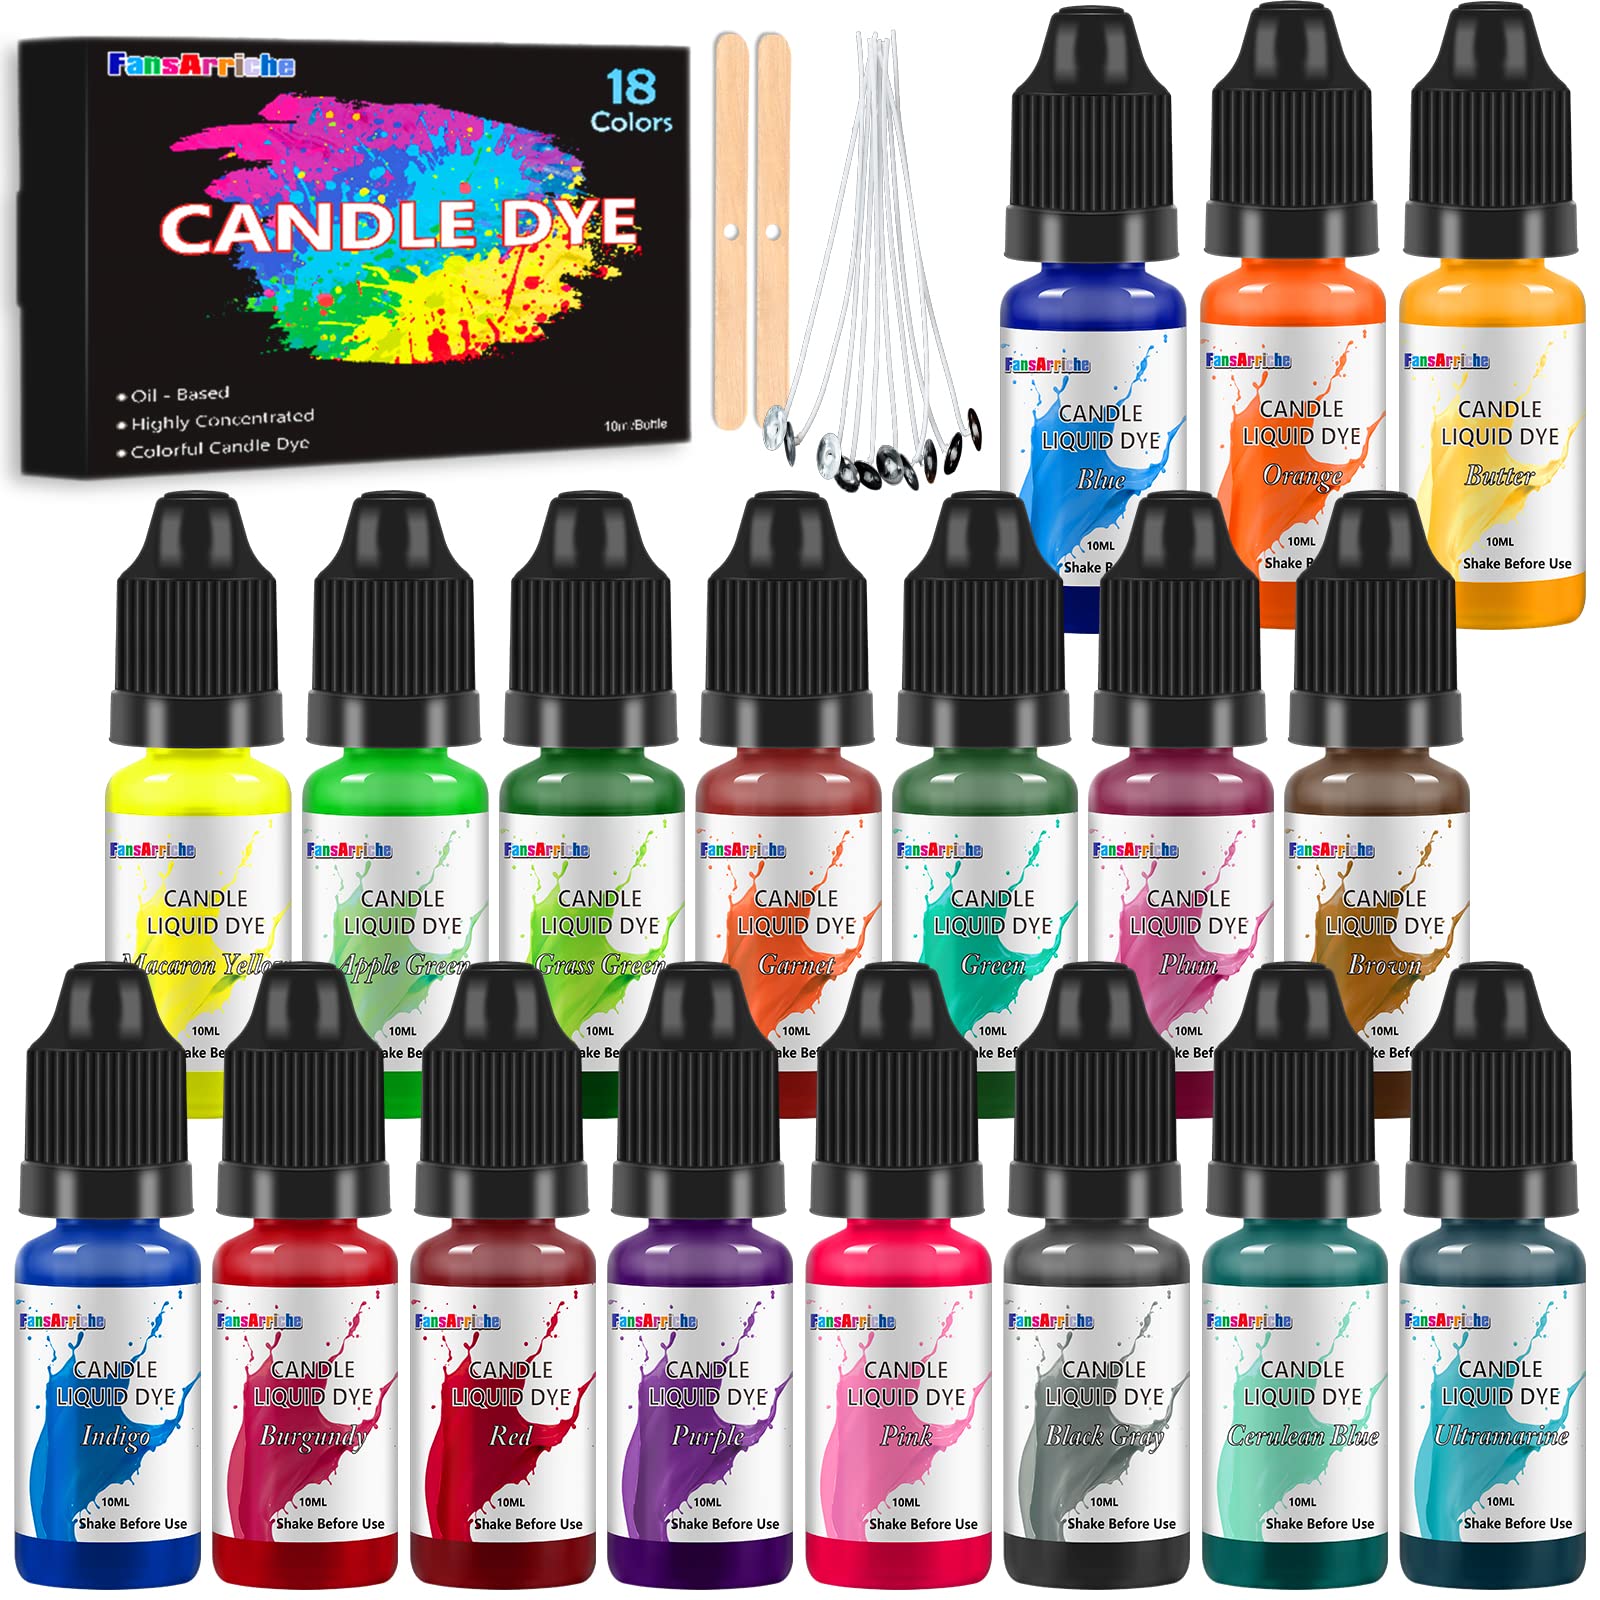
I picked FansArriche when I wanted a broader palette; the 18 shades are vividly pigmented and blend easily for custom hues.
Why I picked it: Large, vivid palette with strong concentration for bright results.
Best for: Crafters seeking lots of hues for blends and thematic collections.
Midrange cost for a wide color selection.
Pros
- Strong pigmentation — vibrant results
- Works across many waxes
- Easy to control density drop by drop
Cons
- Small bottle volumes
- May require more dye for large pours
My take
I leaned on this 18-color set for a few themed collections and appreciated how vividly colors translated into soy wax. The liquid formula mixed cleanly without clumping and held up well during pouring.
Because each bottle is fairly small, I used up favorite greens and blues faster than I expected, especially when casting larger candles. For very large pours I needed to supplement or double-up bottles to reach the saturation I wanted.
Instructional guidance was light, so I recommend testing a small sample at your desired volume to estimate how much dye you’ll need for a full-size candle.
5. FansArriche 18-Color Dye Set (Small Bottles) – Best for Experiments
I keep this set on hand for experiments because the colors blend beautifully and the range encourages creative mixes for lava-lamp pours and marbling.
Why I picked it: Blendability and breadth of shades make it great for creative experiments.
Best for: Artists and makers trying new techniques and color mixes.
Good value for a broad experimental palette.
Pros
- Excellent for blending new tones
- Pigmentation supports layered effects
- Odorless and stable when heated
Cons
- Small supply per bottle
- Color can lighten in very large volumes
My take
I used this set for a lava-lamp style wax project and liked how smoothly the dye incorporated. The colors were bold in small pours and allowed me to mix unique tints without muddying.
In very large single-color candles the same hue sometimes came out paler than expected, which meant I had to add extra drops. For small-batch runs and mixed-color pieces this set is flexible and inspiring.
If you plan high-volume production, factor in that you might go through certain bottles quickly.
6. 24-Color Liquid Candle Dye Kit – Most Colors
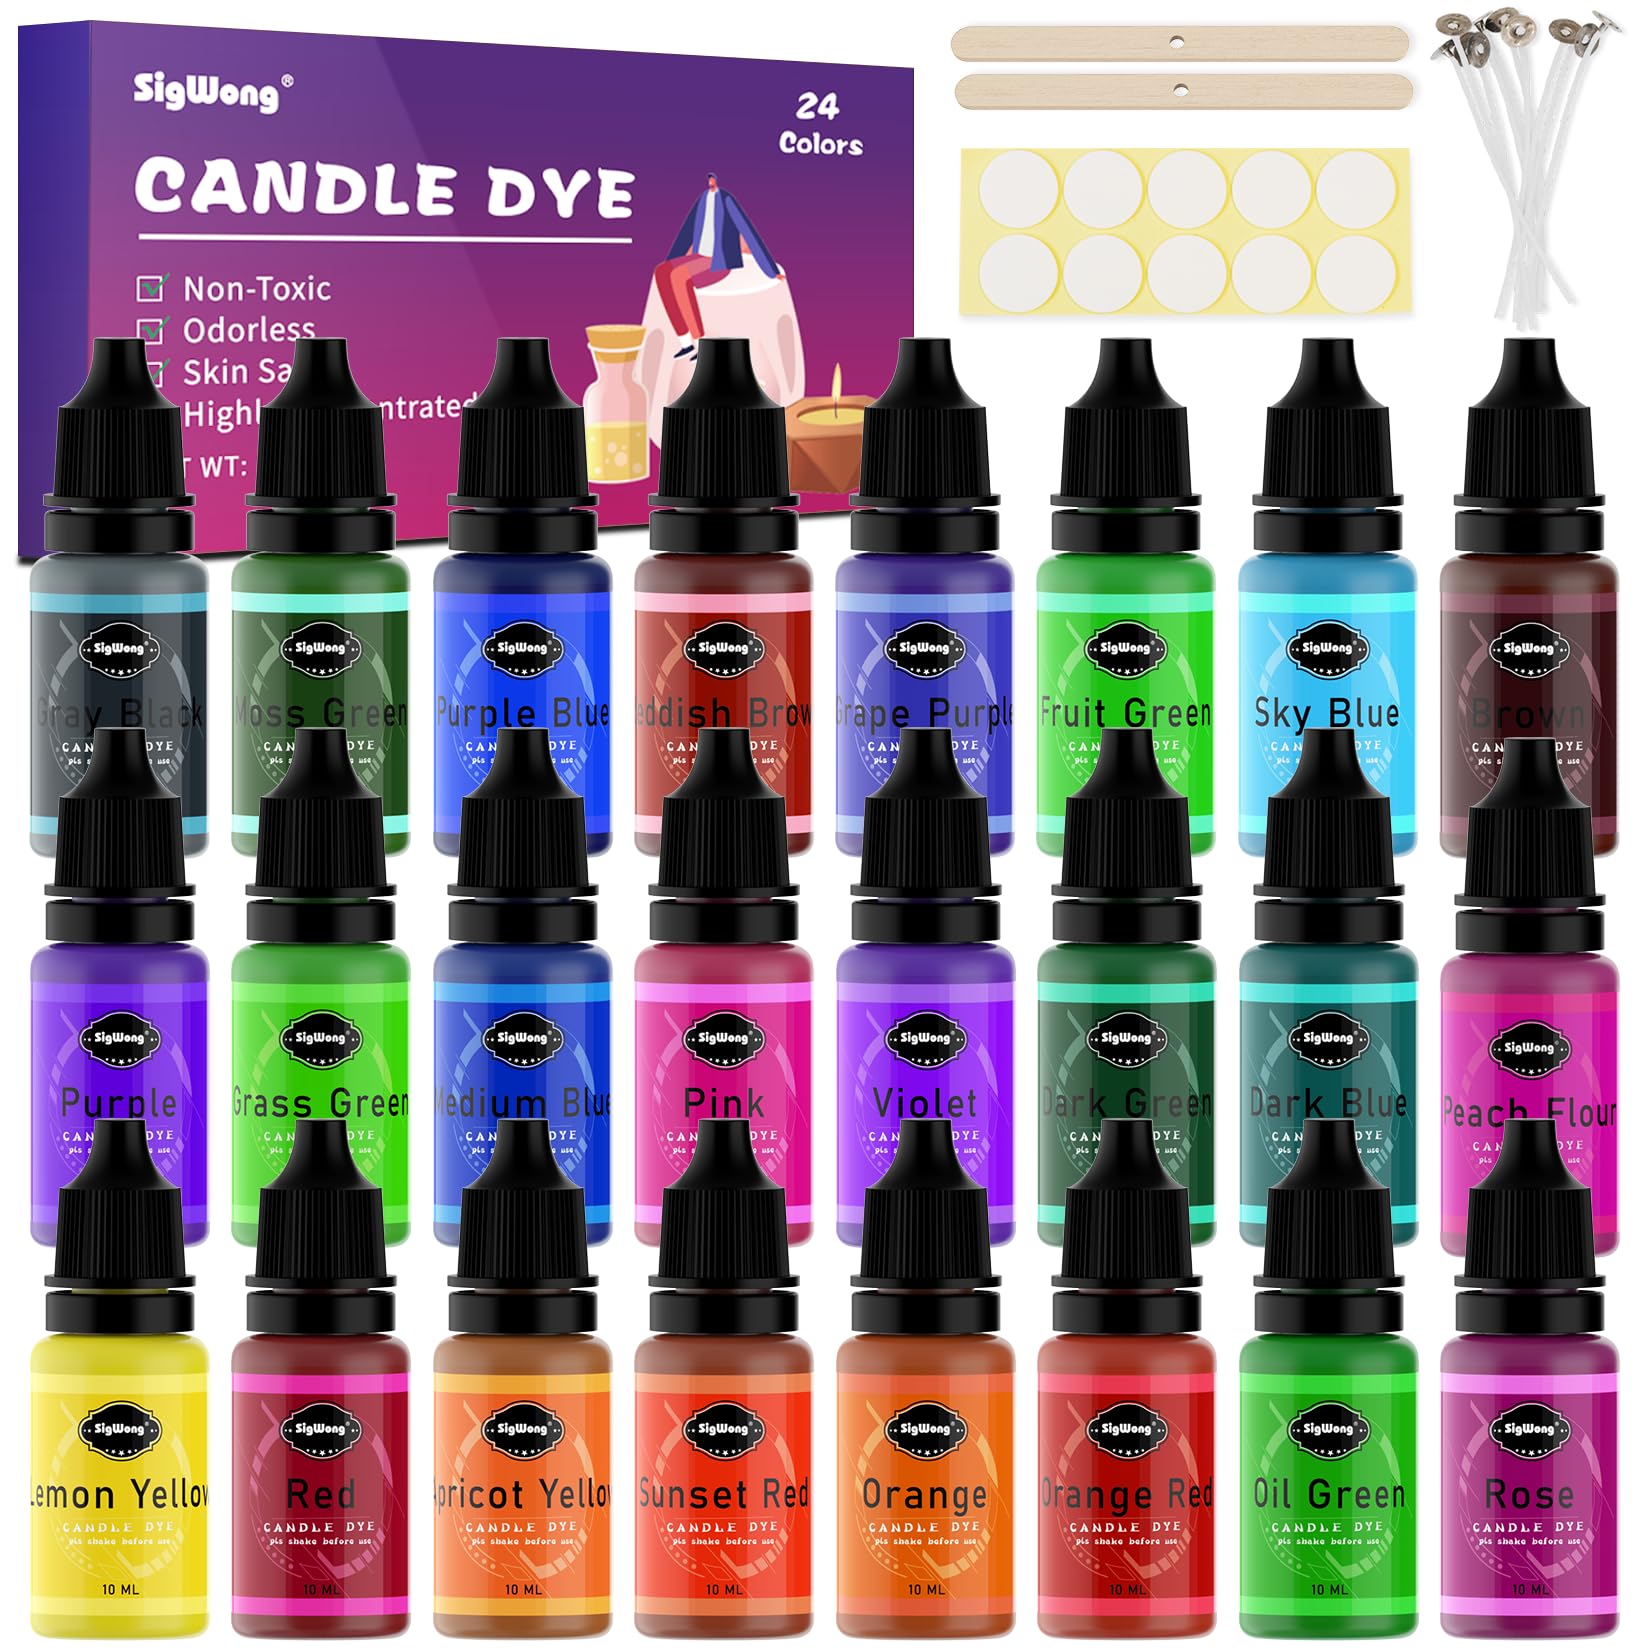
I picked the 24-color kit when I wanted the largest palette possible—the nozzle tops help control dosing and the set covers many craft and wax types.
Why I picked it: Largest color selection for maximum mixing possibilities.
Best for: Crafters who mix custom shades and want many options in one kit.
Slightly higher cost but extensive color range.
Pros
- Biggest selection of colors
- Nozzles help with precise dosing
- Non-toxic and vegan formula
Cons
- Bottles are small and deplete fast
- Some shades are less vibrant than expected
My take
I reached for this 24-color kit when I wanted to expand my palette without buying single-color bottles. Having two dozen hues on hand made it simple to experiment and mix custom tones for seasonal collections.
The nozzle tops made adding drops quick and repeatable, but because the bottles are compact I did go through frequently used hues faster than anticipated. A few colors weren’t as vibrant in soy as they appeared in the bottle, so I recommend adding one drop at a time and testing on a small sample.
Overall this set is a smart buy if you value variety and plan to do a lot of experimenting with blends.
How I Choose Candle Dyes
Liquid vs. Chip Dyes
I pick liquid dyes when I need precise control and fast mixing—dropper and nozzle tops let me tint wax without waiting for chips to melt. I choose chips when I want a traditional approach with bold, concentrated color for larger pours or marbling.
Both formats have pros: liquids are convenient for small batches; chips give me strong pigment for saturated finishes.
- Liquid: quick to mix, easy dosing, better for layering.
- Chips: highly pigmented, excellent for deep colors and marbling.
- Test small batches before committing to a full pour.
Concentration and Dosage
I always start with the manufacturer’s suggested range, then make a test candle. Many dyes are highly concentrated, so a small amount can produce a mid-tone—build color gradually to avoid oversaturation.
For chips I typically add the minimum suggested amount and increase in tiny increments; with liquids I add drops and stir thoroughly between additions.
- Start light and add more—you can’t remove excess dye.
- Record drops or chip weight per pound so you can reproduce colors later.
Wax Compatibility
I match dye to wax: soy and beeswax often show color differently than white or clear paraffin. If a product listing gives mixed compatibility notes, I test with a small sample of the wax I’ll use in production.
Gel and jelly wax behave differently and need dyes formulated for them; always check the product copy and do a quick compatibility test.
- White or clear wax yields truest color.
- Test paraffin and specialty waxes separately.
Color Mixing and Testing
I create swatch strips for every batch and label the dye proportions. That practice saves time when I want to reproduce a shade later.
When mixing colors, add a dominant hue first and build with accent colors, testing in small amounts until you reach the final tone.
- Make swatches for each batch.
- Mix small test pours before full production.
Safety and Handling
I handle dyes with care—wear gloves and avoid direct skin contact during long sessions. For liquids, keep bottles upright to prevent leaks and cap tightly between uses.
I also follow recommended melt temperatures to protect color integrity and scent performance.
- Use gloves and keep workspace ventilated.
- Store dyes away from heat and direct sunlight.
Frequently Asked Questions
Can I use the same dye for soy, paraffin, and beeswax?
In my tests, many liquid and chip dyes worked well in soy and beeswax. Some listings include mixed guidance about paraffin, so I always run a small test pour with paraffin before committing to larger batches.
How do I get very dark or bold colors?
I gradually increase dye—chips for deep saturation, and multiple drops of concentrated liquid—testing a small sample each time. For very dark reds and blues I often need more dye than mid-tones.
Do liquid dyes affect candle scent?
I didn’t notice scent alteration when I used odorless, high-quality liquid dyes at recommended dosages. Keep dosing conservative and test fragrance throw after dyeing to confirm results.
Final Take
I prefer chips when I need intense, saturated color and liquids when I want precise control and quick mixing. Both formats have a place in my studio depending on the project.
If you’re just starting, pick a set with a wide palette and do small test pours to learn how each color behaves in your chosen wax. For repeatability, record exact dosages and temperatures—those small notes make color matching much easier on future batches.
")