
I tested eight practical flooring and trim products for bathrooms and wet areas — from peel-and-stick planks to vinyl base and transition strips — and I explain what worked, what didn’t, and how I used each one.
I tackled a series of small bathroom projects where moisture and imperfect subfloors were the main challenges.
Over multiple installs I focused on products that are waterproof, easy to fit in tight spaces, and forgiving during DIY work.
Below I walk through the options I used, why I chose each one, and the real-world trade-offs you should expect.
I compared these products by how they handled moisture, how easy they were to install without specialty tools, and how durable they felt under foot; peel-and-stick planks win for quick floor makeovers, while vinyl wall base and transition strips are my go-to for tidy edges.
1. M-D Dry Back Vinyl Wall Base – Best For Baseboard Finish
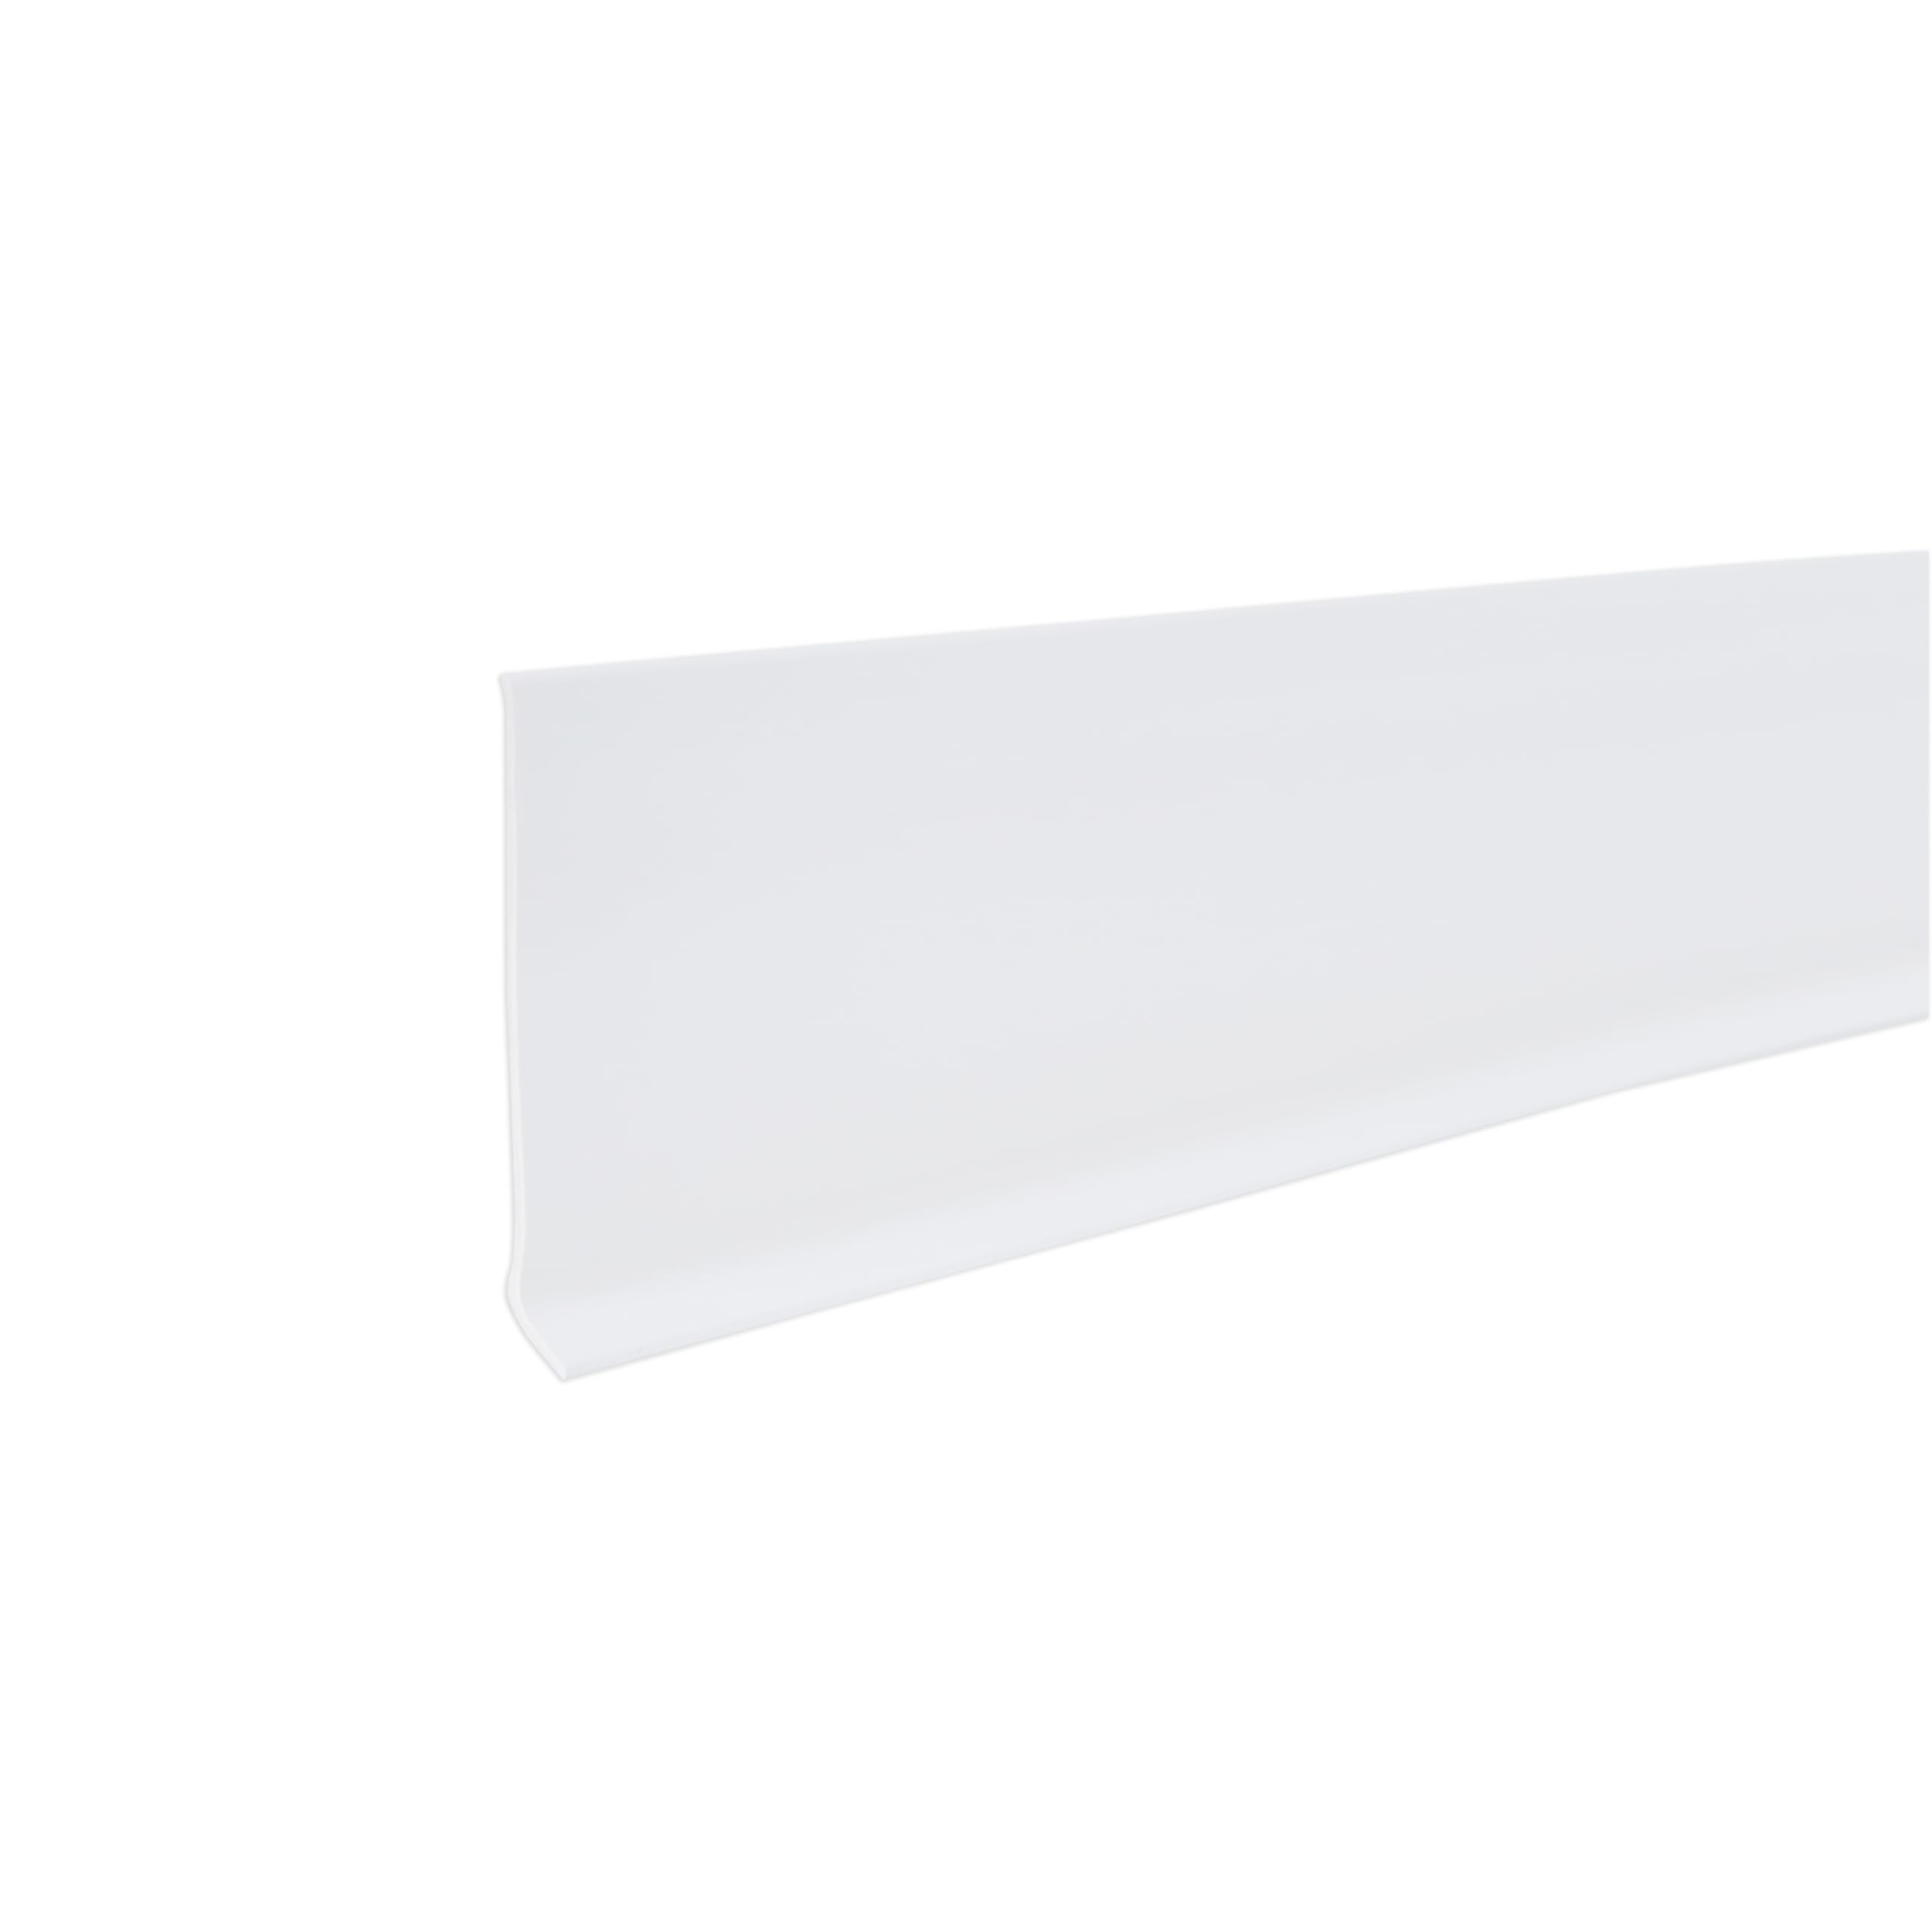
I used this flexible vinyl cove base to hide gaps and give walls a clean, professional edge where floors meet drywall.
Why I picked it: I picked it because the soft, rubber-like vinyl tolerates scuffs and cleans easily while producing a polished finish.
Best for: Finishing basement, bathroom or kitchen baseboards and covering uneven floor-to-wall gaps.
A cost-effective roll for covering long runs without custom millwork costs.
Pros
- I like the bright, clean white finish
- I found the vinyl flexible but durable
- I appreciated how easy it was to cut and clean
Cons
- I needed to buy adhesive separately
- I experienced a learning curve for neat seams
My take
I installed this dry-back cove in a basement and a kitchen and liked how it instantly dressed up the edge where the floor met the wall.
The material feels like a heavy-duty vinyl that resists scuffs and wipes clean with a damp cloth, which is ideal in damp or high-traffic bathroom zones.
Because it’s a ribbed dry-back design, I applied a dedicated cove-base adhesive and followed a short cure window — plan to factor that adhesive step into the job.
Cutting is straightforward with a utility knife, and once bonded the strip lays flat and looks professional, but take time on corners to avoid visible gaps.
2. Art3d Peel-and-Stick Vinyl Wood Planks (36-pack) – Best Peel-and-Stick Wood Look
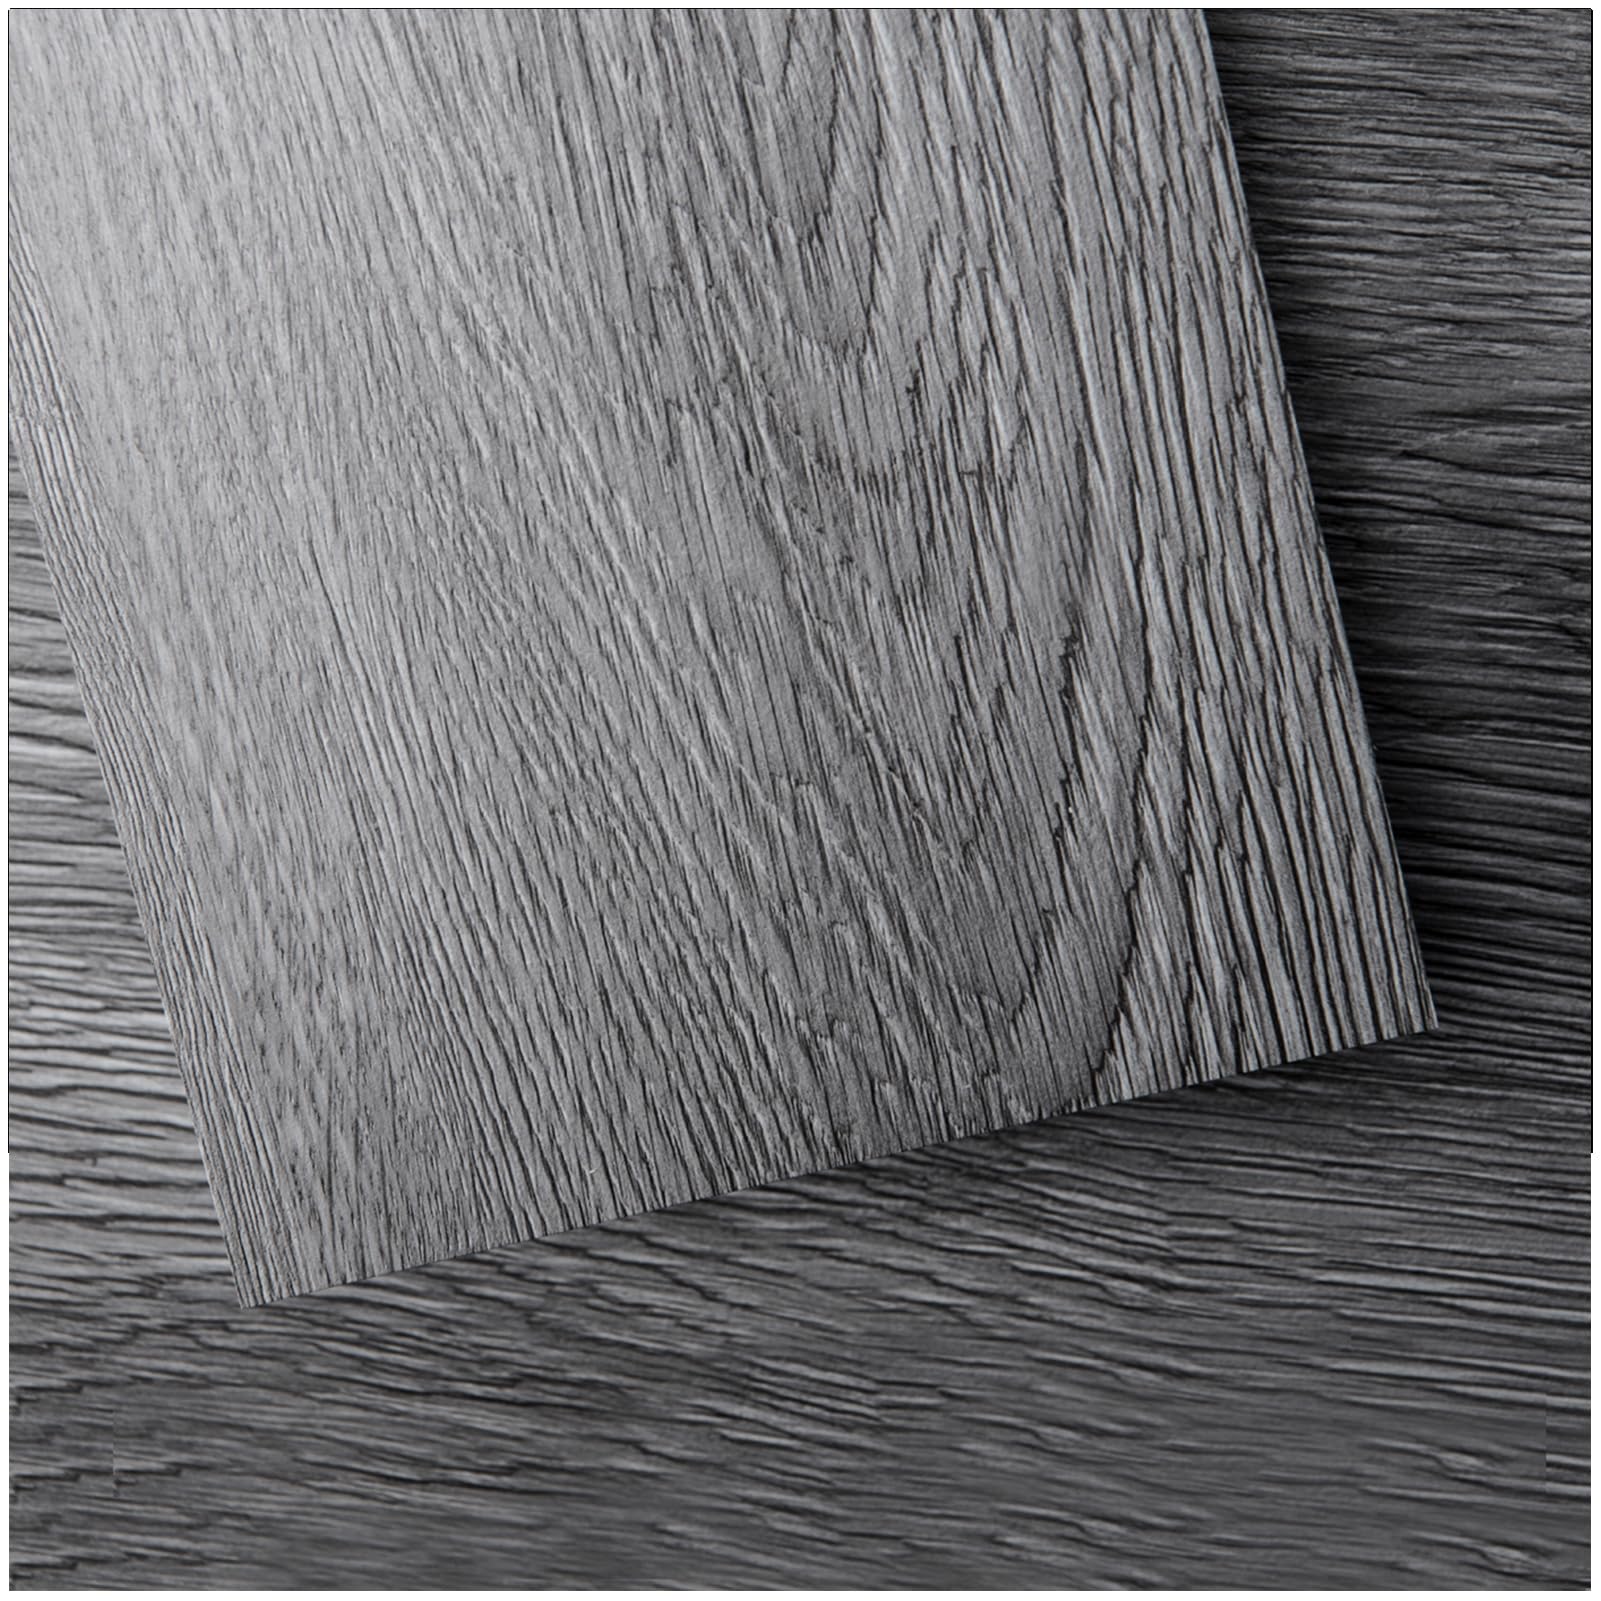
I installed these rigid, peel-and-stick planks in a half bath and a laundry room—both times they transformed the look quickly.
Why I picked it: I chose them for the realistic grain, rigid core, and true peel-and-stick convenience for quick DIY rooms.
Best for: Updating small bathrooms, laundry rooms, or layering over existing concrete or linoleum.
A wallet-friendly way to get LVT-like looks without a pro install.
Pros
- I like the authentic wood grain look
- I found installation fast and tool-free
- I appreciated the waterproof surface
Cons
- I had to prep and patch uneven spots first
- I recommend careful alignment for seamless joins
My take
I prepped concrete and existing linoleum by patching low spots and priming where needed, then peeled and stuck the planks down.
Scoring the back for clean cuts and using a straightedge made trim work much easier; for curves I traced templates and cut with scissors.
Once placed they felt solid underfoot, and the adhesive held well when the substrate was clean and dry.
If you take your time on seams and keep the surface spotless during install, the result looks far more expensive than the product cost.
3. FONUNO Peel-and-Stick Vinyl Wall Base – Best Self-Adhesive Baseboard
I used the self-adhesive FONUNO baseboard for a garage-to-mudroom transition where I wanted a simple DIY finish without liquid adhesive.
Why I picked it: I picked it because the integrated adhesive speeds installation for small runs and it’s flexible enough for corners.
Best for: Quick baseboard repairs, garage and utility room finishing, or spots where adhesive application is inconvenient.
A handy, mid-price option that saves time by skipping separate adhesive.
Pros
- I appreciated the peel-and-stick convenience
- I found the material flexible for tight corners
- I liked that it provided a clean, protective edge
Cons
- I discovered the adhesive can pull paint if removed
- I had to warm the adhesive in cool temps
My take
I unrolled long sections for minimal seams and used a hair dryer in cooler weather to reactivate the adhesive before pressing the strip into place.
The product conforms well to inner and outer corners when I scored a narrow V at the bottom and eased the material into the corner.
While the adhesive is strong (good for holding over time), I learned it can take paint off drywall if you try to remove it later — so buy a little extra for mistakes.
Overall the finish looks professional and saved me the mess of glue and tacking.
4. FloorPops Bonneville Grey Marble Peel & Stick Tiles – Best Patterned Peel-and-Stick Tile
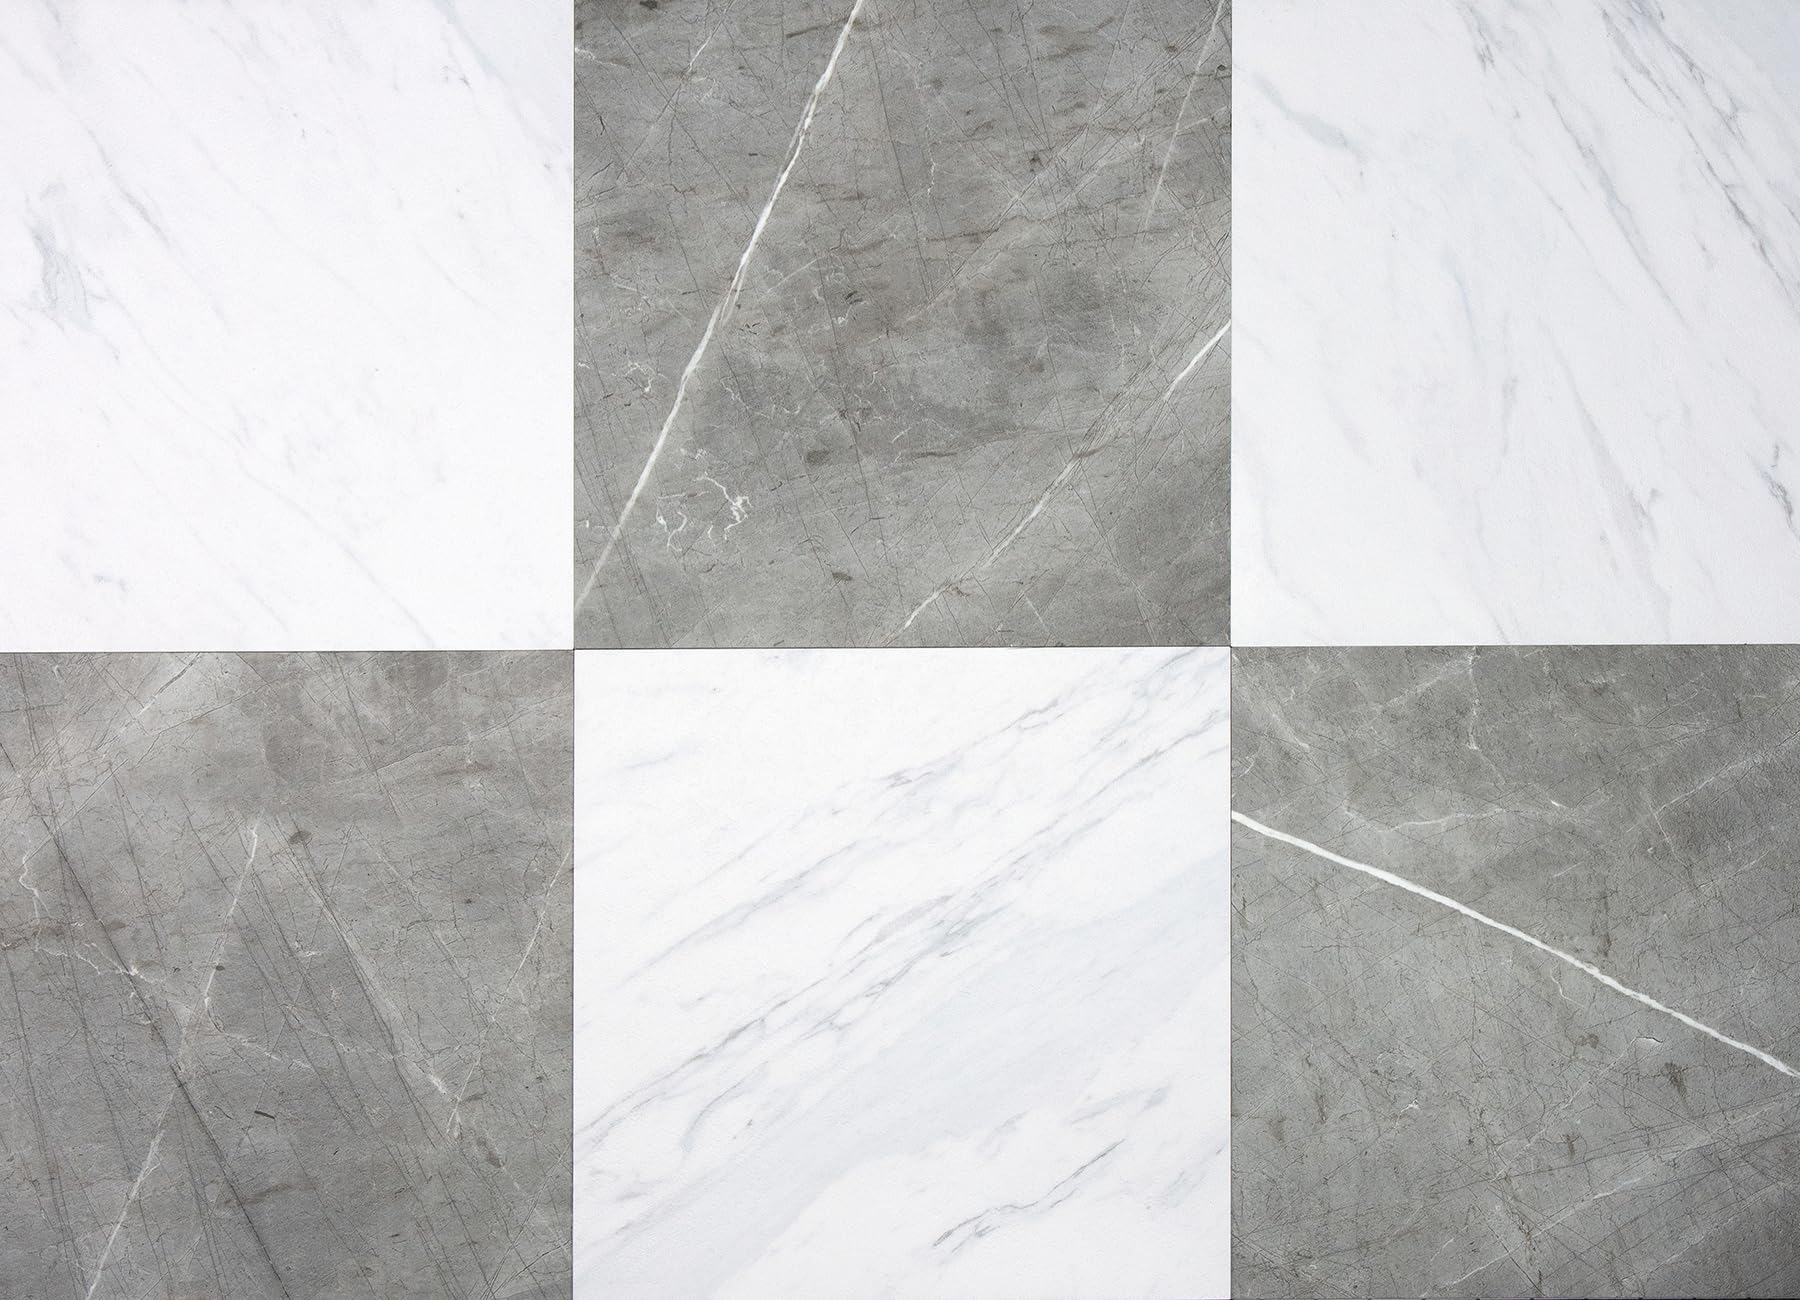
I tested these marble-inspired checkerboard tiles to get a bold look quickly without grout, and they deliver the pattern with minimal tools.
Why I picked it: I picked them for the marble aesthetic and easy peel-and-stick installation for small areas.
Best for: Short-term bathroom makeovers, rentals, or accent areas with careful installation.
A stylish, lower-cost marble alternative, but it needs careful installation to hold up to wet cleaning.
Pros
- I like the marble-inspired checkerboard pattern
- I found installation tool-free and fast
- I appreciated the textured vinyl finish
Cons
- I found edges can lift if seams aren’t tight
- I had to use primer on concrete subfloors
My take
The visual impact is immediate — the grey-and-white checkerboard looks much more polished than the old floor beneath.
Because the adhesive is permanent, I made sure to follow the manufacturer’s note: use a primer over concrete and press seams tightly to avoid lifting.
In one test area I saw corner lift when water pooled at the edges, so I avoid using these tiles where heavy wet-mopping or standing water is expected.
For a quick style upgrade in a low-moisture bathroom or powder room they’re a great choice, but I recommend meticulous seam work and spot-testing adhesive on your substrate first.
5. Genesis Smooth Pro PVC Ceiling Tiles – Best Ceiling Tile for Steam
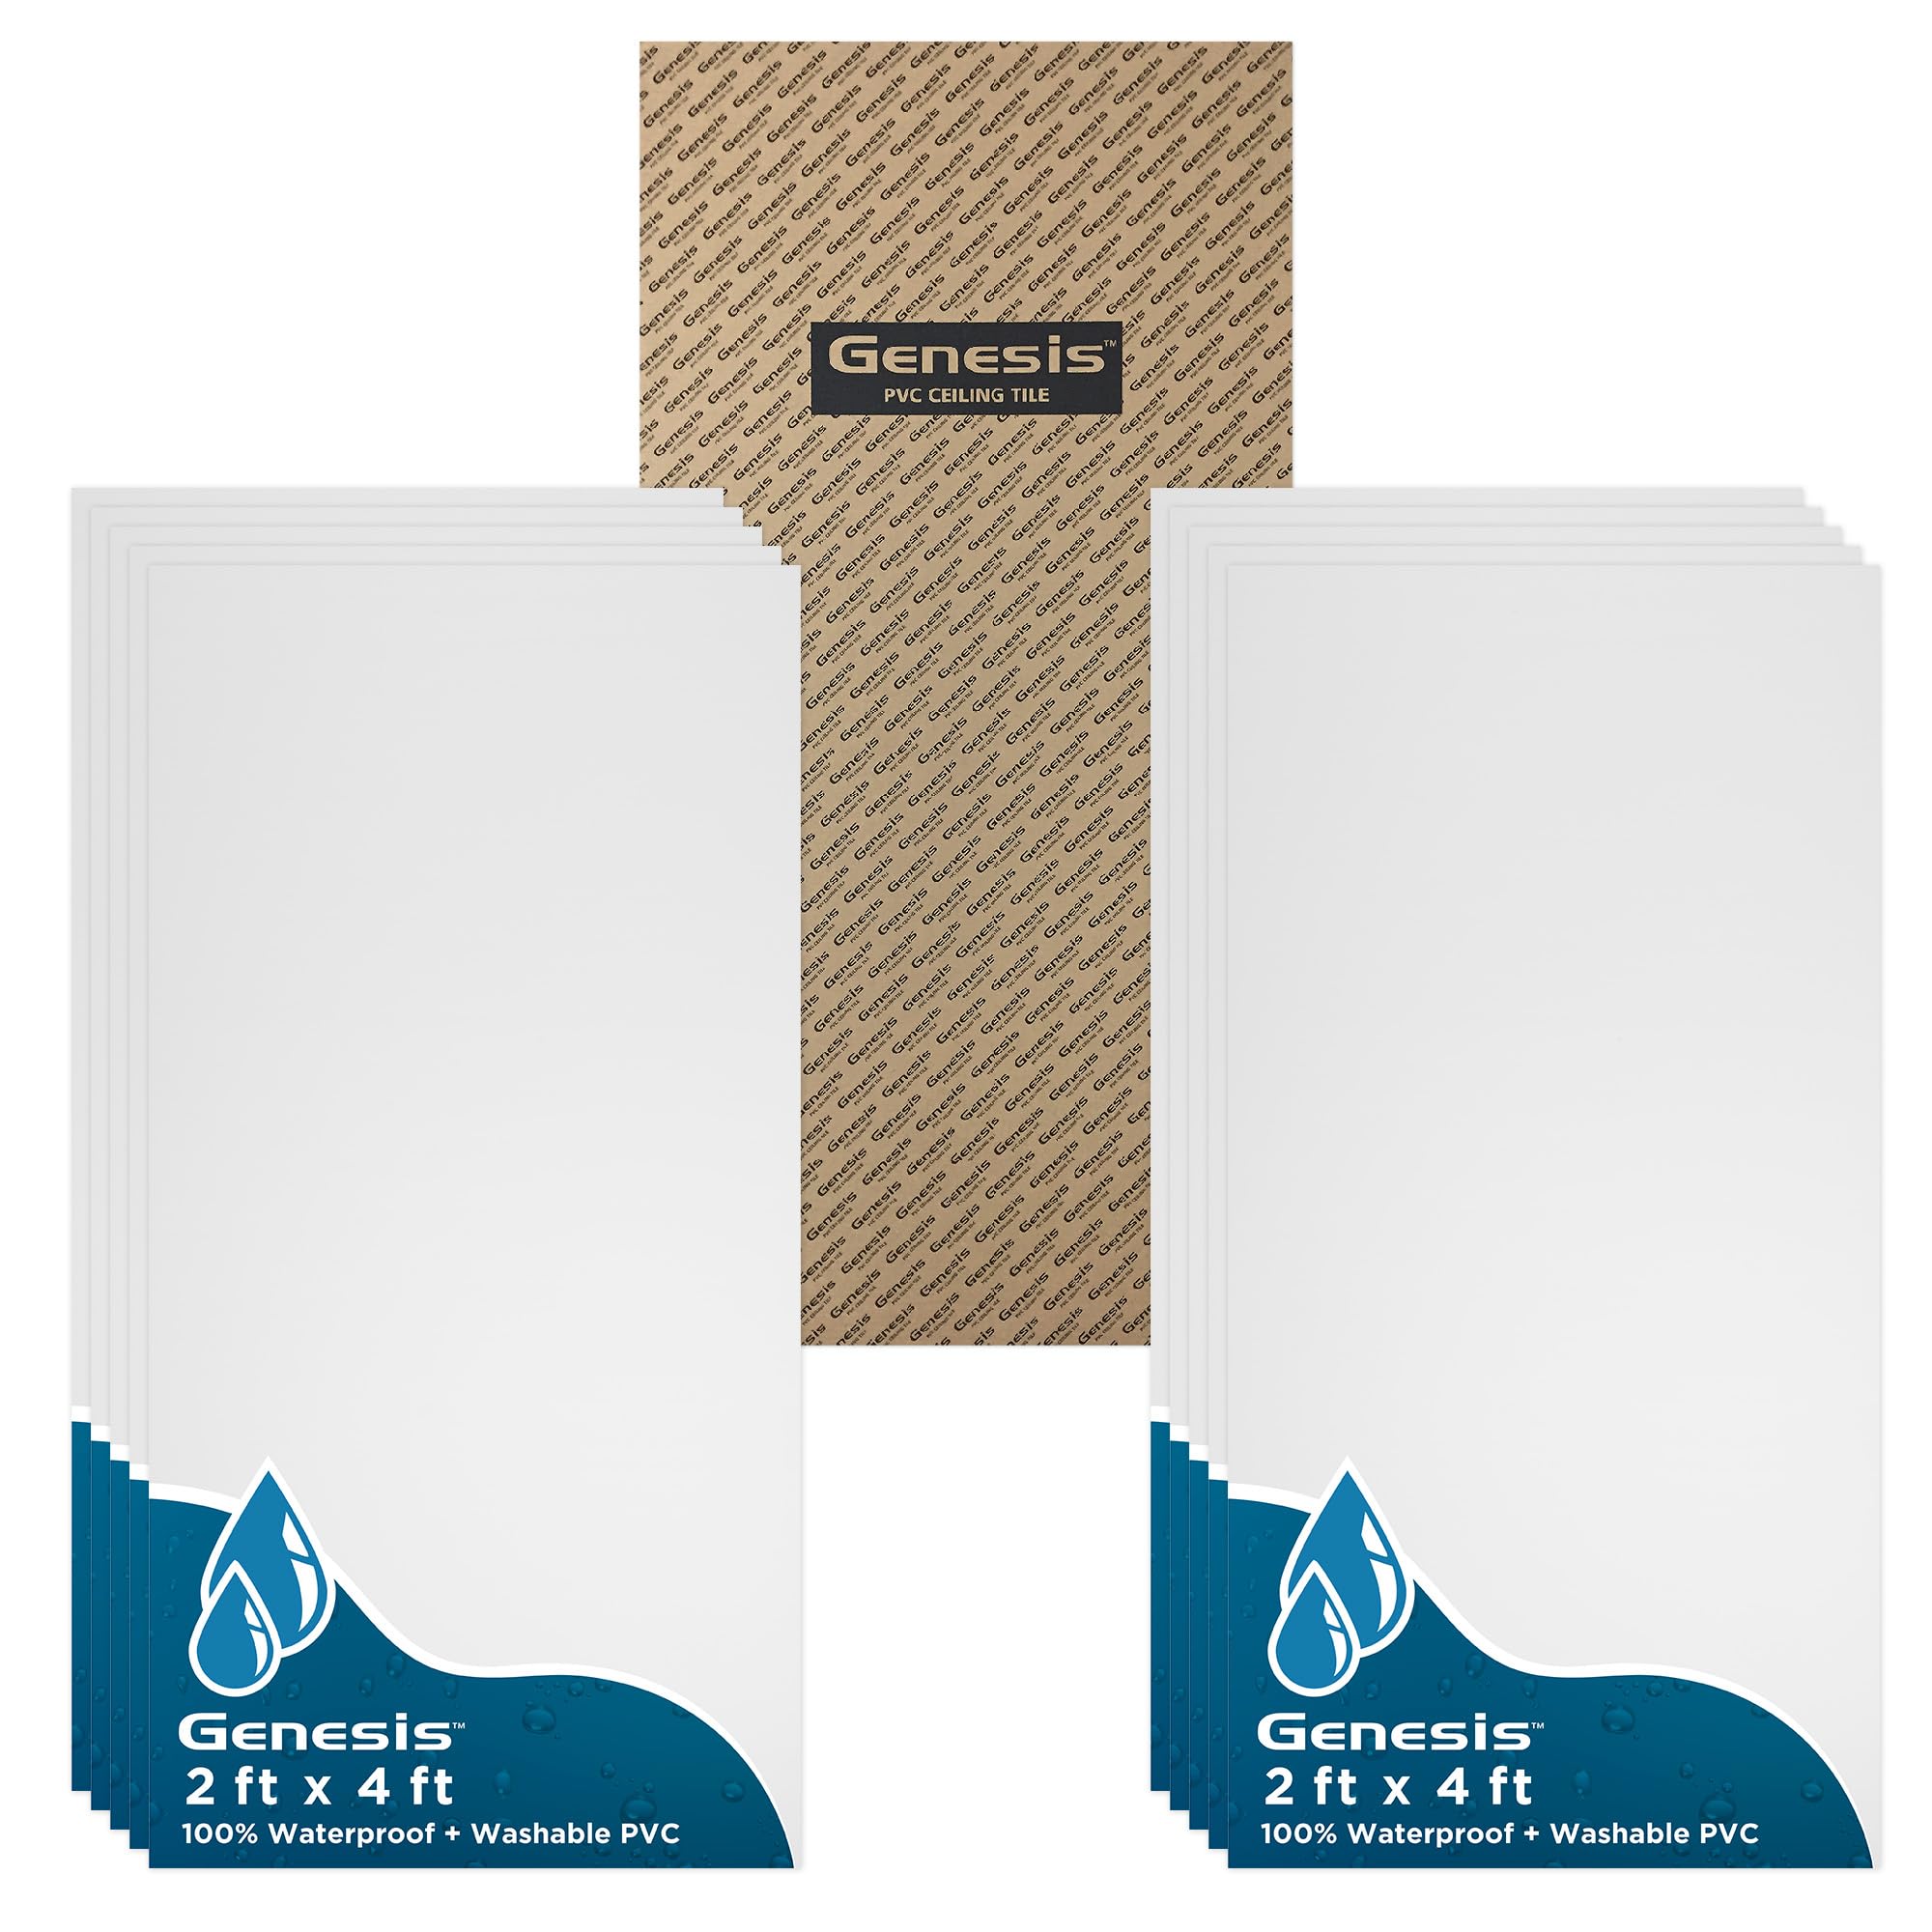
I swapped out old fiber tiles for these PVC panels in a steam-prone bathroom and appreciated their waterproof, flexible performance.
Why I picked it: I chose them because they’re lightweight, waterproof, and drop into standard grids without mess.
Best for: Bathrooms with high humidity, basements, or any hung ceiling that needs a waterproof, low-maintenance option.
A durable ceiling solution that avoids frequent replacement in humid spaces.
Pros
- I liked that they’re waterproof and washable
- I appreciated the light weight and flexibility
- I found them easy to cut and install
Cons
- I received a small number of damaged tiles in one order
- I noticed they’re thinner than traditional tiles
My take
I installed these in a bathroom over a 15/16" grid and the panels dropped in cleanly without dust or breakage.
Their flexibility helped around pipes and conduits where rigid tiles tend to chip during install, and they handled steam exposure without discoloring.
Cutting is simple — score and snap with a utility knife — and they stayed flat over time.
Be aware that on a large order I encountered a few damaged pieces out of the pack, so I budgeted a small extra quantity to avoid installation delays.
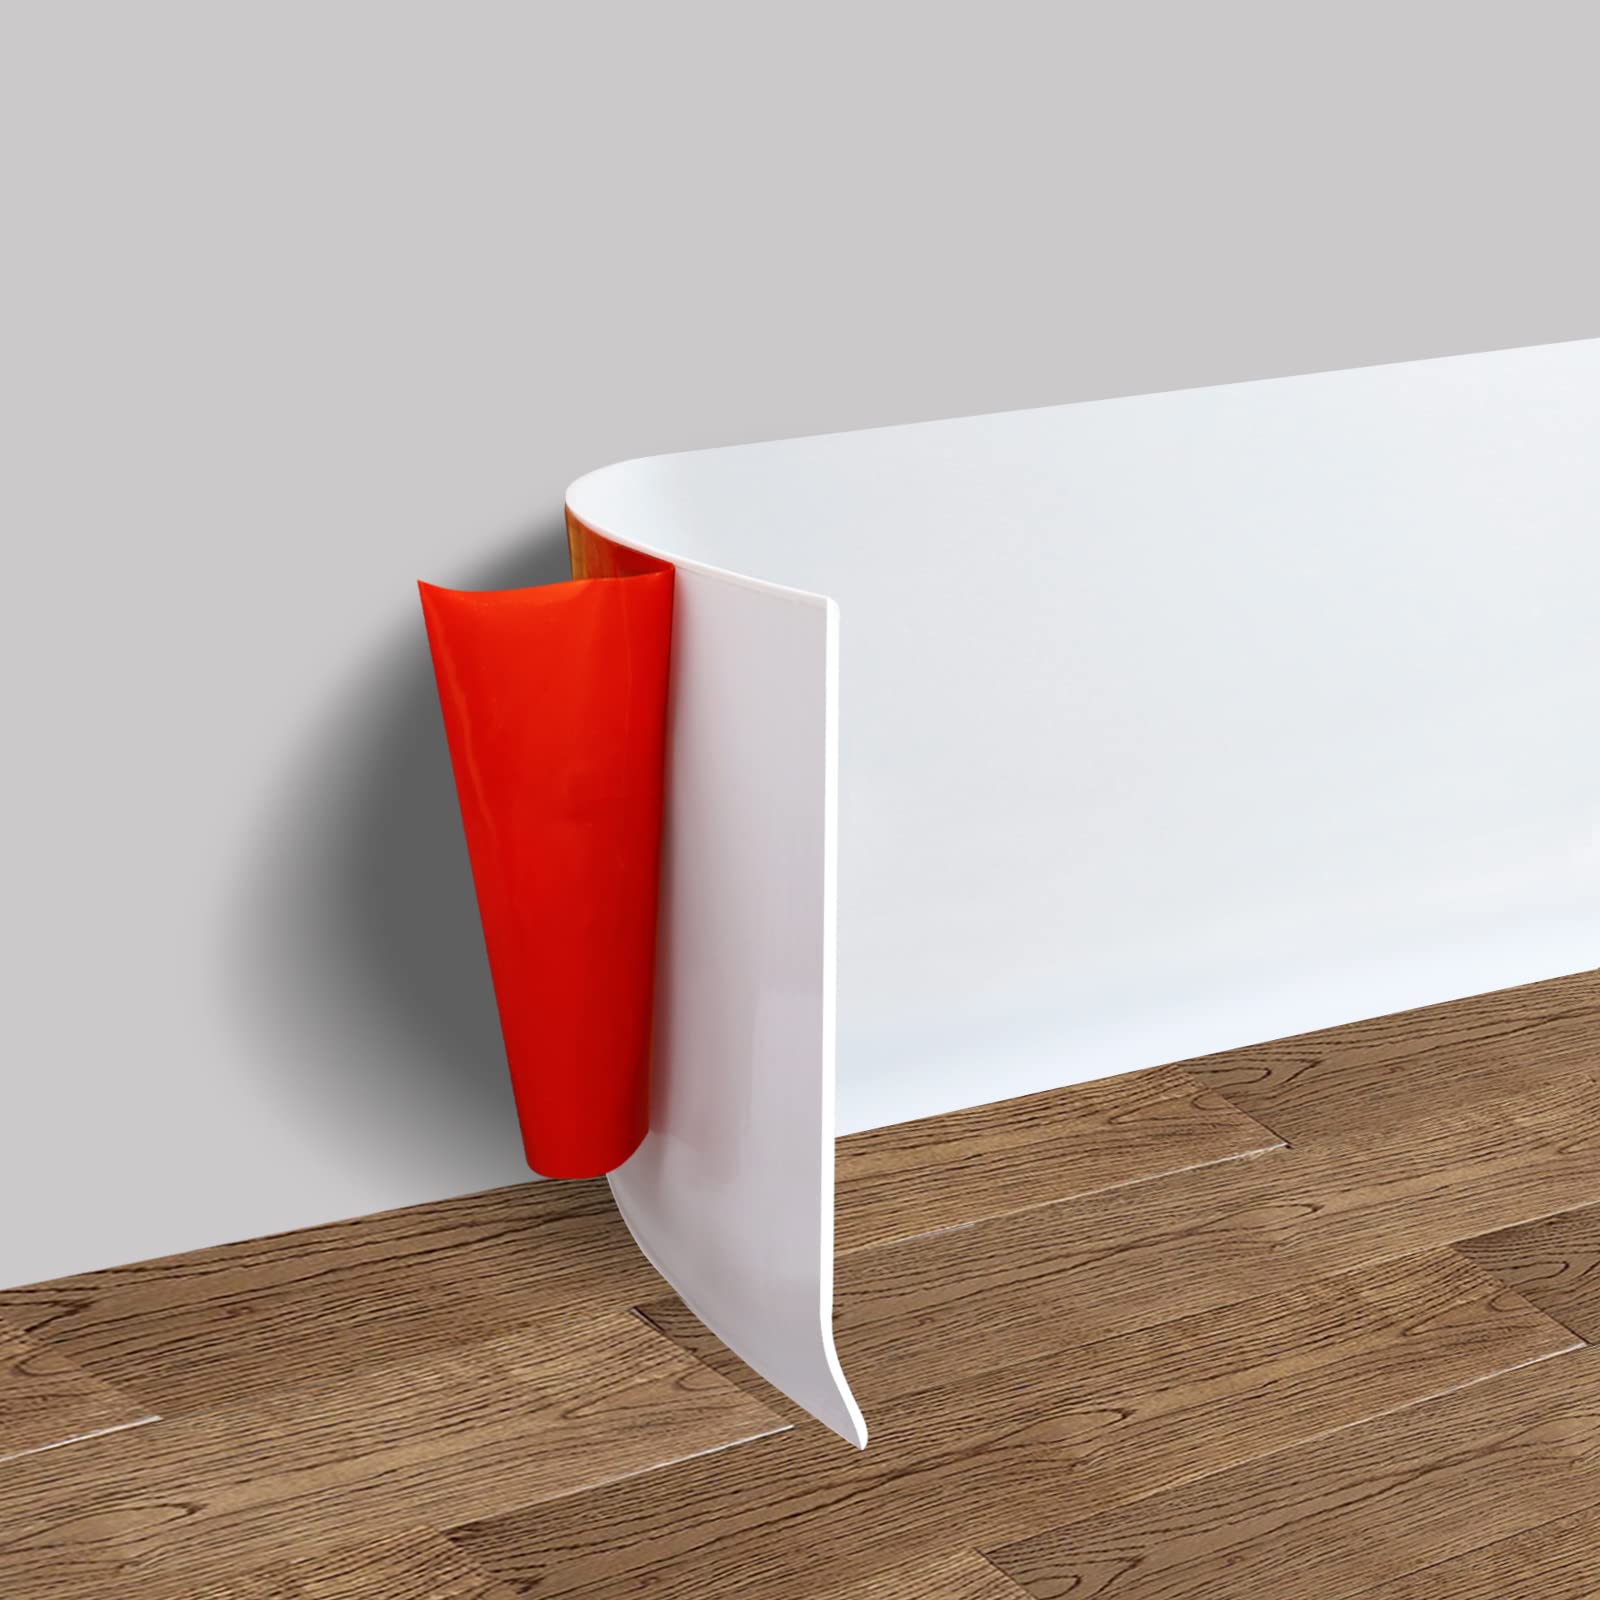
6. PVC Self-Adhesive Transition Strip (4ft) – Best Wide Transition Strip
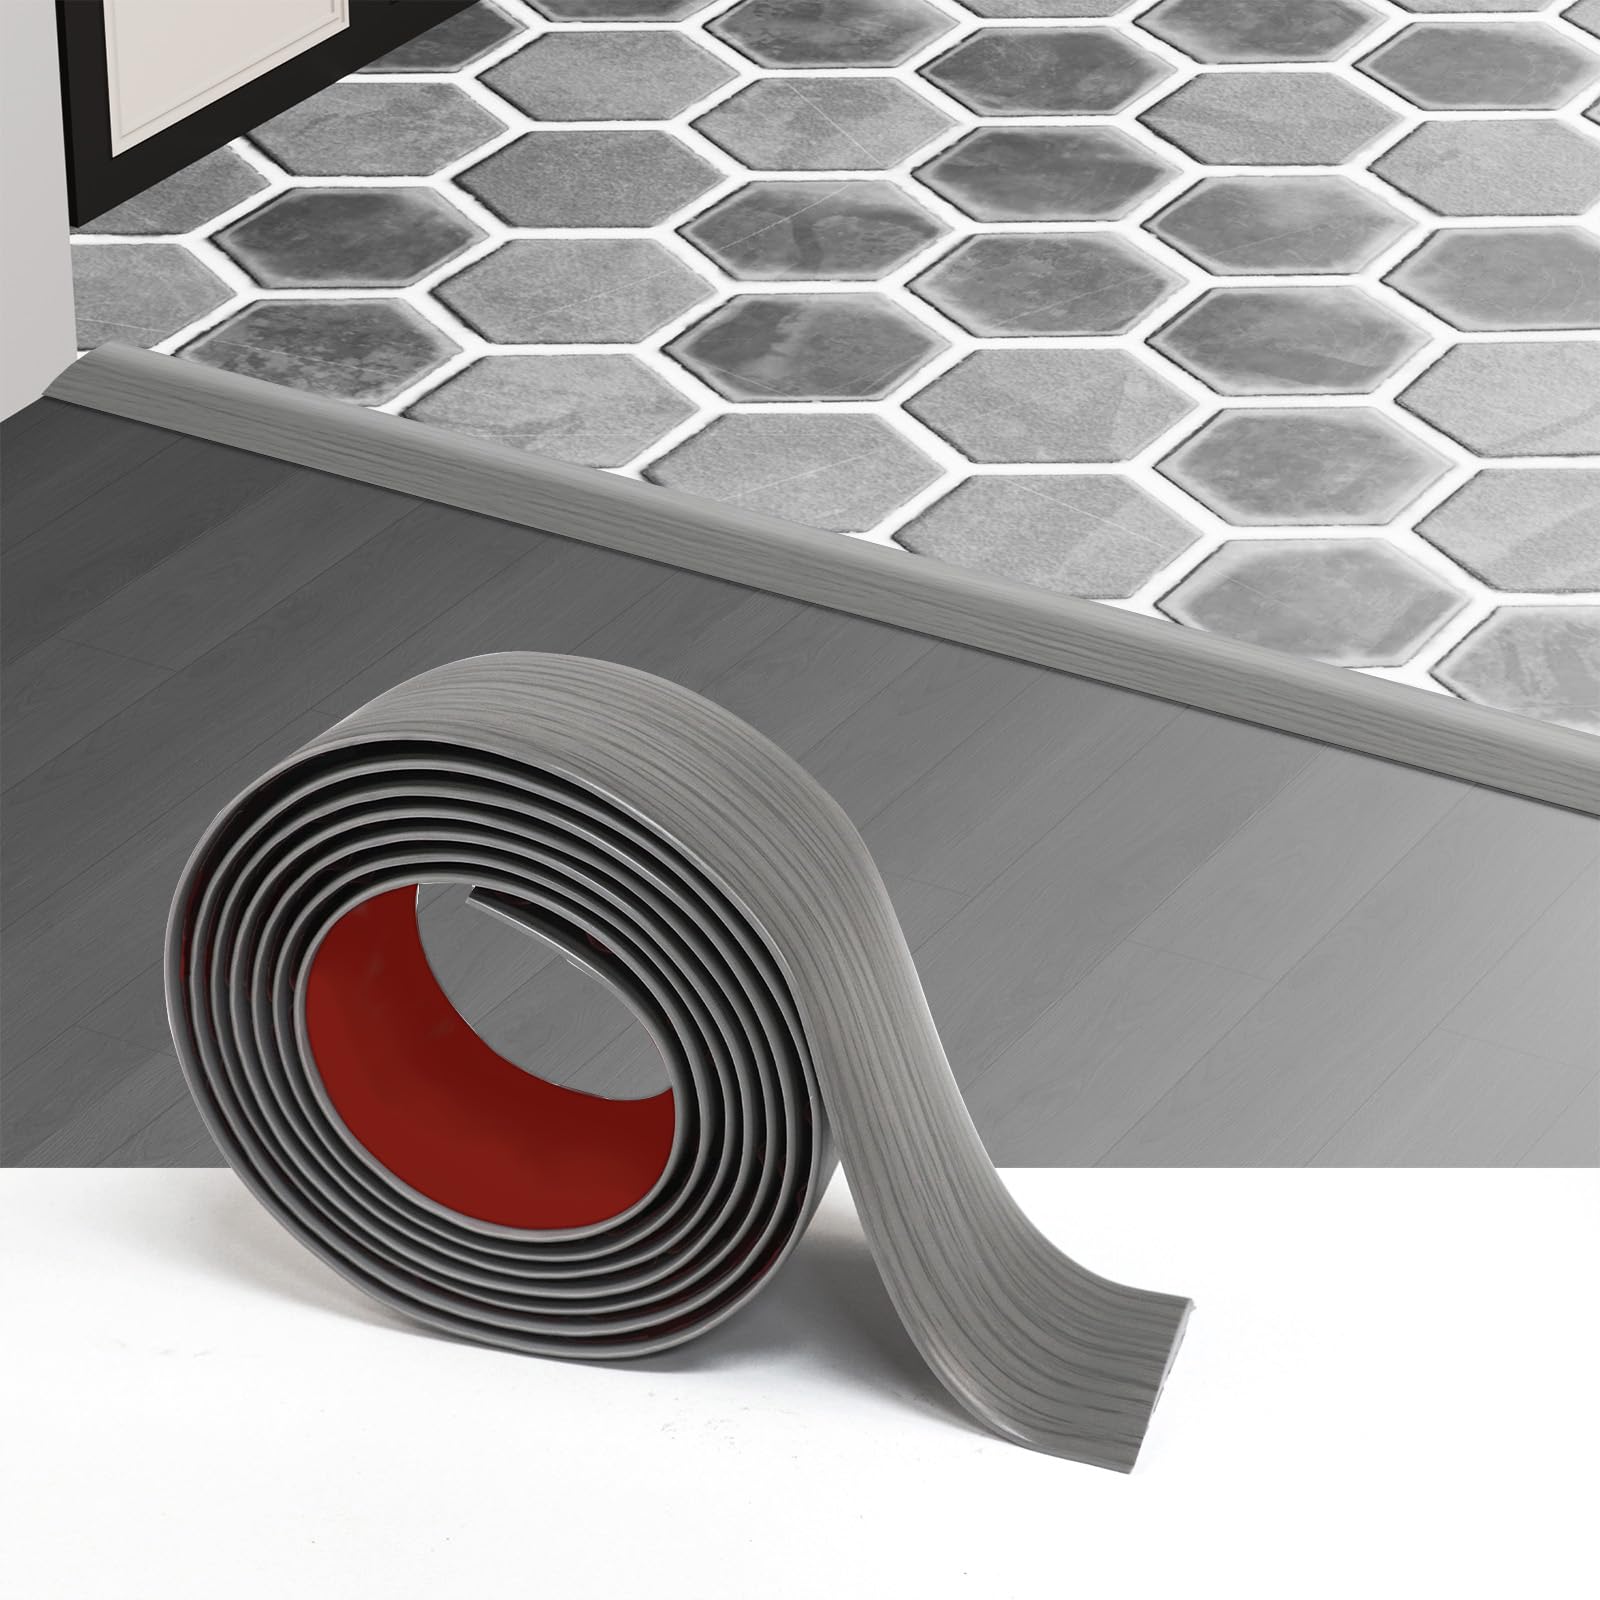
I used this heavy-duty PVC strip to bridge a wide transition between tile and carpet and to hide an uneven threshold.
Why I picked it: I picked it because the low-profile height keeps the transition trip-free while resisting scratches and stains.
Best for: Bridging tile, hardwood, and carpet junctions and protecting shower edges or cabinet openings.
A low-cost, durable alternative to metal or wood threshold profiles.
Pros
- I found it durable and scratch-resistant
- I liked the low, trip-free profile
- I appreciated the peel-and-stick simplicity
Cons
- I noticed color matching can vary between orders
- I found removal can be difficult once bonded
My take
I cleaned the area thoroughly and warmed the strip slightly with a hair dryer to help it conform to slight curves.
After cutting to length with scissors I pressed it down firmly and it hasn’t lifted in high-traffic areas during months of use.
It solved my toe-stubbing problem at a doorway and gives a neat finished look where different floor materials meet.
If you plan to reuse the strip later, expect the adhesive to be tenacious — removal can be messy.
7. Art3d Rosewood Peel-and-Stick Vinyl Planks (36-pack) – Best Full-Room Plank Pack

I used multiple boxes of these rosewood planks to cover a bedroom and a spare room; they’re consistent, waterproof, and relatively easy to fit.
Why I picked it: I chose this pack for value and the realistic wood appearance that holds up in moisture-prone spots.
Best for: Larger DIY room installations where you want an inexpensive, waterproof plank floor.
A budget-friendly way to overhaul several rooms without hiring pros.
Pros
- I found the planks waterproof and stable
- I liked the consistent quality across boxes
- I appreciated how easy they were to cut
Cons
- I had to vacuum thoroughly before laying
- I noticed color can look different in photos
My take
I followed a staggered layout, started with a half plank to avoid repeating seams, and used a rubber mallet to snug joints.
Surface prep was the most important step — any debris left under a plank showed as bumps, so I vacuumed and used alcohol to de-grease the substrate.
The planks handled small irregularities in older floors and remained firmly in place after weeks of daily wear.
If you want a fast full-room refresh that tolerates moisture, these are a reliable, economical choice.
8. Vinyl Self-Adhesive Transition Strip (2in x 10ft) – Best Narrow Transition Strip
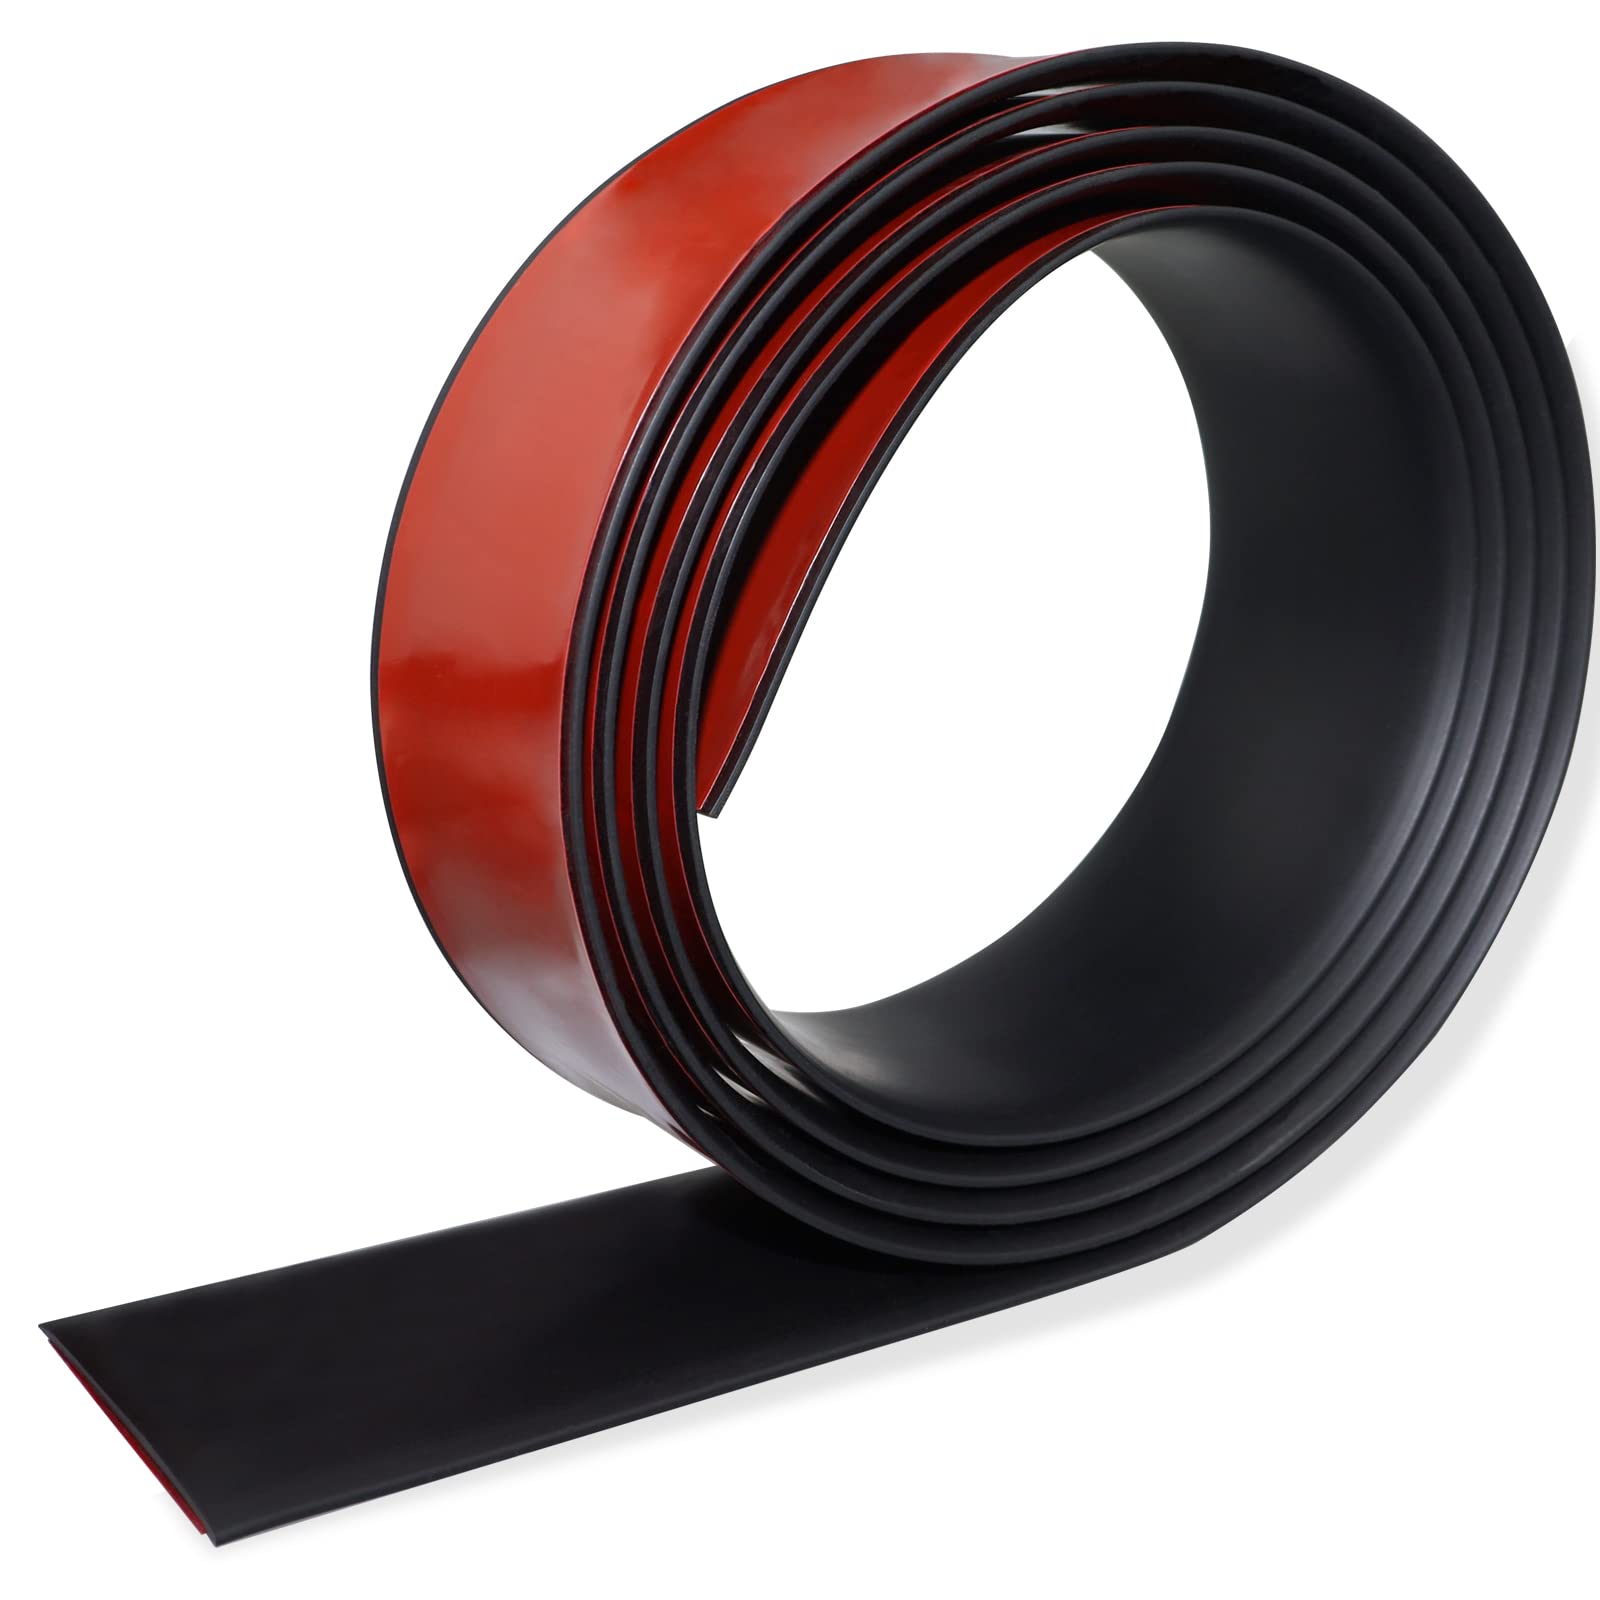
I used this narrow, long transition strip at several doorways to cover seams and protect edges where laminate met tile.
Why I picked it: I picked it because it’s flexible, easy to trim, and the adhesive holds well in daily traffic.
Best for: Doorway transitions, small gap repairs, and short-run edge protection.
An inexpensive, quick-fix transition that installs with no tools.
Pros
- I liked how easy it was to cut to length
- I found the adhesive very strong
- I appreciated its clean, low profile
Cons
- I learned it’s hard to reposition once stuck
- I had to be precise when aligning edges
My take
I peeled the backing, aligned the strip, and pressed firmly; for very heavy traffic zones I planned my placement carefully because the adhesive is permanent.
In one high-traffic installation this strip has stood up to walkers and wheelchairs for months without lifting.
If you remove it later you should expect to scrape adhesive residue, so treat this as a long-term fix rather than a temporary tape-and-go solution.
Overall it delivered a quick, nearly invisible transition that solved several tripping points around my house.
How I Choose Bathroom Flooring and Trim
Water resistance and material
I prioritize products rated waterproof or made of PVC/vinyl for bathrooms because steam and occasional splashes are inevitable.
Where I used peel-and-stick planks or tiles, I confirmed the manufacturer noted 100% waterproof cores or virgin vinyl facing.
- Prefer PVC or vinyl in wet zones
- Avoid porous materials without a waterproof seal
- Use primer on concrete prior to permanent adhesives
Surface prep and adhesion
I never skip cleaning, degreasing, and repairing low spots before sticking anything down — adhesion is only as good as the surface.
If a product uses a dry-back adhesive, I plan for separate cove-base glue; if it’s peel-and-stick, warm the adhesive in cool weather for best bond.
- Remove dust and debris with vacuum
- Patch cracks and level dips before installation
- Warm adhesive backing in temperatures below 68°F
Installation tips I use
I score and snap large panels, trace templates for awkward cutouts, and use a roller or rubber mallet to seat seams.
When working across doorways, I stagger end joints and leave expansion where the manufacturer suggests.
- Trace curves on paper templates for tight cuts
- Stagger seams for a natural look
- Press seams firmly and allow adhesives to set
Finishing touches and maintenance
I seal vulnerable edges and finish transitions with PVC strips or vinyl base to protect edges from water intrusion.
For cleaning, I use non-abrasive cleaners and avoid excessive standing water on peel-and-stick tiles to prevent edge lift.
- Protect edges with base or transition strips
- Avoid heavy wet-mopping on marginally adhesive tiles
- Keep a small amount of extra material for repairs
Frequently Asked Questions
Can I install peel-and-stick planks directly over tile?
I have layered peel-and-stick planks over existing tile after thoroughly cleaning and lightly scuffing the surface; ensure the tile is flat and free of loose grout, and prime if the product recommends it.
Do peel-and-stick tiles stand up to bathroom steam and mopping?
In my experience, many vinyl tiles and planks tolerate steam well, but I avoid heavy standing water and make sure seams are tight; for areas prone to lots of water, I choose full waterproof cores or use extra adhesive at the perimeter.
Are self-adhesive baseboards easy to remove later?
I found self-adhesive baseboards stick very well; removing them can pull paint or damage drywall, so I buy a bit extra and treat them as semi-permanent.
Final Take
I found there’s no single best product for every bathroom — match the material to the moisture level and the quality of your subfloor.
For fast whole-room makeovers I reach for peel-and-stick planks; for clean, lasting edges I use vinyl base and transition strips.
If you prep the surface properly and follow a few simple installation steps I described, you’ll avoid most of the common issues I encountered.
")