
I tested several self-regulating heat tapes and heating cables to keep exposed water lines from freezing. These are the units I reached for most often for different pipe layouts, installation styles, and levels of cold.
I’ve spent winters fitting heat tape to exterior faucets, tankless water lines, crawlspace plumbing, and livestock troughs. In this roundup I focused on self-regulating heating cables with built-in thermostats and safety certifications because they give the easiest, safest protection without constant monitoring.
Below I share which tape I used where, why each one earned a spot, and the simple installation and safety notes I rely on when installing a heating cable.
All of these are self-regulating cables with built-in thermostats and a range of wattages. I prioritized certification, ease of installation, and whether a cable supports overlapping or must be run straight when matching a product to a specific pipe run.
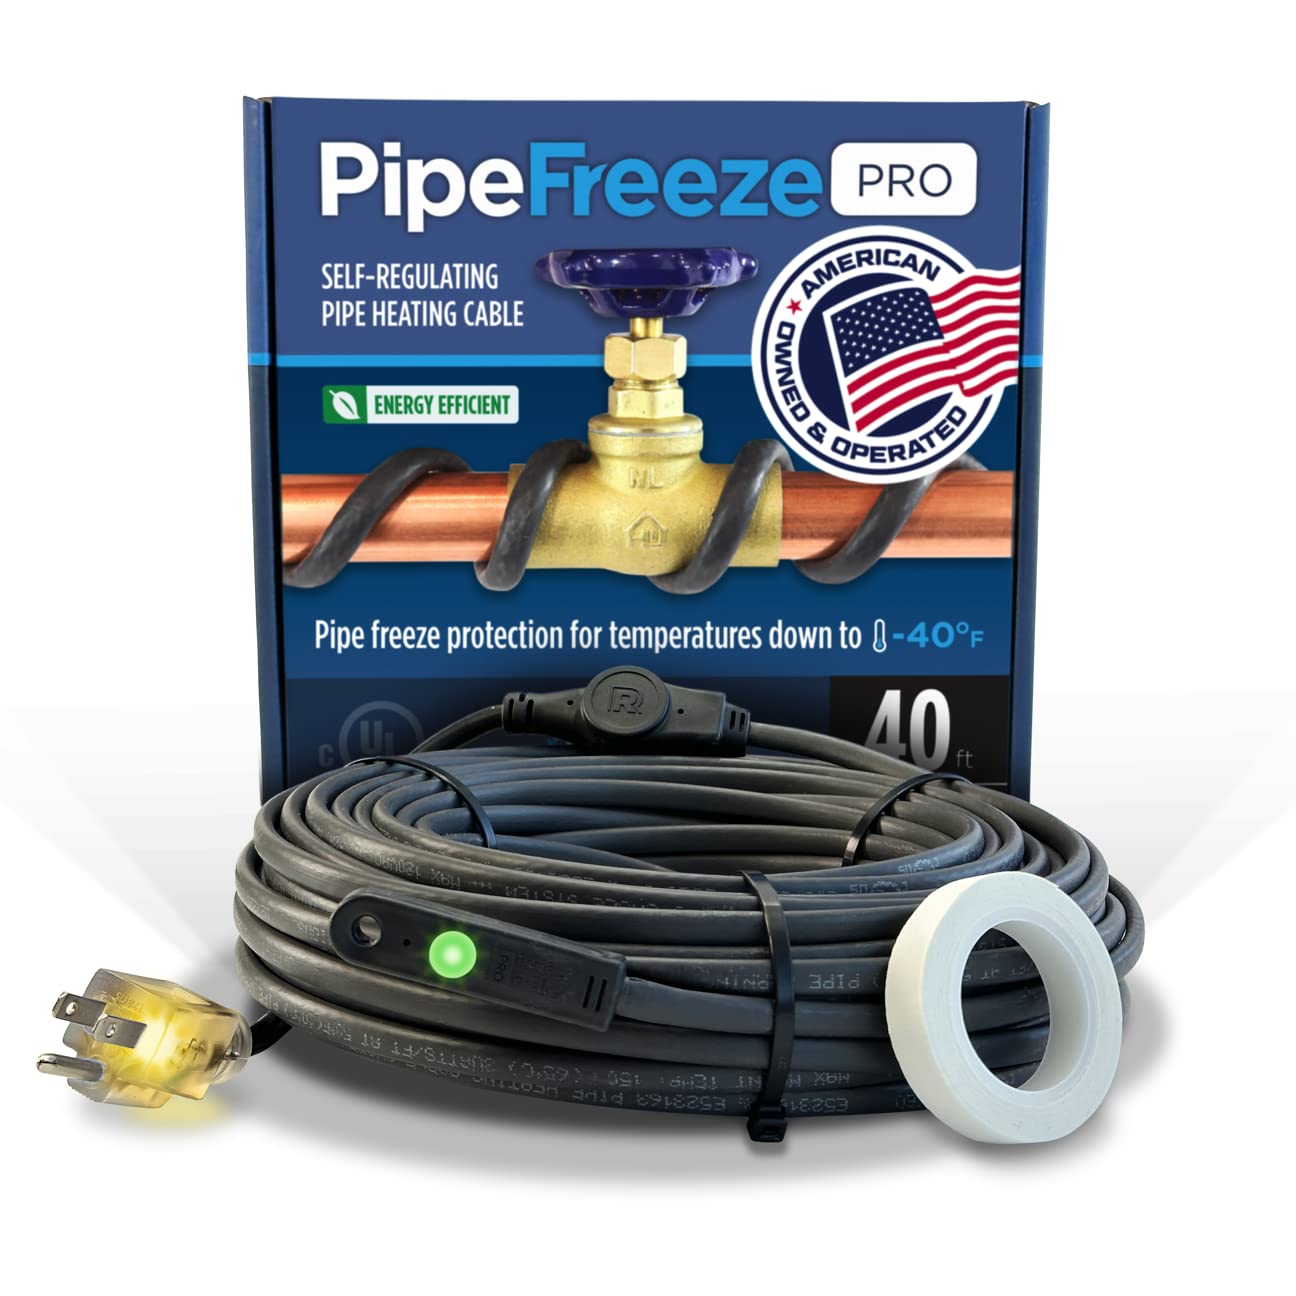
1. HEATIT 6 ft Heat Tape – Best Overall
A fully ETL-certified, self-regulating 6 ft heating cable with an integrated thermostat that I used to keep short exterior and service-run pipes flowing in deep cold.
Why I picked it: Full ETL certification and a built-in thermostat make it a safe, reliable everyday choice.
Best for: short exterior runs, tankless heater lines, outdoor faucets and basements
A sensible midrange choice for typical household pipe protection.
Pros
- ETL certified end-to-end
- Self-regulating to avoid overheating
- Works down to -40°F
- Built-in thermostat activates automatically
- Flexible for wrapping and spiraling
Cons
- Needs a nearby outlet
- Cord is somewhat stiff
- Limited length for bigger jobs
My take
I used the 6 ft HEATIT on an exterior tankless heater feed and on an outdoor faucet, and it performed exactly as advertised. The cable warms quickly and the built-in thermostat cycling between about 38°F and 50°F kept it off when it wasn’t needed, which I appreciated for energy savings.
Installation was straightforward — I wrapped it in the spiral pattern for one run and straight-traced another, secured it with the provided tape, and then insulated the pipe. The cable’s ETL certification gave me extra confidence on safety, and in an ice-bucket test it activated as expected.
If you need more coverage I’d buy a longer length, but for short, exposed plumbing this unit is my go-to because it’s simple, reliable, and safe.
2. HEATIT HISD 6 ft Heating Cable – Best for Straight Runs
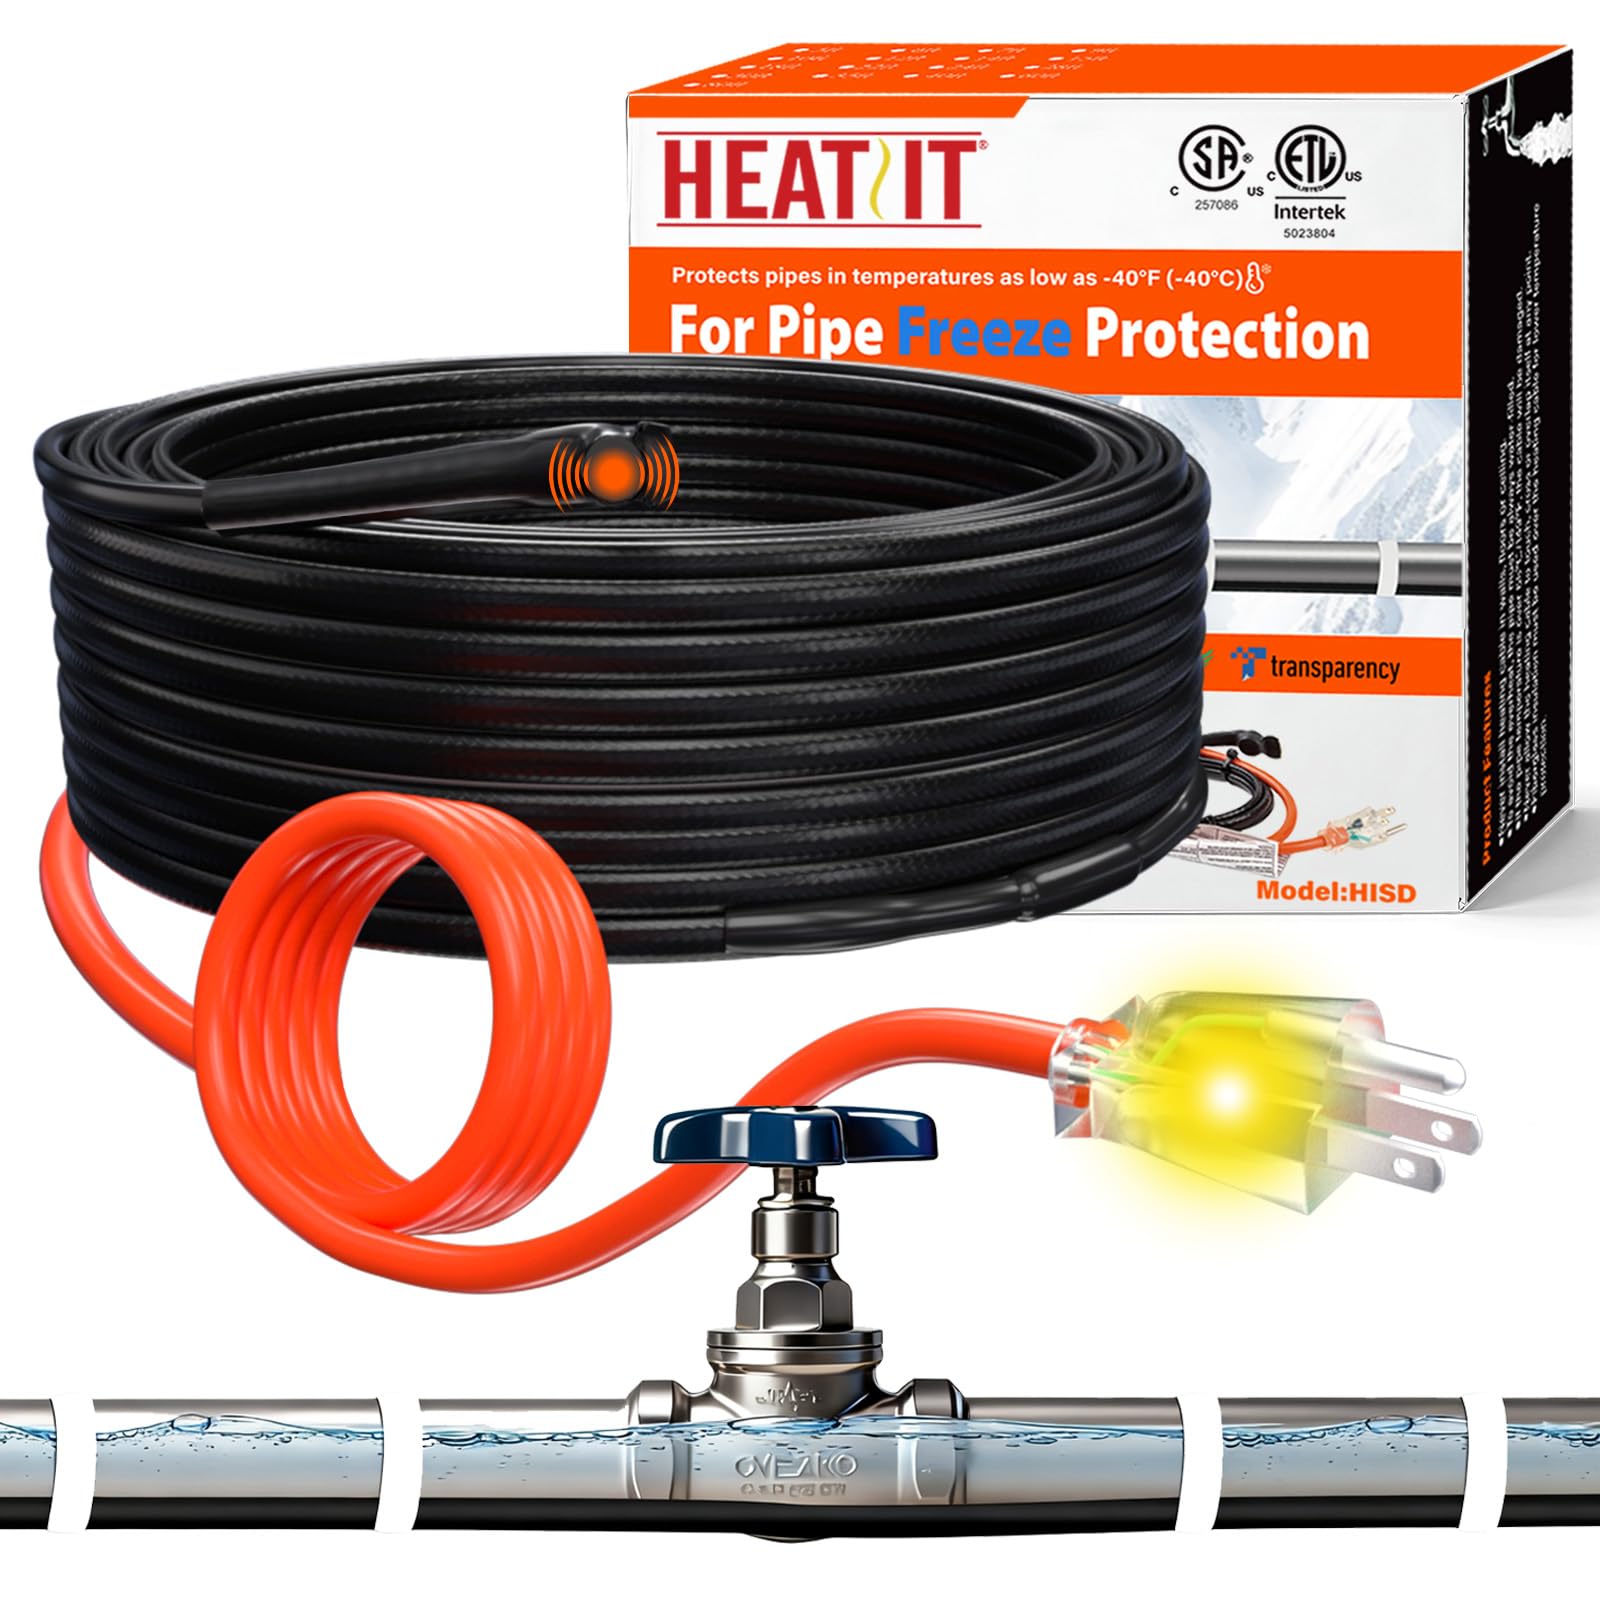
A higher-output, CSA and ETL-approved heating cable designed to be run straight along water-filled pipes—great when you have a clear, linear run to protect.
Why I picked it: Robust construction, higher wattage, and a clear indicator light make it excellent for straight-traced applications.
Best for: long straight supply lines, livestock trough feeds, single-run exterior lines
A budget-friendly option with higher heat output per foot.
Pros
- CSA and ETL certified
- Higher output at 7 W/ft
- Grounded plug with indicator light
- Pre-assembled for quick install
- Two-year limited warranty
Cons
- Must be run straight
- Not for empty lines or hoses
- Requires insulation over the cable
My take
I installed the HISD 6 ft heating cable on a 3/4" supply to a livestock watering trough and left it on through several nights below zero. The higher 7 W/ft output made a noticeable difference; the line stayed unfrozen when adjacent runs without heat tape iced up.
The cable ships pre-assembled with a grounded plug and indicator light, so testing in an ice bucket before final installation was simple and reassuring. Follow the manufacturer instruction to keep the cable straight and beneath the specified insulation thickness — I wrapped insulation over the cable after securing it to the pipe.
For any straight-traced pipe where you can’t spiral or overlap the cable, this model gives reliable, higher-output protection without fuss.
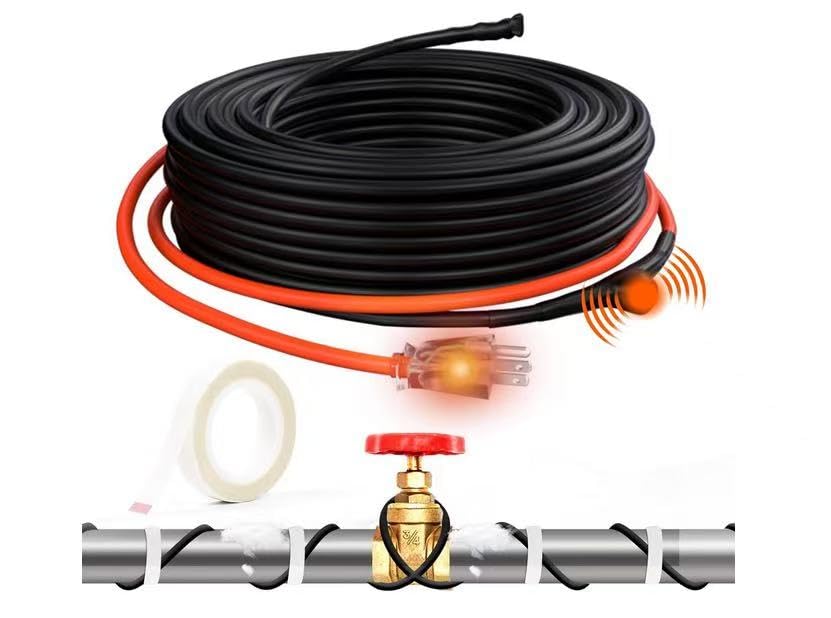
3. MAXKOSKO 6 ft Heating Cable – Best for Flexible Installs
A versatile 5 W/ft self-regulating cable that I relied on when pipes needed spiral or overlap installation and where routing wasn’t perfectly straight.
Why I picked it: Supports spiral and overlapped installs, so I used it on awkward runs and vertical sections.
Best for: irregular pipe layouts, internal walls, buried sections that need flexible routing
An energy-saving midlevel choice with flexible installation options.
Pros
- Can be spiraled or overlapped
- Self-regulating to -40°F
- Pre-assembled and ready
- Works on metal and plastic
Cons
- Short unheated cord
- Can take longer to fully warm
- Not as heavy-duty as premium jackets
My take
I used the MAXKOSKO cable on a PVC drain line in an unheated area that would occasionally ice up. After installation I noticed the gurgling stopped and the line stayed clear through cold snaps; it took a day or two to bring the line fully up to temp in my worst-case run.
Installation was easy and I appreciated that this cable lets me spiral and overlap where needed — I secured it with the included tape and added zip ties where routing was vertical. The 5 W/ft output was sufficient for the runs I tested, and the pre-assembled cord made the initial check simple.
If you need the flexibility to wrap or overlap your cable, this one saved me time and fit odd layouts without forcing a straight-trace install.
4. Radiant Solutions Intelligent Heat Tape 18 ft – Best Heavy-Duty
A heavy-duty, intelligent heat tape with the GlowCap diagnostic, an integrated thermostat, and a long warranty that I used where durability and proven diagnostics mattered.
Why I picked it: GlowCap diagnostic and a commercial-grade jacket gave me confidence in demanding installations.
Best for: long interior runs, mobile homes, high-risk freeze zones where diagnostics matter
A premium option with a long warranty and heavy-duty construction.
Pros
- GlowCap shows cable health
- Commercial-grade outer jacket
- Integrated thermostat
- Long warranty coverage
Cons
- Stiffer and thicker jacket
- Not intended for outdoor use
- Warranty may require specific validation
My take
I installed the Radiant Solutions 18 ft tape inside a mobile home where past winters gave me repeated freeze problems. The cable is thick and not the easiest to wrangle, but once taped and insulated it performed exactly as needed.
The GlowCap feature is genuinely useful — it lets me confirm the cable is powered and functioning without pulling insulation back. In my tests the cable thawed pipes in single-digit conditions over several hours and then kept them warm during prolonged cold spells.
This is my pick when I want a heavy-duty interior solution and a long warranty, though I would avoid it for exposed outdoor runs since it’s not rated for that application.
How I Choose Heat Tape and What I Watch For
Wattage and Pipe Type
I compare wattage per foot with the pipe material and diameter before buying. Higher wattage (like 7 W/ft) delivers faster heat for exposed or high-risk runs; lower wattage (3–5 W/ft) is fine for many residential lines when combined with insulation.
I always confirm the manufacturer specifically allows use on PEX or PVC if that’s what I’m protecting — some cables explicitly limit use to water-filled pipes.
- Use 7 W/ft for exposed, high-heat-loss lines.
- 3–5 W/ft is usually enough if you add insulation.
- Confirm compatibility with PVC, PEX, copper, or steel.
Installation Style: Straight vs. Spiral/Overlap
I check whether the cable requires straight tracing or allows spiral/overlap. If my run is messy or wraps around fittings, I pick a cable that supports spiraling or overlapping.
For straight-trace cables I make sure I have the clearance to run the length without crossing or doubling back.
- Straight-trace cables: follow the manufacturer’s spacing and insulation limits.
- Spiral/overlap capable cables are best for short, exposed sections and irregular routing.
Safety Features and Certification
I always prioritize ETL, CSA, or UL certifications and look for an integrated thermostat and grounded plug. Certification is the easiest way I verify that a cable was built to safety standards.
For interior installs I prefer cables with diagnostics (indicator lights or GlowCap) so I can check operation without removing insulation.
- Choose certified cables (ETL/CSA/UL).
- Prefer built-in thermostats that switch on near freezing.
- Look for diagnostic lights or caps for easier checks.
Power and Practical Details
I plan for power: most units require a nearby grounded outlet or extension rated for outdoor use. I also check the unheated cord length — shorter unheated cords sometimes force me to relocate outlets or use an electrician.
After installation I always add pipe insulation over the heat tape; it reduces energy use and improves freeze protection.
- Check unheated cord length before ordering.
- Always insulate over the cable per instructions.
- Test the cable before final insulation using manufacturer-recommended methods.
Frequently Asked Questions
Can I use heat tape on PEX or PVC pipes?
Yes — most of the cables I tested are rated for PEX and PVC, but I always verify the specific model’s guidance. Some cables explicitly require water-filled pipes and limit installation styles, so I confirm the manufacturer’s instructions before wrapping nonmetal pipes.
Do I need to insulate the pipe after installing heat tape?
Yes. I always cover the installed cable with the recommended insulation. Insulation reduces heat loss, lowers energy use, and helps the tape maintain temperature with less run time.
How should I test a heat tape before final installation?
I uncoil the cable, plug it in, and place the thermostat section in an ice bucket per the manufacturer’s instructions. A brief test confirms the thermostat triggers; I avoid prolonged tests to prevent overheating and follow any brand-specific recommendations.
Final Take
I keep a short ETL-certified HEATIT on hand for most household jobs, the higher-output HEATIT HISD for straight exterior runs, the MAXKOSKO when routing is awkward, and the Radiant Solutions tape when I want a heavy-duty interior option with diagnostics and a long warranty.
Pick the cable that matches your routing needs (straight vs. spiral), check the wattage against exposure and insulation, and test before you finalize the install. Do that and you’ll dramatically reduce the risk of winter freeze-ups.
")