
I tested four microwave carts to find compact, sturdy, and outlet-equipped stands that free up counter space and organize small kitchens.
I live in a small kitchen and have tried multiple microwave carts to reclaim countertop space while keeping appliances accessible.
In this roundup I focused on footprint, storage configuration, build quality, mobility, and whether the rack includes power for appliances.
Below are the four microwave carts I used most and the situations where each one made the biggest difference in my kitchen.
I compared each cart by footprint, shelf layout and adjustability, load capacity and stability (bracing/steel frame), assembly effort, mobility/locking wheels, and presence or safety of built-in outlets.
1. Mr IRONSTONE Microwave Cart – Best for Small Spaces
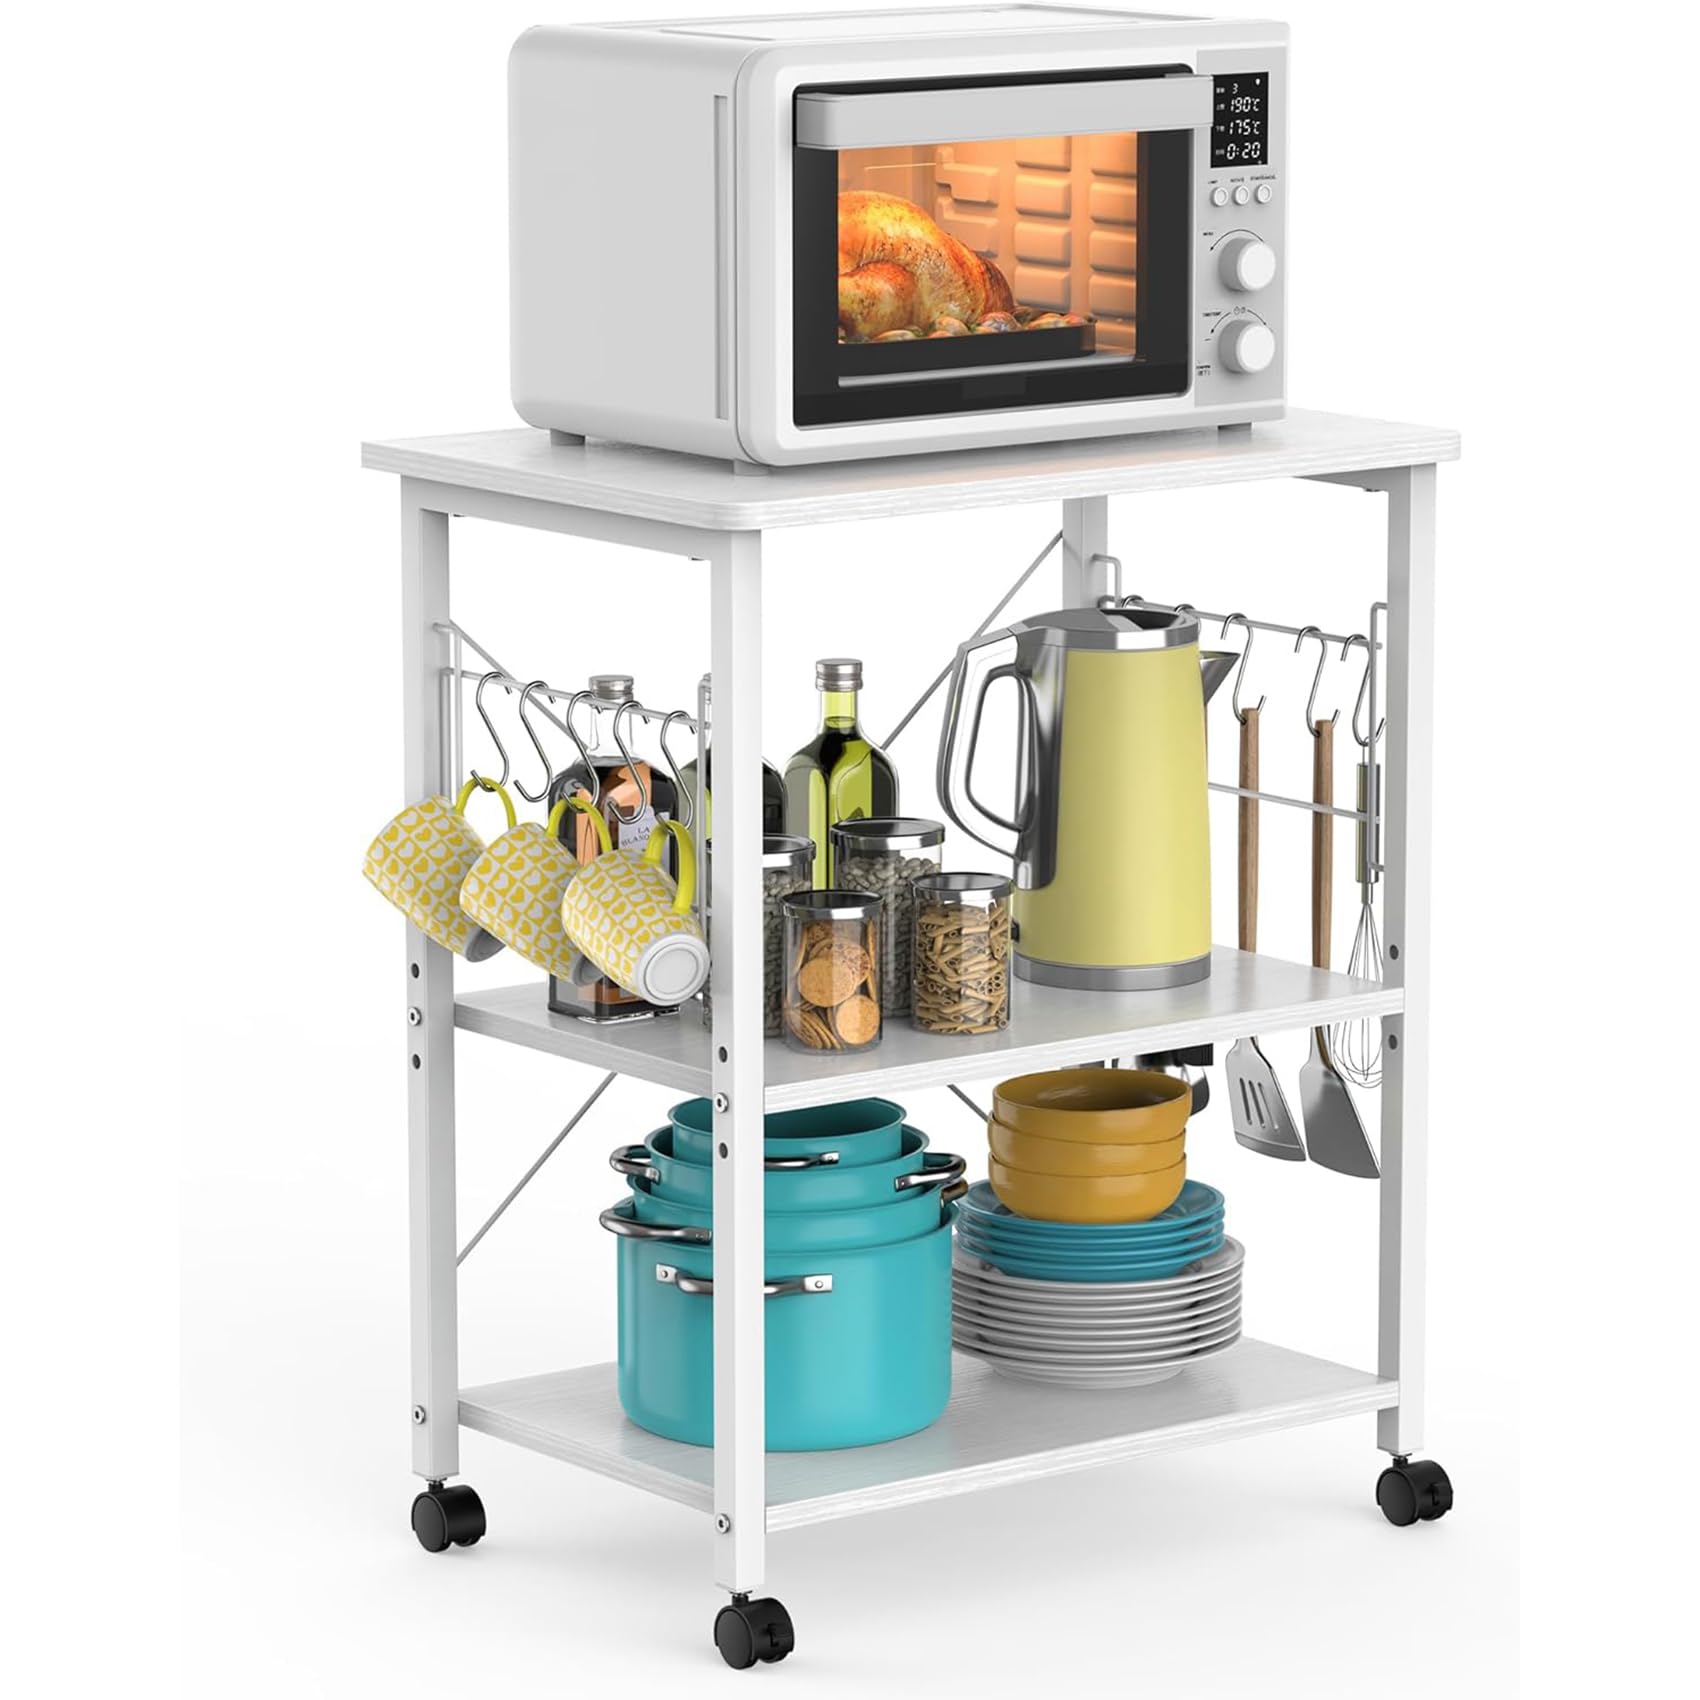
A compact 3-tier cart with lockable wheels, scratch-resistant surfaces, S-hooks, and a steel frame that fits tight kitchens, dorms, and studios.
Why I picked it: Compact footprint, easy assembly, and lockable wheels for tight spaces.
Best for: Dorm rooms, studios, tiny kitchens, or any place I need a narrow appliance stand.
An affordable option for basic storage and mobility.
Pros
- Very compact footprint
- Lockable rolling wheels
- Scratch-resistant surface
- S-shaped hooks for utensils
Cons
- Budget particleboard feels lightweight
- Packaging can arrive battered
My take
I reached for this cart when I needed a very narrow stand to hold a microwave and a small coffee maker. The three tiers give me a dedicated top for the microwave and two shelves for mugs and supplies without taking much floor space.
Assembly was straightforward and fast; all parts were labeled and the included hardware made it possible to finish in under 30 minutes. The metal X-brace in back really improves lateral stability once tightened.
I move it around my apartment a lot and appreciate that two wheels lock so the cart stays put during use. The surface wipes clean easily and resists light scratching, which keeps it looking tidy in a high-traffic spot.
This is a budget-minded build: engineered wood panels feel lighter than solid wood, but the steel frame supports typical countertop appliances just fine. Expect a good value if you need a simple, mobile microwave station.
2. VASAGLE Baker’s Rack (Golden Oak & White) – Best for Style & Organization
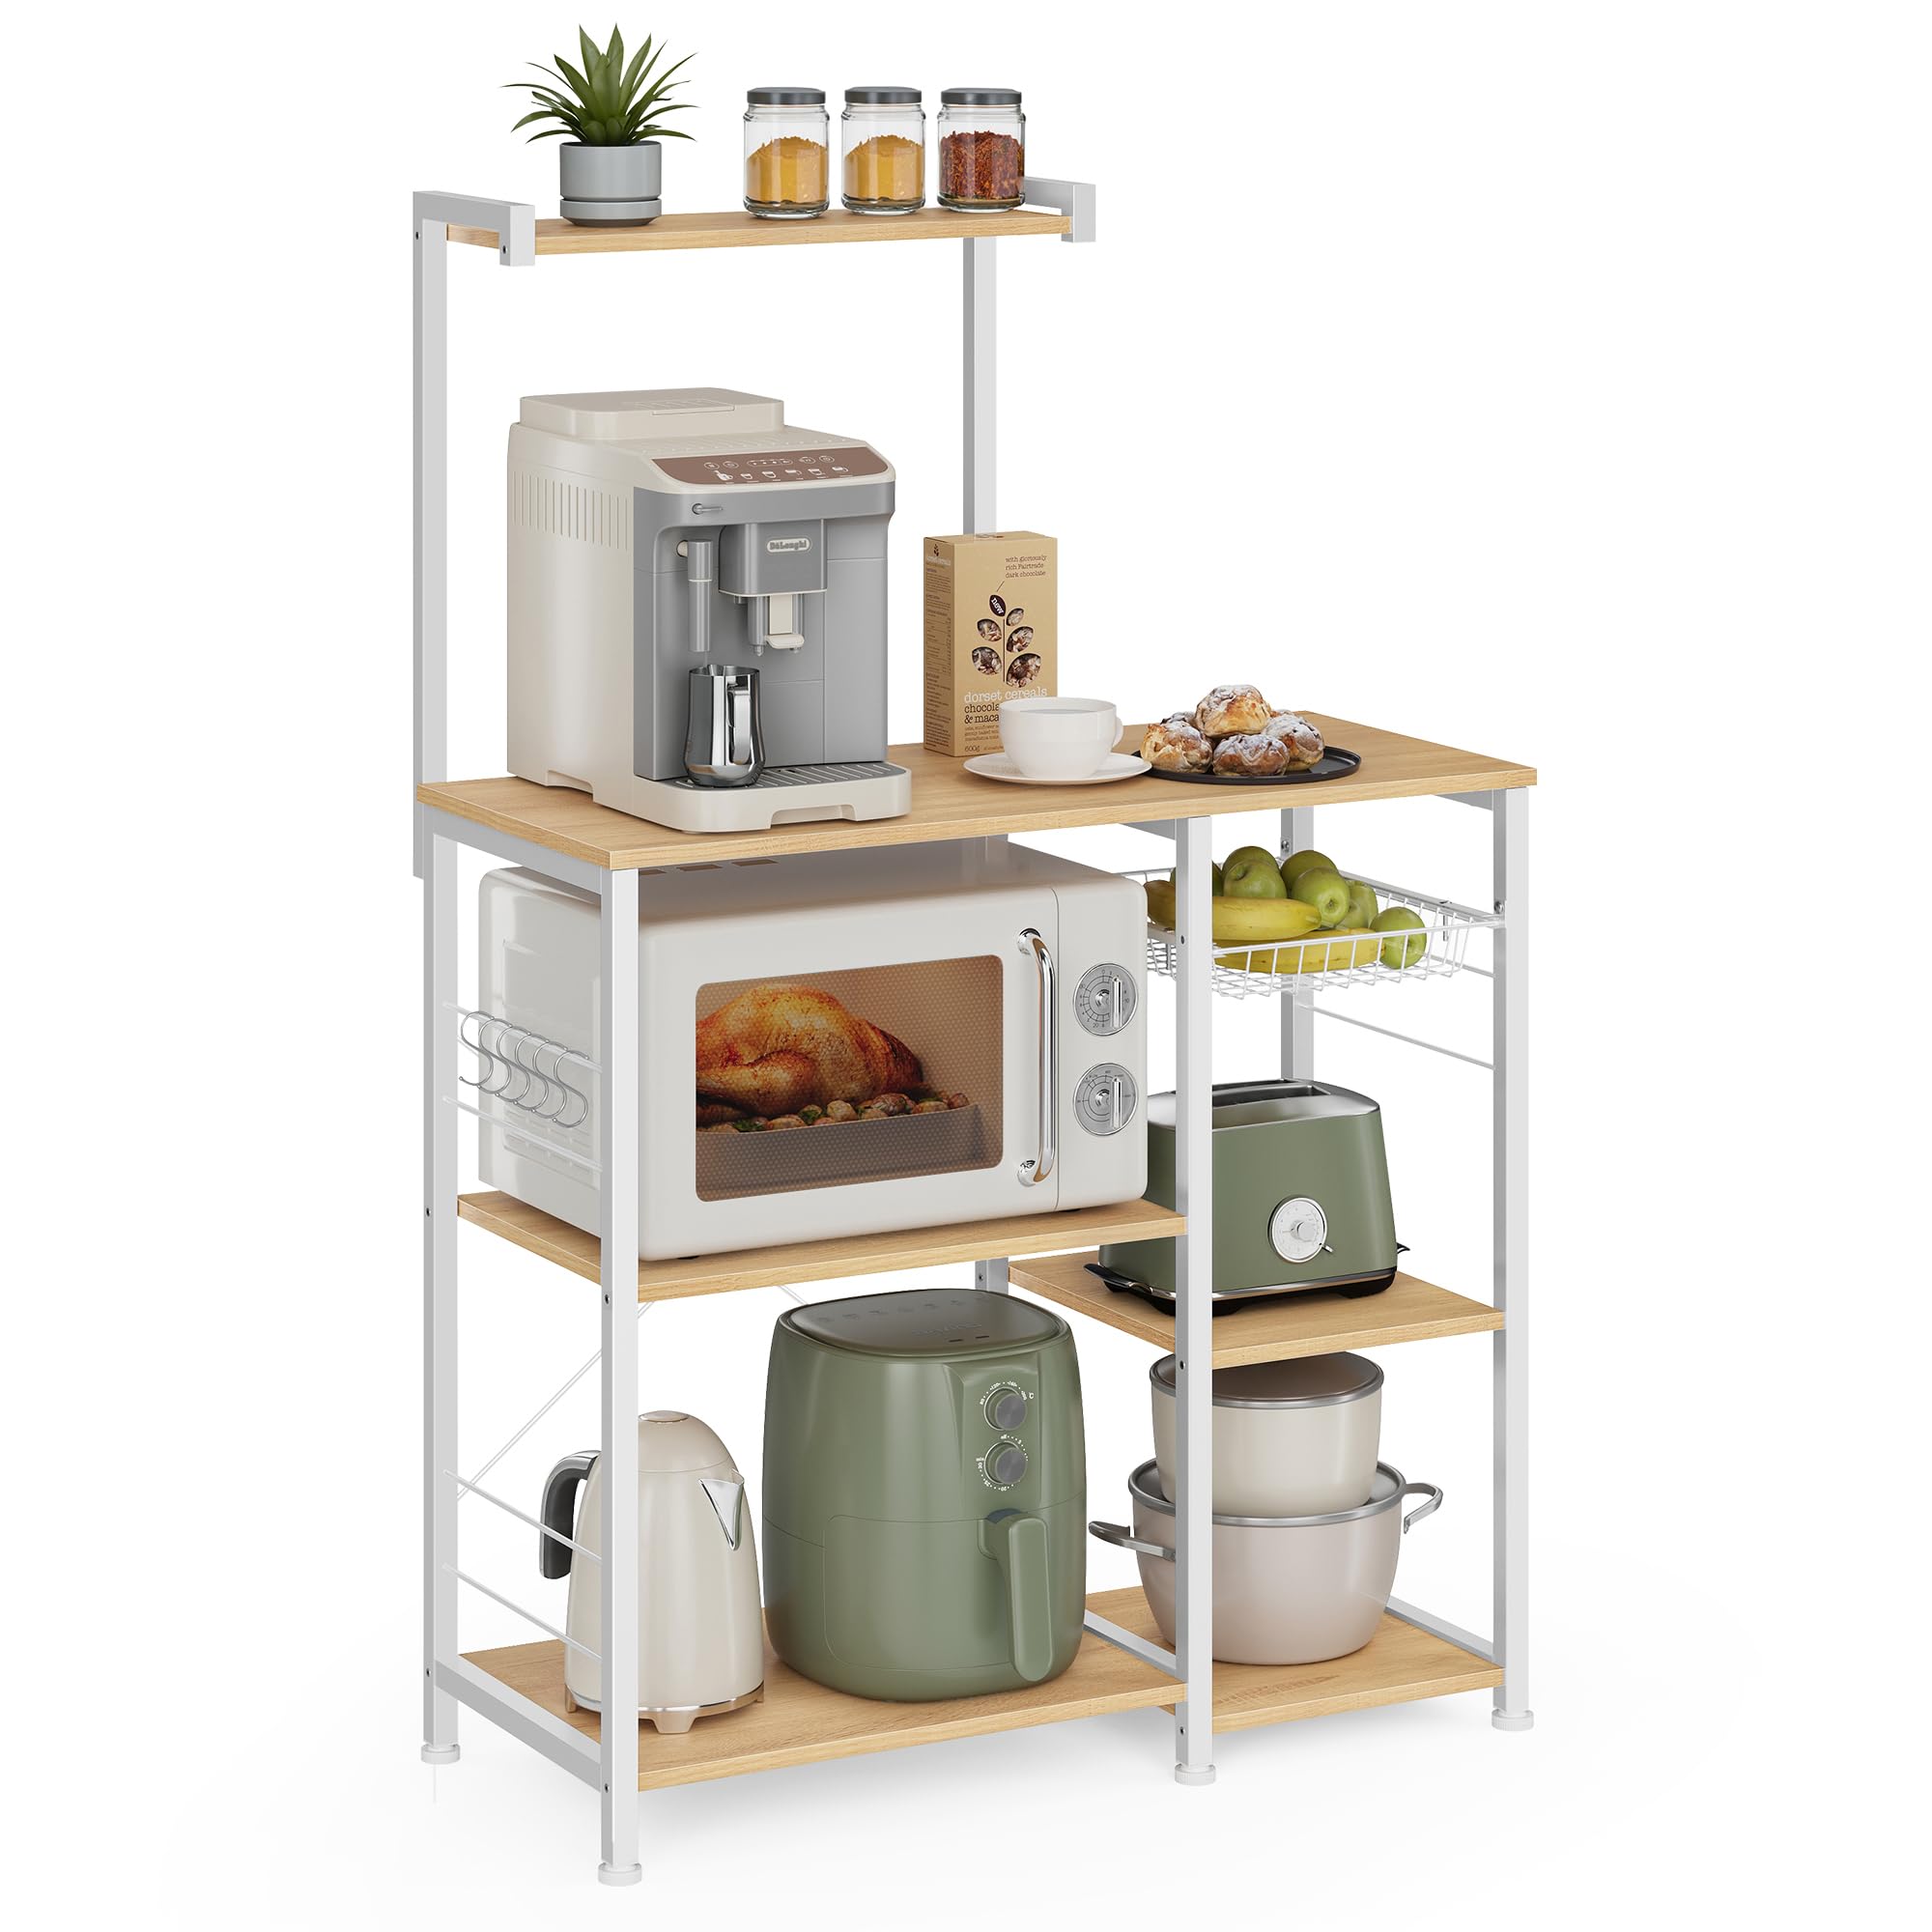
A visually appealing baker's rack with labeled parts, adjustable feet, wire baskets, hooks, and an anti-tip kit that balances looks and storage.
Why I picked it: Combines attractive finishes with categorized storage and anti-tip safety.
Best for: Organizing spices, displaying kitchenware, and creating a stylish coffee bar.
A mid-range option that emphasizes looks and practical storage.
Pros
- Attractive golden oak and white finish
- Wire basket and multiple hooks
- Adjustable feet for leveling
- Anti-tip kit included
Cons
- Upper screw alignment can be fussy
- Particleboard isn’t premium hardwood
My take
I put this baker's rack in a corner where I needed both function and a bit of style. The golden oak shelves and white frame elevated the space more than a plain metal cart would.
The rack offers a thoughtful storage setup: a top shelf for spices, hooks for utensils, a wire basket for odd items, and roomy lower shelves for small appliances. That categorized storage made my counter clutter disappear.
Assembly took a little patience—some of the upper screw holes required careful alignment—but labeled parts and diagrams kept me on track. Once built, the steel tubes and X-brace delivered a steady, confidence-inspiring feel.
After months of use I still appreciate the way it fits into the room visually while handling everyday loads. If you want something that looks intentional rather than utilitarian, this was my go-to pick.
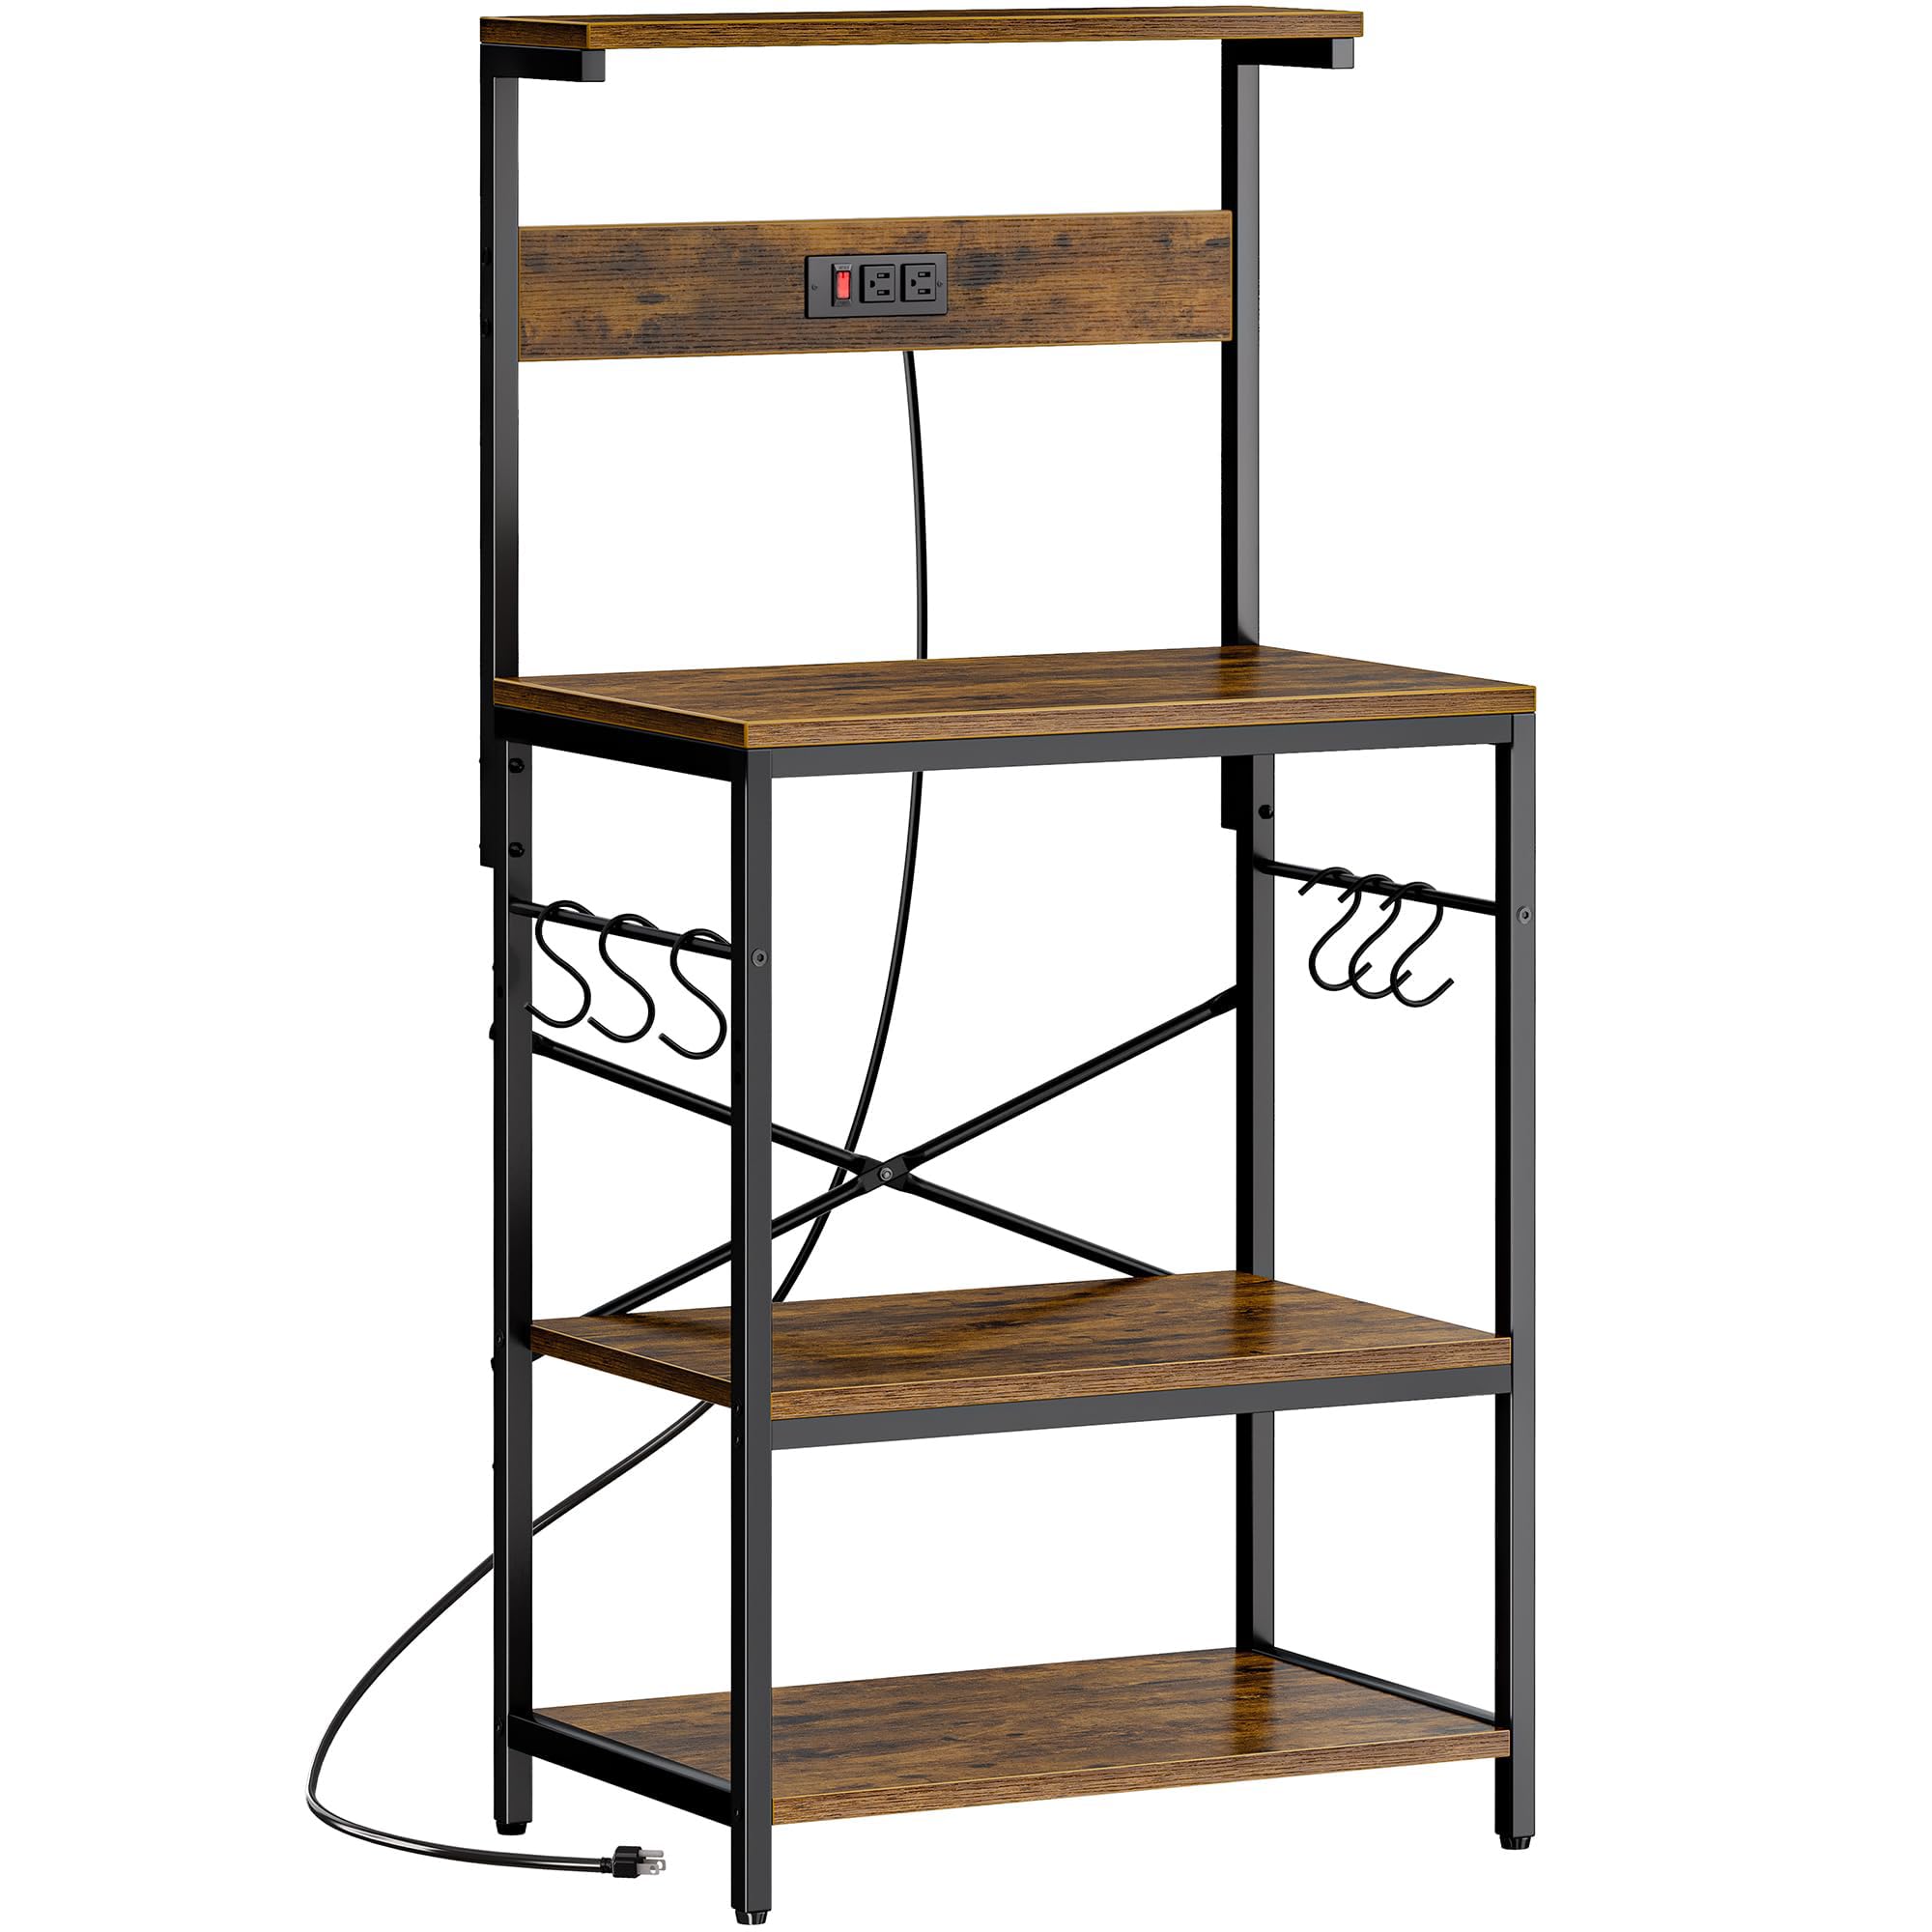
3. VASAGLE Baker’s Rack with Power Strip – Best with Power Outlets

A versatile baker's rack that includes a built-in power strip (four AC outlets), overload protection, adjustable shelves, and a pull-out wire basket.
Why I picked it: Integrated, protected power makes appliance placement simple and tidy.
Best for: Coffee bars, microwave-and-blender setups, and kitchens lacking nearby outlets.
A practical mid-range pick for outlet convenience.
Pros
- Built-in power strip with multiple outlets
- Adjustable middle shelves
- Hidden cord for tidier look
- Very sturdy over time
Cons
- Requires wall anchoring for max safety
- Taller footprint than compact stands
My take
I’ve owned this rack for several years and kept coming back to it when I needed a powered station for my coffee maker, toaster oven, and blender. The built-in power strip made plugging in multiple appliances effortless and kept cords from running across the countertop.
The power strip includes overload and leakage protection plus an on-off switch, which gave me confidence using higher-draw appliances. Hiding the cord behind the frame also left the area looking much neater.
Adjustable middle shelves let me tweak the space for different appliance heights, and the pull-out wire basket is useful for stashing packets and utensils. It assembled quickly and felt robust from day one.
If you want a durable powered rack that functions as a proper appliance station, this one balanced safety features and long-term sturdiness in a way I found very helpful.
4. SUPERJARE Bakers Rack with Power Outlet – Best Value with Outlets
A budget-friendly 4-tier rack with two built-in outlets, removable shelf positions, six S-hooks, and a steel frame with P2 particleboard shelves.
Why I picked it: Power outlets plus flexible shelf positions at a budget price.
Best for: Creating a coffee station or holding a microwave plus an air fryer affordably.
A budget-friendly choice that still includes outlet convenience.
Pros
- Built-in outlets with air switch
- Removable/adjustable shelf positions
- Six S-shaped hooks
- Solid steel frame
Cons
- Instructions demand patience
- Particleboard thinner than higher-end models
My take
I added this rack to my kitchen when I wanted outlets on the shelf level without spending much. The two integrated outlets and the air switch made it simple to power a coffee maker and toaster at the same time.
Assembly required attention to the instruction note about not tightening everything until the end; following that advice made the process go smoothly. Parts were labeled and fit together cleanly once I took that approach.
The removable shelf option allowed me to fit a taller air fryer on the lower shelf while keeping a microwave above. The steel legs felt sturdy once all fasteners were secured, and the S-hooks provided easy mug storage.
For the price and features, this rack gave me the most outlet-equipped flexibility without moving up into a higher price bracket.
How I Choose a Microwave Cart
Key features I look for
I prioritize footprint, stability, storage layout, and outlet availability when I evaluate a microwave cart. Those factors determine whether a cart truly frees up counter space or just rearranges clutter.
I also consider assembly complexity and long-term durability; some particleboard models are perfectly fine, but a solid steel frame or X-brace is what I want if I plan to load heavier appliances.
- Footprint: Measure the cart's width and depth against your space.
- Shelf adjustability: I prefer adjustable shelves for taller appliances.
- Power options: Built-in outlets simplify appliance placement.
- Mobility: Lockable casters are essential if you want a movable station.
- Stability: Look for X-bracing, anti-tip kit, or adjustable feet.
Safety and power considerations
If a cart includes outlets, I check for overload protection, a visible on/off switch, and a way to hide the cord so the setup stays tidy and safer around water or pets.
I anchor taller units to the wall when provided with an anti-tip kit; that’s a small step that prevents wobble and keeps appliances secure.
- Confirm wattage limits on built-in strips before plugging multiple high-draw appliances.
- Use the anti-tip hardware on tall racks for extra safety.
Assembly tips from my experience
I always unpack and sort labeled parts before starting; that saves time and avoids backtracking. Many of these carts include labeled pieces and simple diagrams.
Don’t fully tighten fasteners until the frame is aligned. That trick made assembly much easier across multiple models I’ve built.
- Sort parts first and follow the 'don’t tighten until aligned' advice.
- Use a power driver with appropriate care to speed up the process.
Frequently Asked Questions
Can these carts safely hold a microwave?
Yes—most of the carts I tested support typical countertop microwaves if you follow the listed weight guidance. I prefer racks with a steel frame or X-brace for added stability and always use the anti-tip kit where supplied.
Are the built-in power strips safe to use with kitchen appliances?
I look for overload protection, an on/off switch, and explicit wattage limits. The powered racks I used include safety features and hid cords tidily; still, I avoid plugging multiple high-draw devices beyond the strip's stated capacity.
How difficult is assembly?
Most of these racks come with labeled parts and diagrams and assemble in under an hour. My best tip is to keep fasteners loose until everything aligns—this makes the process much smoother.
Final Take
If I need the smallest possible footprint and mobility, the Mr IRONSTONE cart was my go-to. It’s compact, locks in place, and cleans up easily.
For a balance of style and organized storage I reached for the VASAGLE golden oak and white rack. If I wanted integrated power, the VASAGLE model with the power strip was the most reliable long-term option I owned.
When I wanted the best value that still included outlets and flexible shelf positions, the SUPERJARE rack gave me the most feature-packed solution for the price. Choose the cart that matches your space, appliance needs, and whether you need built-in outlets.
")