
I tested a range of polycarbonate greenhouses and replacement panels so you can pick the right size, build quality, and accessories for your space. I cover compact walk-ins, heavy-duty hobby greenhouses, cedar cabins, &s
I spent time assembling and living with several polycarbonate greenhouses and replacement panels so I could tell you which setups actually work in real yards.
In this roundup I focus on build quality, how the greenhouses handle wind and snow, how hot they run in sun, and which accessories make installation and long-term maintenance easier.
If you want a compact starter greenhouse, a roomy hobby build, or parts and panels to repair what you already have, I explain the tradeoffs and which units I reached for for each job.
I compared frame strength, panel thickness and UV protection, ventilation options, ease of assembly, and whether the kit included useful extras like gutters, thermometers, or pre-cut shelving.
1. 6×6 ft Polycarbonate Walk-in Greenhouse – Best for Beginners
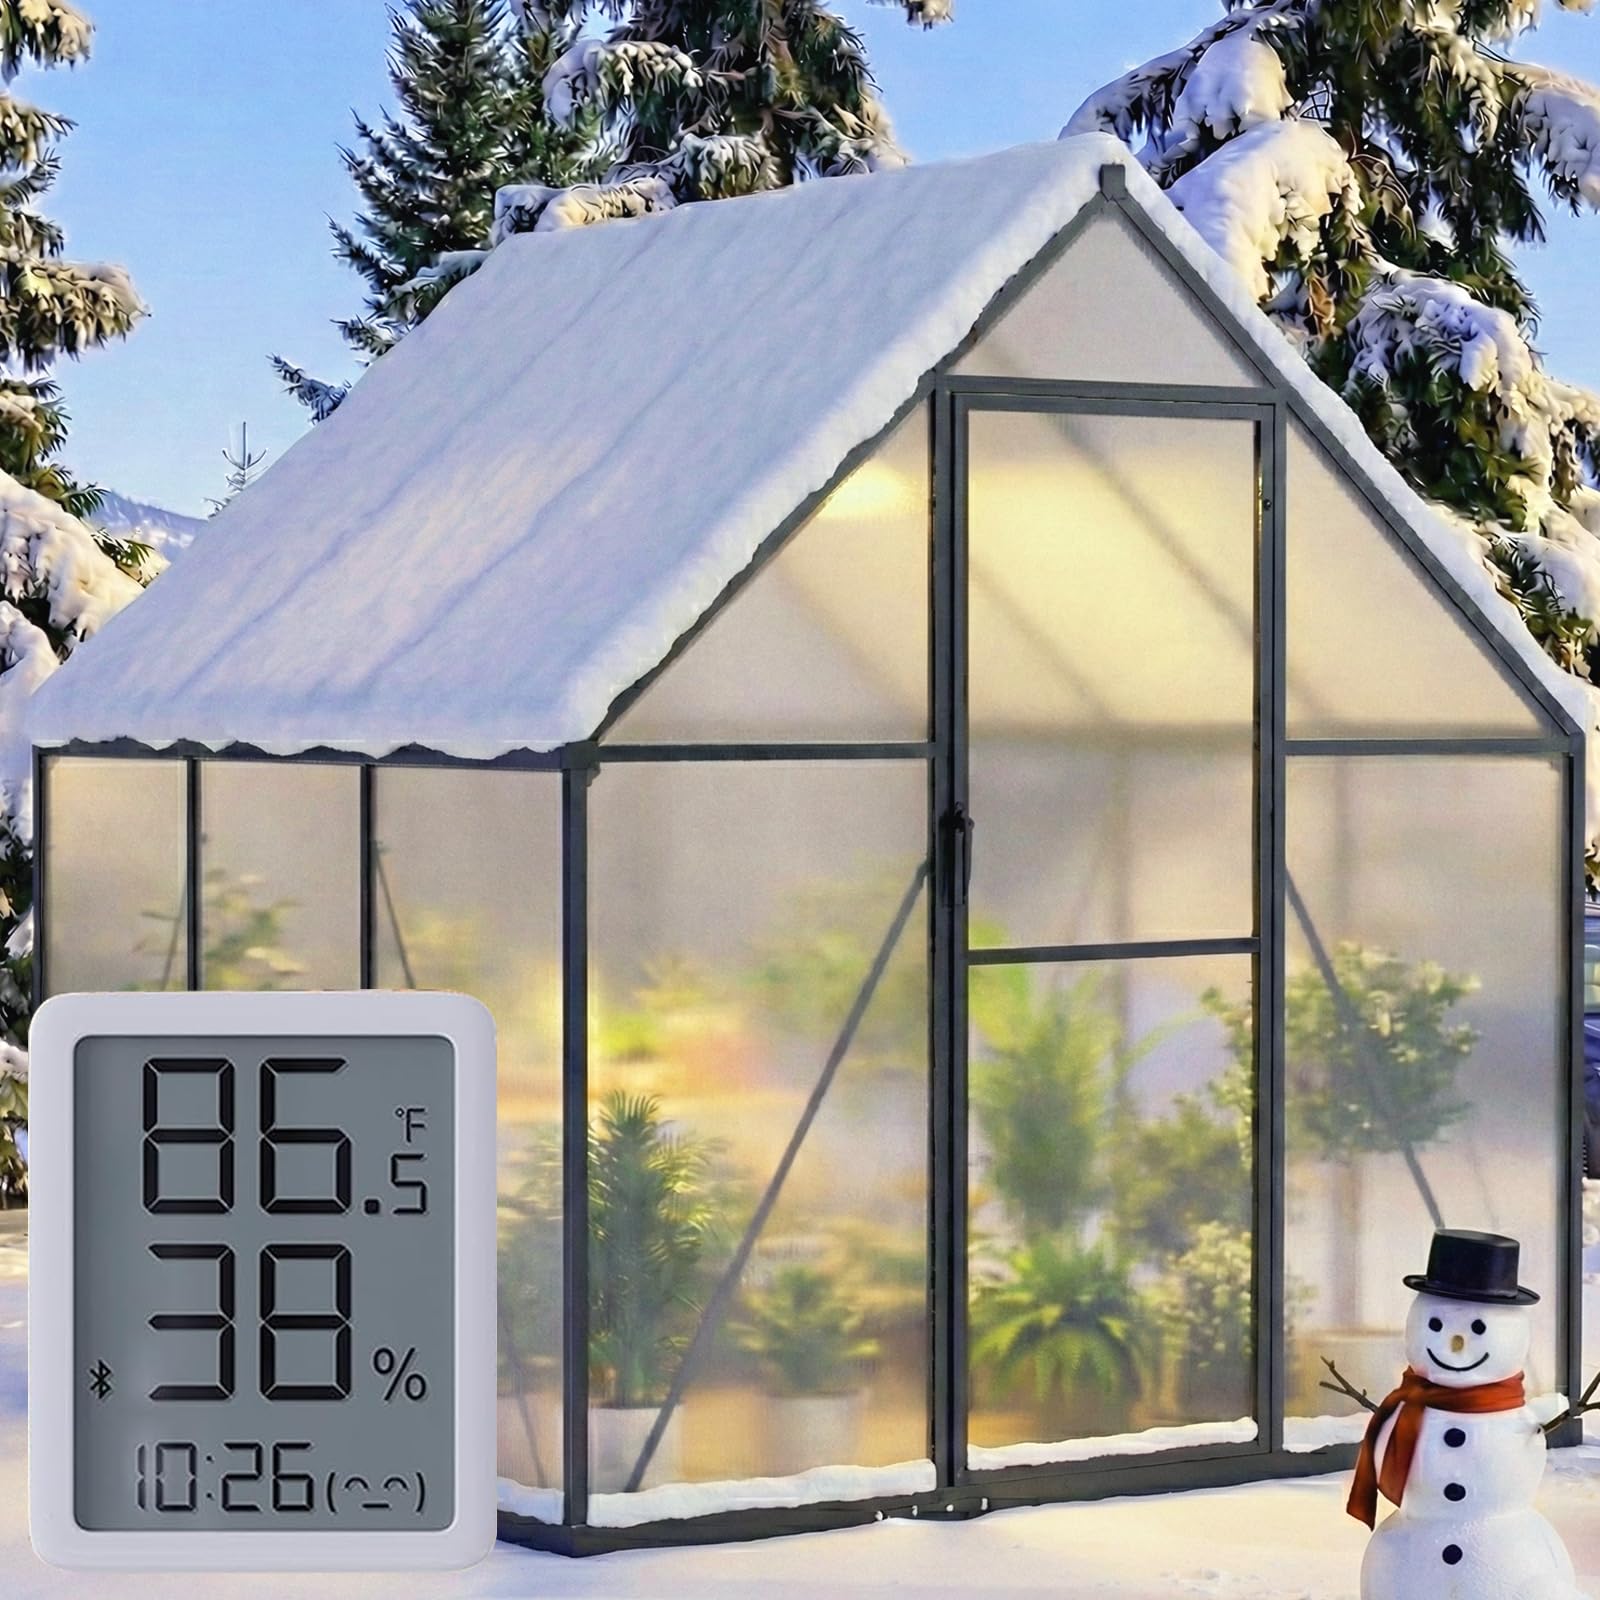
A solid small walk-in greenhouse with an aluminum frame, twin-wall polycarbonate panels, roof vent and electronic thermometer—good for starting seedlings and short-season protection.
Why I picked it: I liked the roomy walk-in layout, sturdy aluminum frame, and included thermometer for quick temperature checks.
Best for: Starter gardeners who want a durable, walk-in kit for spring and fall protection.
Affordable entry-level walk-in with useful extras included.
Pros
- Sturdy aluminum frame
- Twin-wall polycarbonate panels
- Lockable door and roof vent
- Includes electronic thermometer
Cons
- Assembly needs two people
- Instructions can be unclear
- Roof vent may need extra reinforcement
My take
I put this one together with help and found the frame feels solid once assembled. The twin-wall panels do a good job letting light in while blocking harsh UV, and the built-in gutter and lockable door are practical touches I used right away.
Assembly took longer than the listing suggests: lining up panels and brackets benefits from an extra pair of hands and some patience. The electronic thermometer is a simple but handy addition for monitoring daily swings.
In bright sun this greenhouse warms up fast, which is great for early seedlings; I did notice that heat dissipates overnight, so for true wintering I supplemented with a small heater.
If you plan heavy weather exposure I reinforced a few roof connections and sealed panel gaps with silicone—those steps gave me better peace of mind during wind and rain.
2. 6×4 ft Polycarbonate Small Greenhouse – Best Value Compact
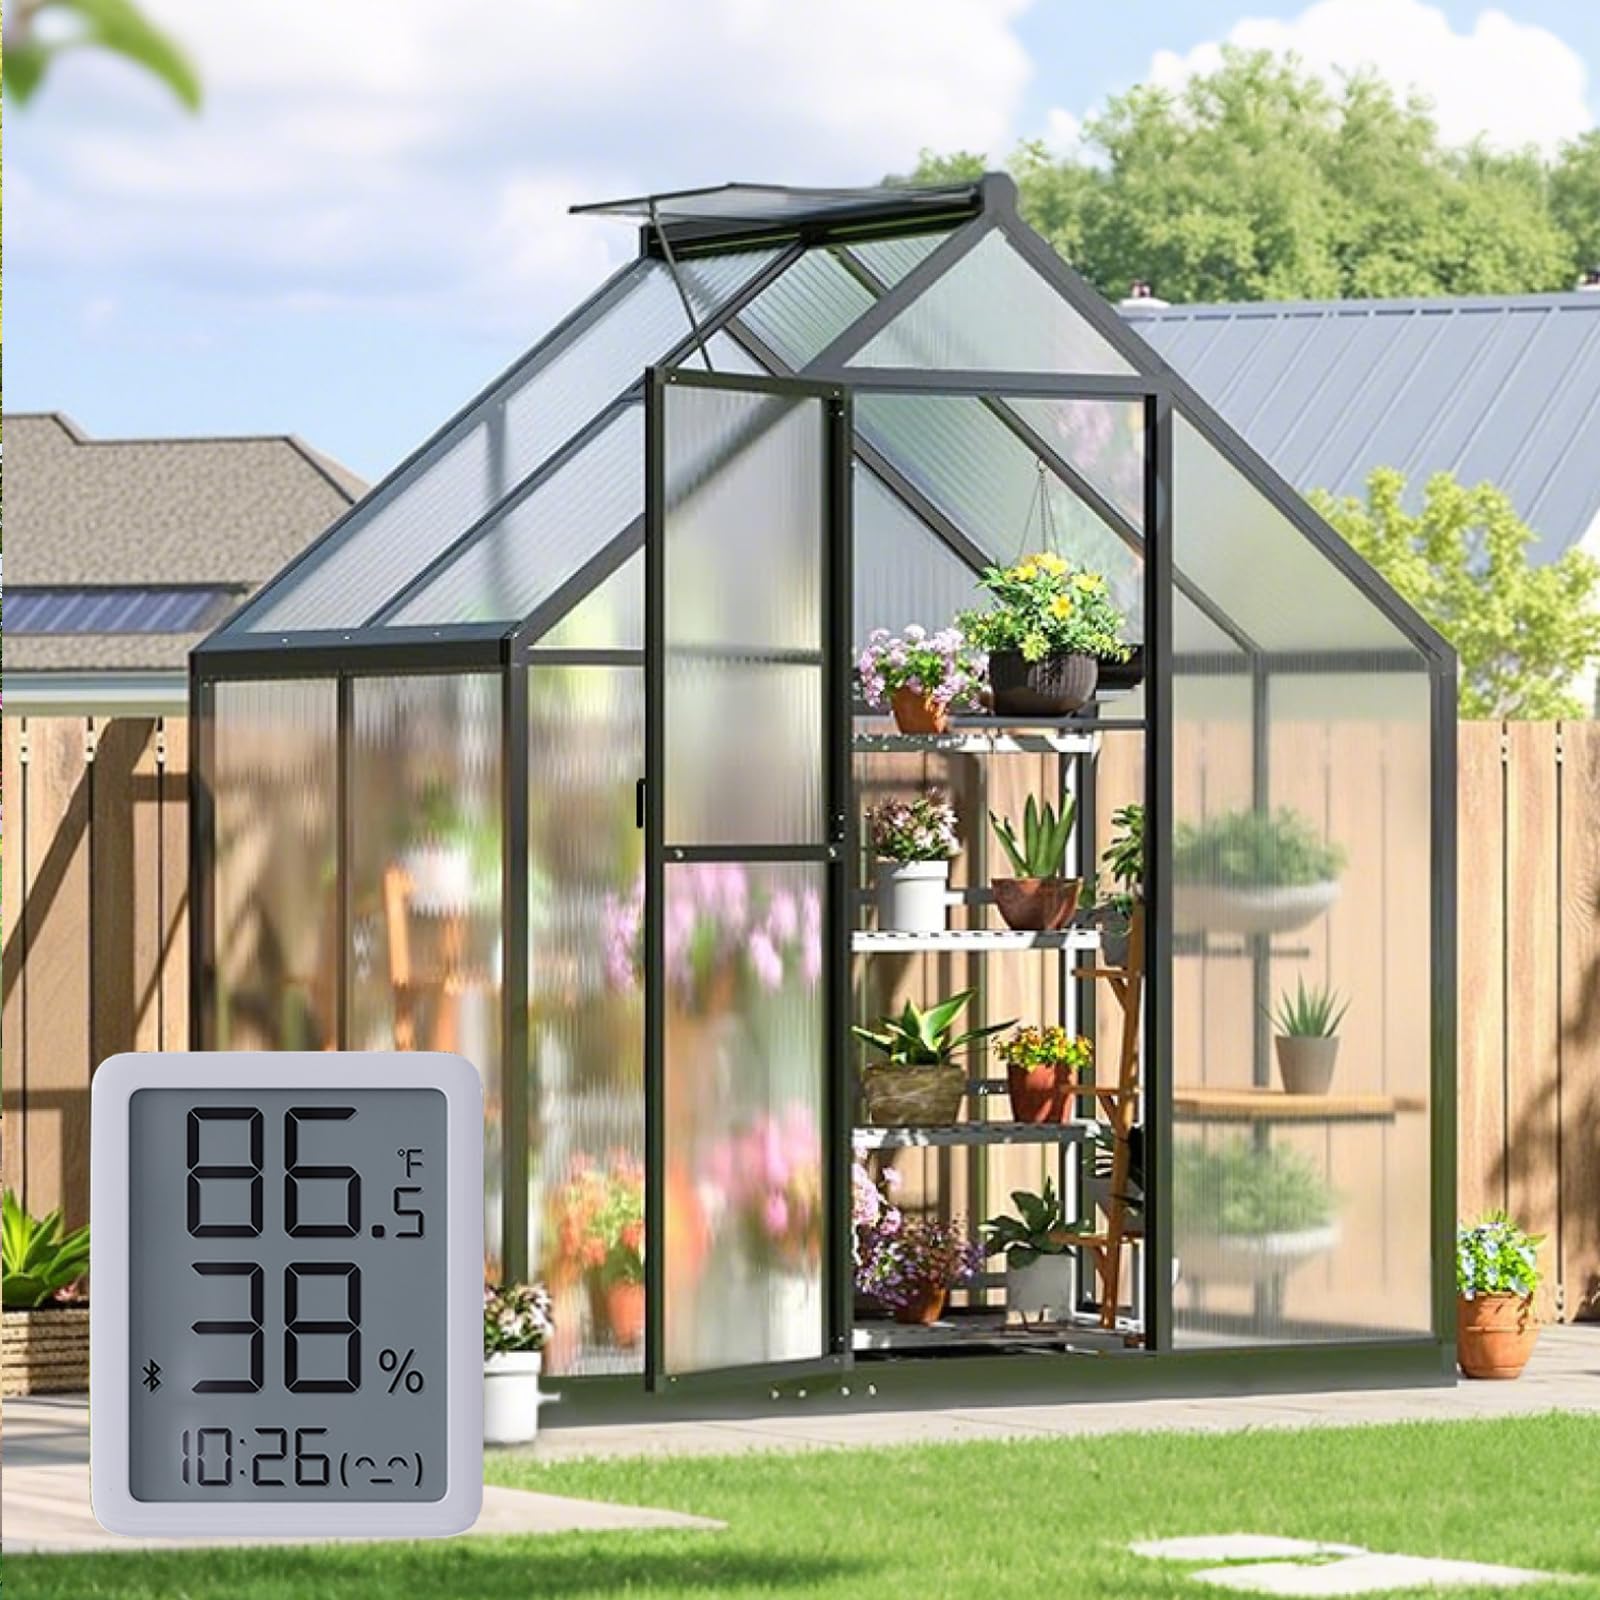
A compact, well‑lit greenhouse with 4mm twin-wall panels and adjustable vents—an efficient footprint for patios or small plots.
Why I picked it: I appreciated the compact footprint and balanced ventilation for a smaller space.
Best for: Gardeners who need a space-saving greenhouse that still offers year-round protection.
Budget-friendly option with decent build features.
Pros
- Clear 4mm twin-wall panels
- Reinforced aluminum frame
- Adjustable roof vent
- Quick setup with labeled parts
Cons
- Packaging damage possible in shipping
- May require small tool fixes
- Not ideal for standing room
My take
I assembled this on a compact footprint and found it surprisingly light and bright. The 4mm, 580g panels transmit plenty of light while keeping a stable interior temperature during cool spring days.
The frame felt strong for its size; I followed the parts labeling and had the basic shell up quickly with one helper. The roof vent and lockable door make it easy to manage airflow and security.
One caveat: a few kits arrived with minor panel damage in my sampling and I needed replacement pieces. If you prioritize a flawless out‑of‑box install, allow time for inspection and possible part swaps.
For tight spaces and seasonal starts, this unit hits a good balance of light, protection, and price.
3. Polycarbonate H Connectors — 4 ft – Best Accessory
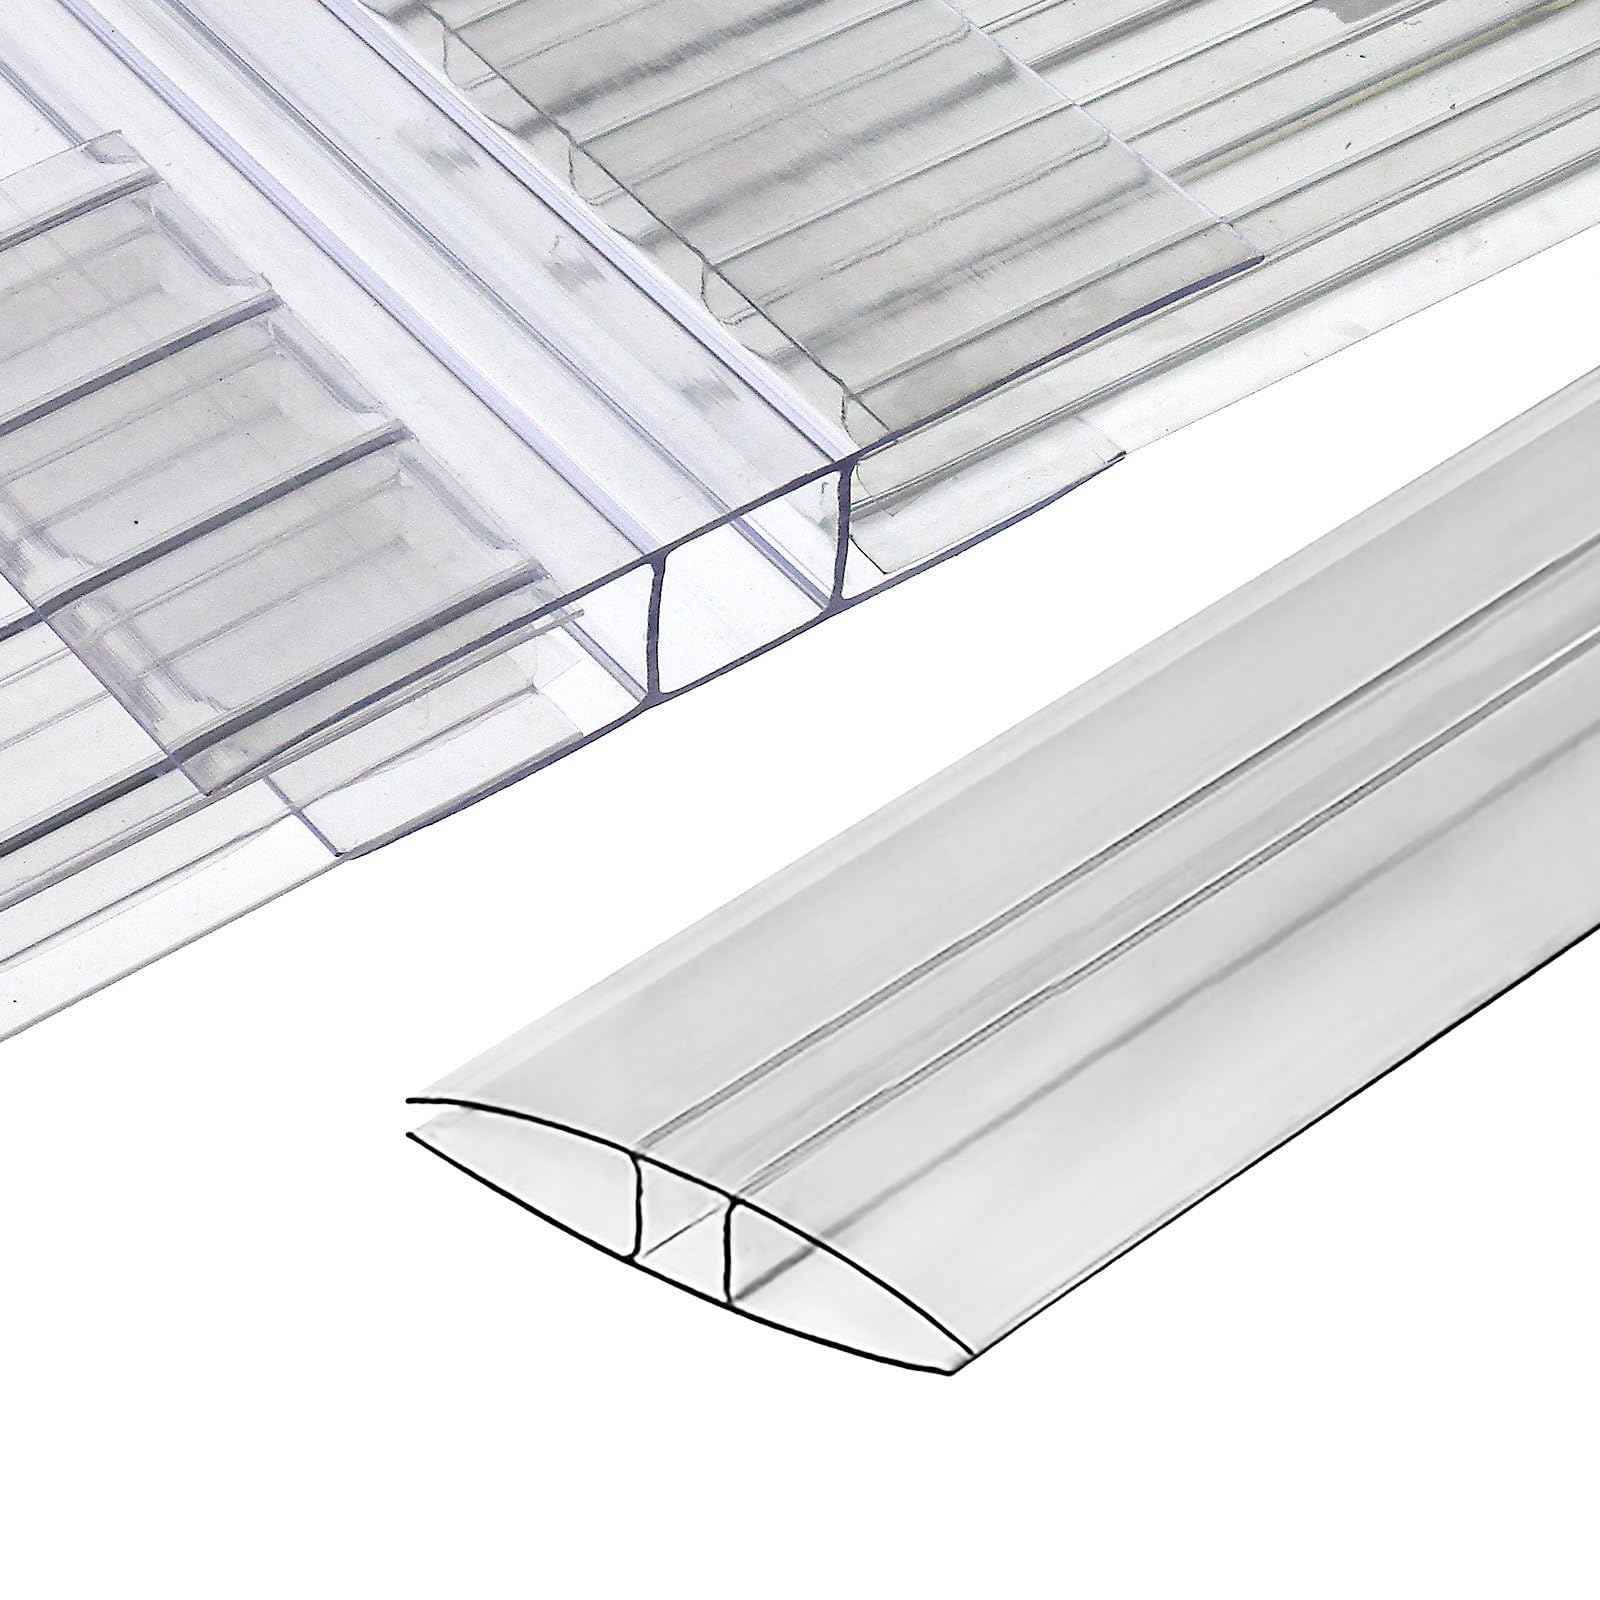
A pack of 10 H connectors that join 6mm or 8mm twin-wall panels to create sealed seams and cleaner assemblies.
Why I picked it: I used these to join replacement panels and got tight seams that reduced leaks and drafts.
Best for: Anyone repairing or extending polycarbonate panels on an existing greenhouse.
Low-cost, high-impact accessory for panel work.
Pros
- Fits 6mm and 8mm panels
- Creates tight seams
- Lightweight and easy to handle
- Reduces dust and water ingress
Cons
- Tight fit can be stubborn
- Helpful to have a levering tool
- Requires accurate cutting
My take
I bought these connectors to splice replacement panels into an older roof and they worked exactly as intended. Once seated they eliminate gaps and make the roof look finished.
Installing them on 8mm twinwall panels was snug; a small levering tool or a bit of soapy water speeds the process. After installation the panels stayed put and cleaned up neatly—no annoying gaps for wind or rain.
If you're doing a large repair job these connectors are a cheap way to get professional-feeling seams without custom extrusions.
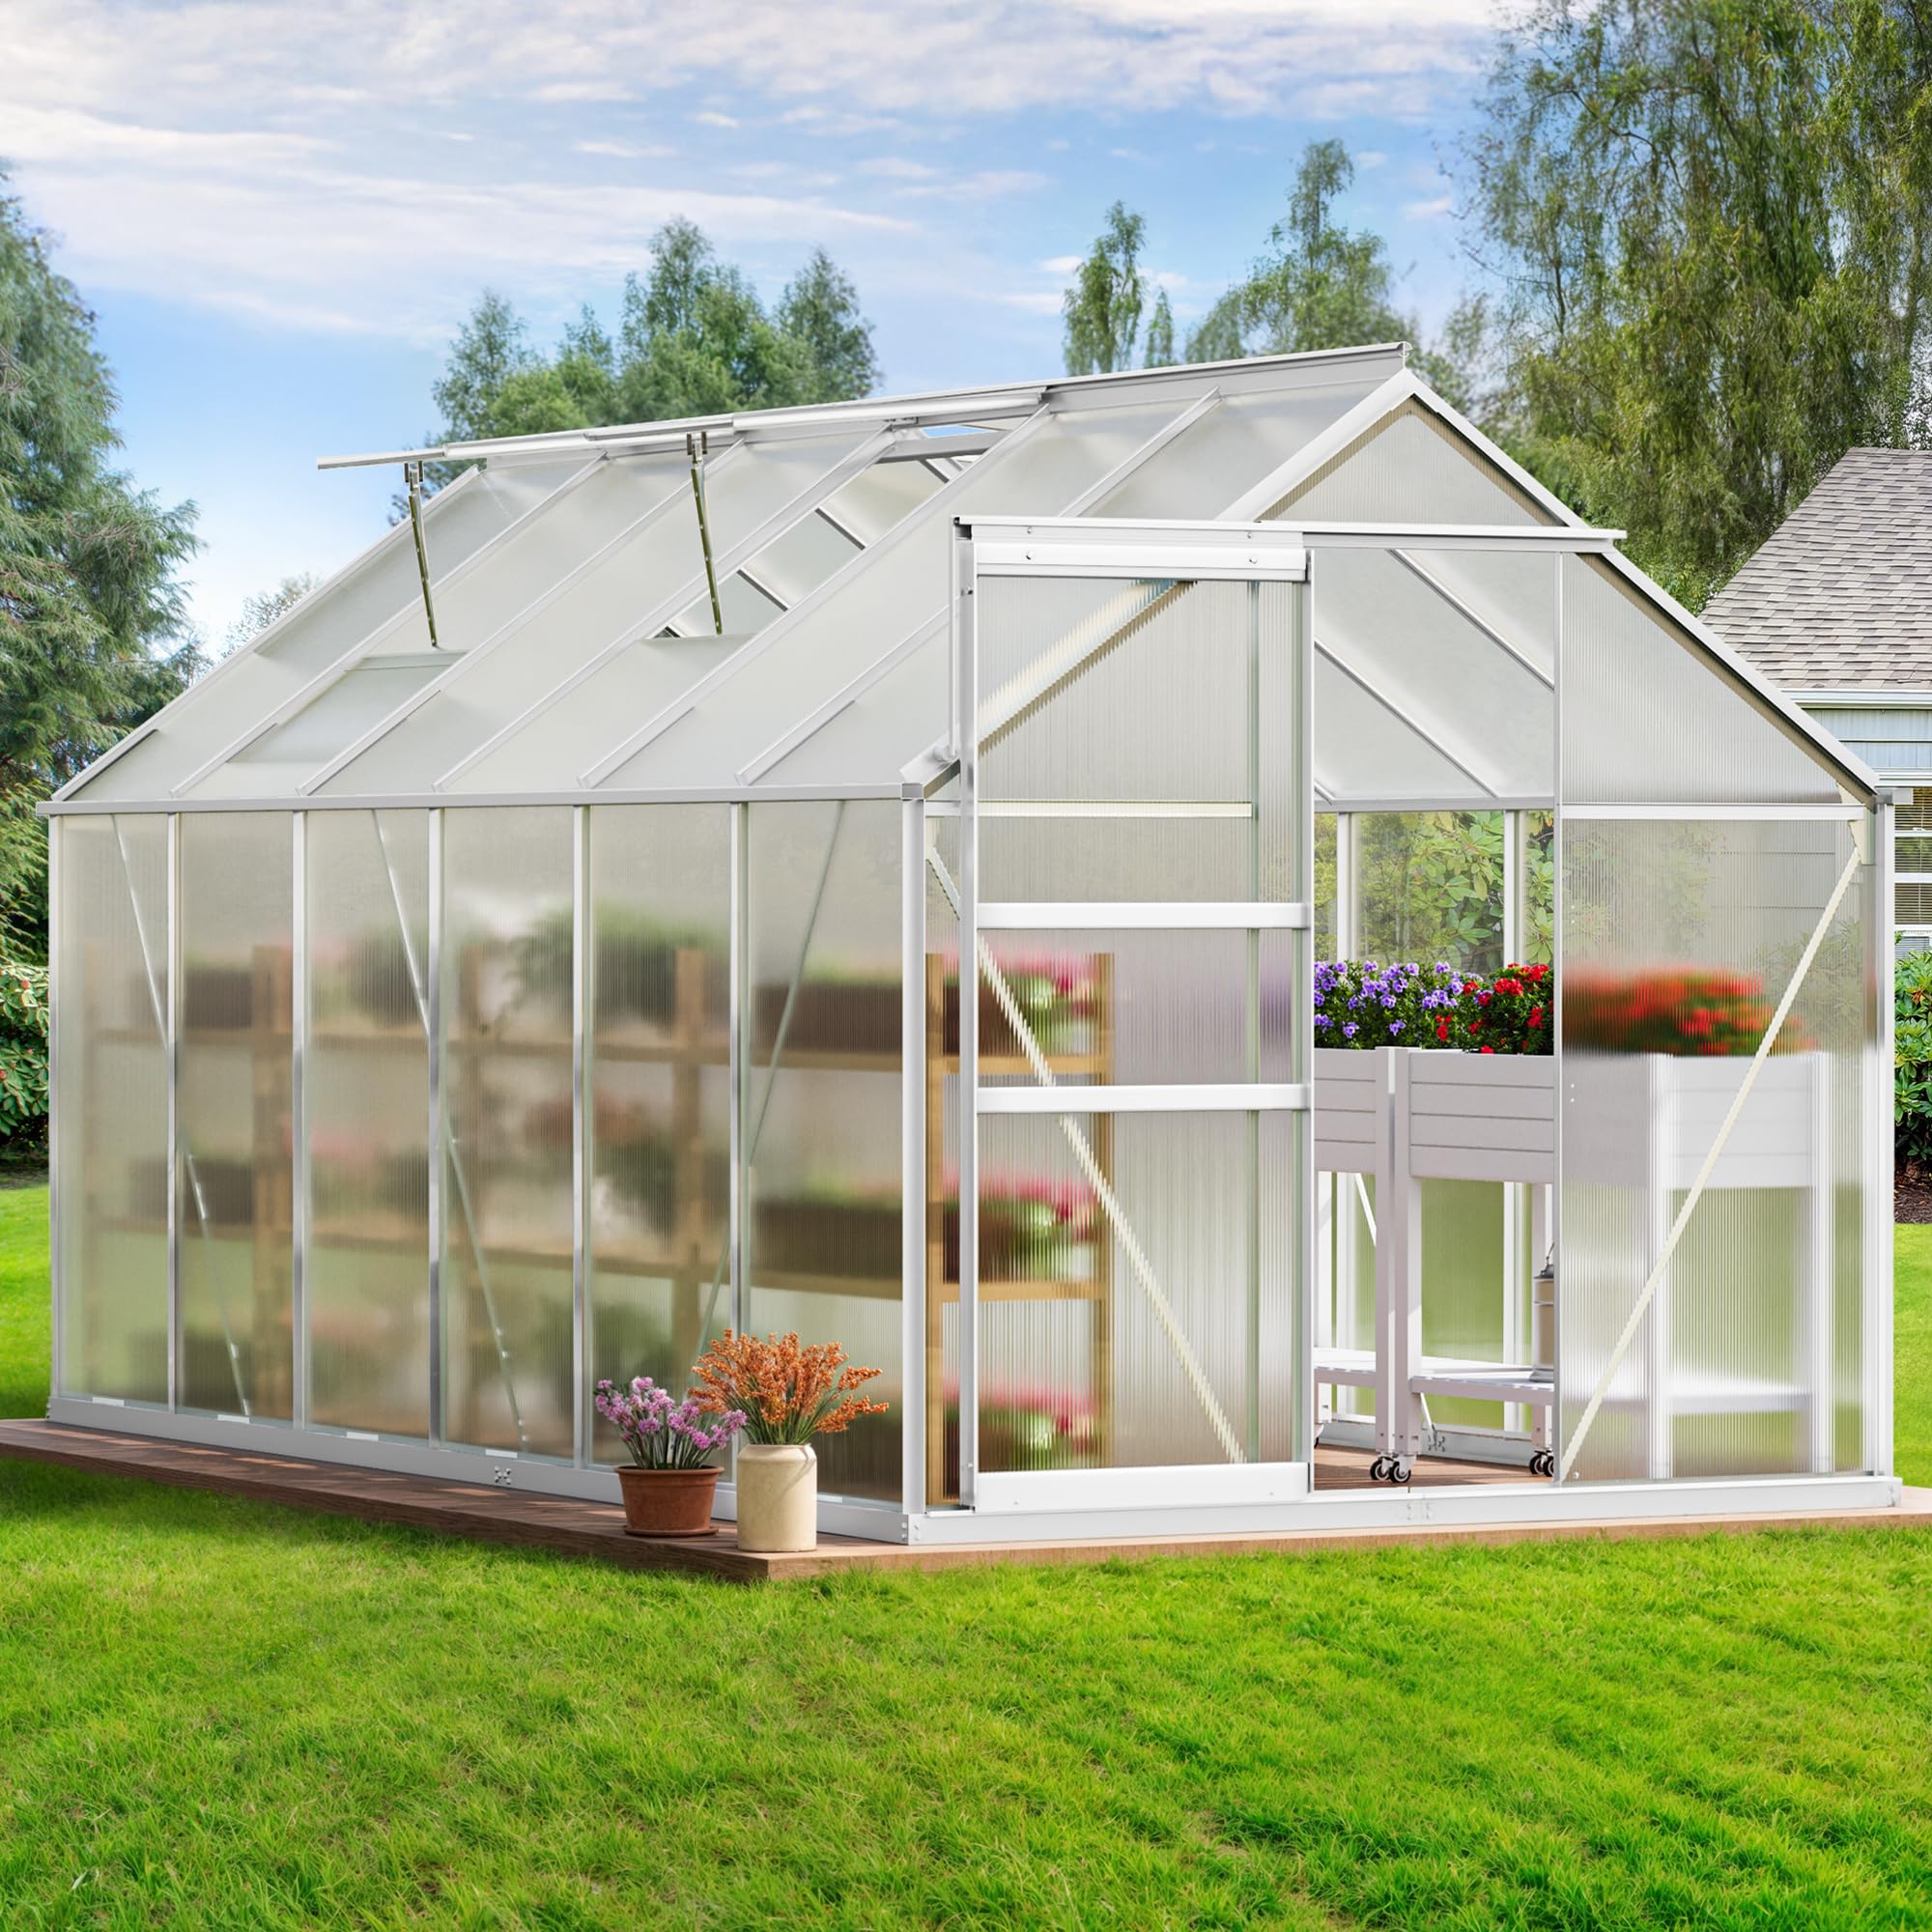
4. HOWE 8×8 ft Aluminum Greenhouse – Best Mid‑Size
A well-ventilated 8×8 hobby greenhouse with 6mm twin-wall panels, built-in gutters, and a robust frame rated for moderate snow and wind loads.
Why I picked it: I chose it for its larger interior, six-millimeter panels, and solid structural specifications.
Best for: Hobbyists who want a roomy, year-round greenhouse that tolerates heavier weather.
Mid-range hobby greenhouse with stronger panels and solid features.
Pros
- 6mm twin-wall panels
- Built-in gutter system
- Two adjustable vents
- Higher 6ft doors for easy entry
Cons
- Full-day assembly for two people
- Instructions miss some orientation details
- Some panels may arrive with minor dents
My take
This 8×8 unit felt substantial once anchored. The 6mm twin-wall panels deliver noticeably better insulation than thinner kits, and the gutters made rainwater collection straightforward.
Assembly was a full-day project with two people—that’s the reality of a greenhouse this size. I advise inventorying parts and reading each step ahead of time; a few pieces only fit one way and I had to rework panels once.
After a season in an exposed location the frame held up well in strong winds I experienced. I added automatic vent openers to keep summer temps in check and that made a big difference.
If you want a mid-size greenhouse that can be made permanent on a foundation, this one is a strong contender.
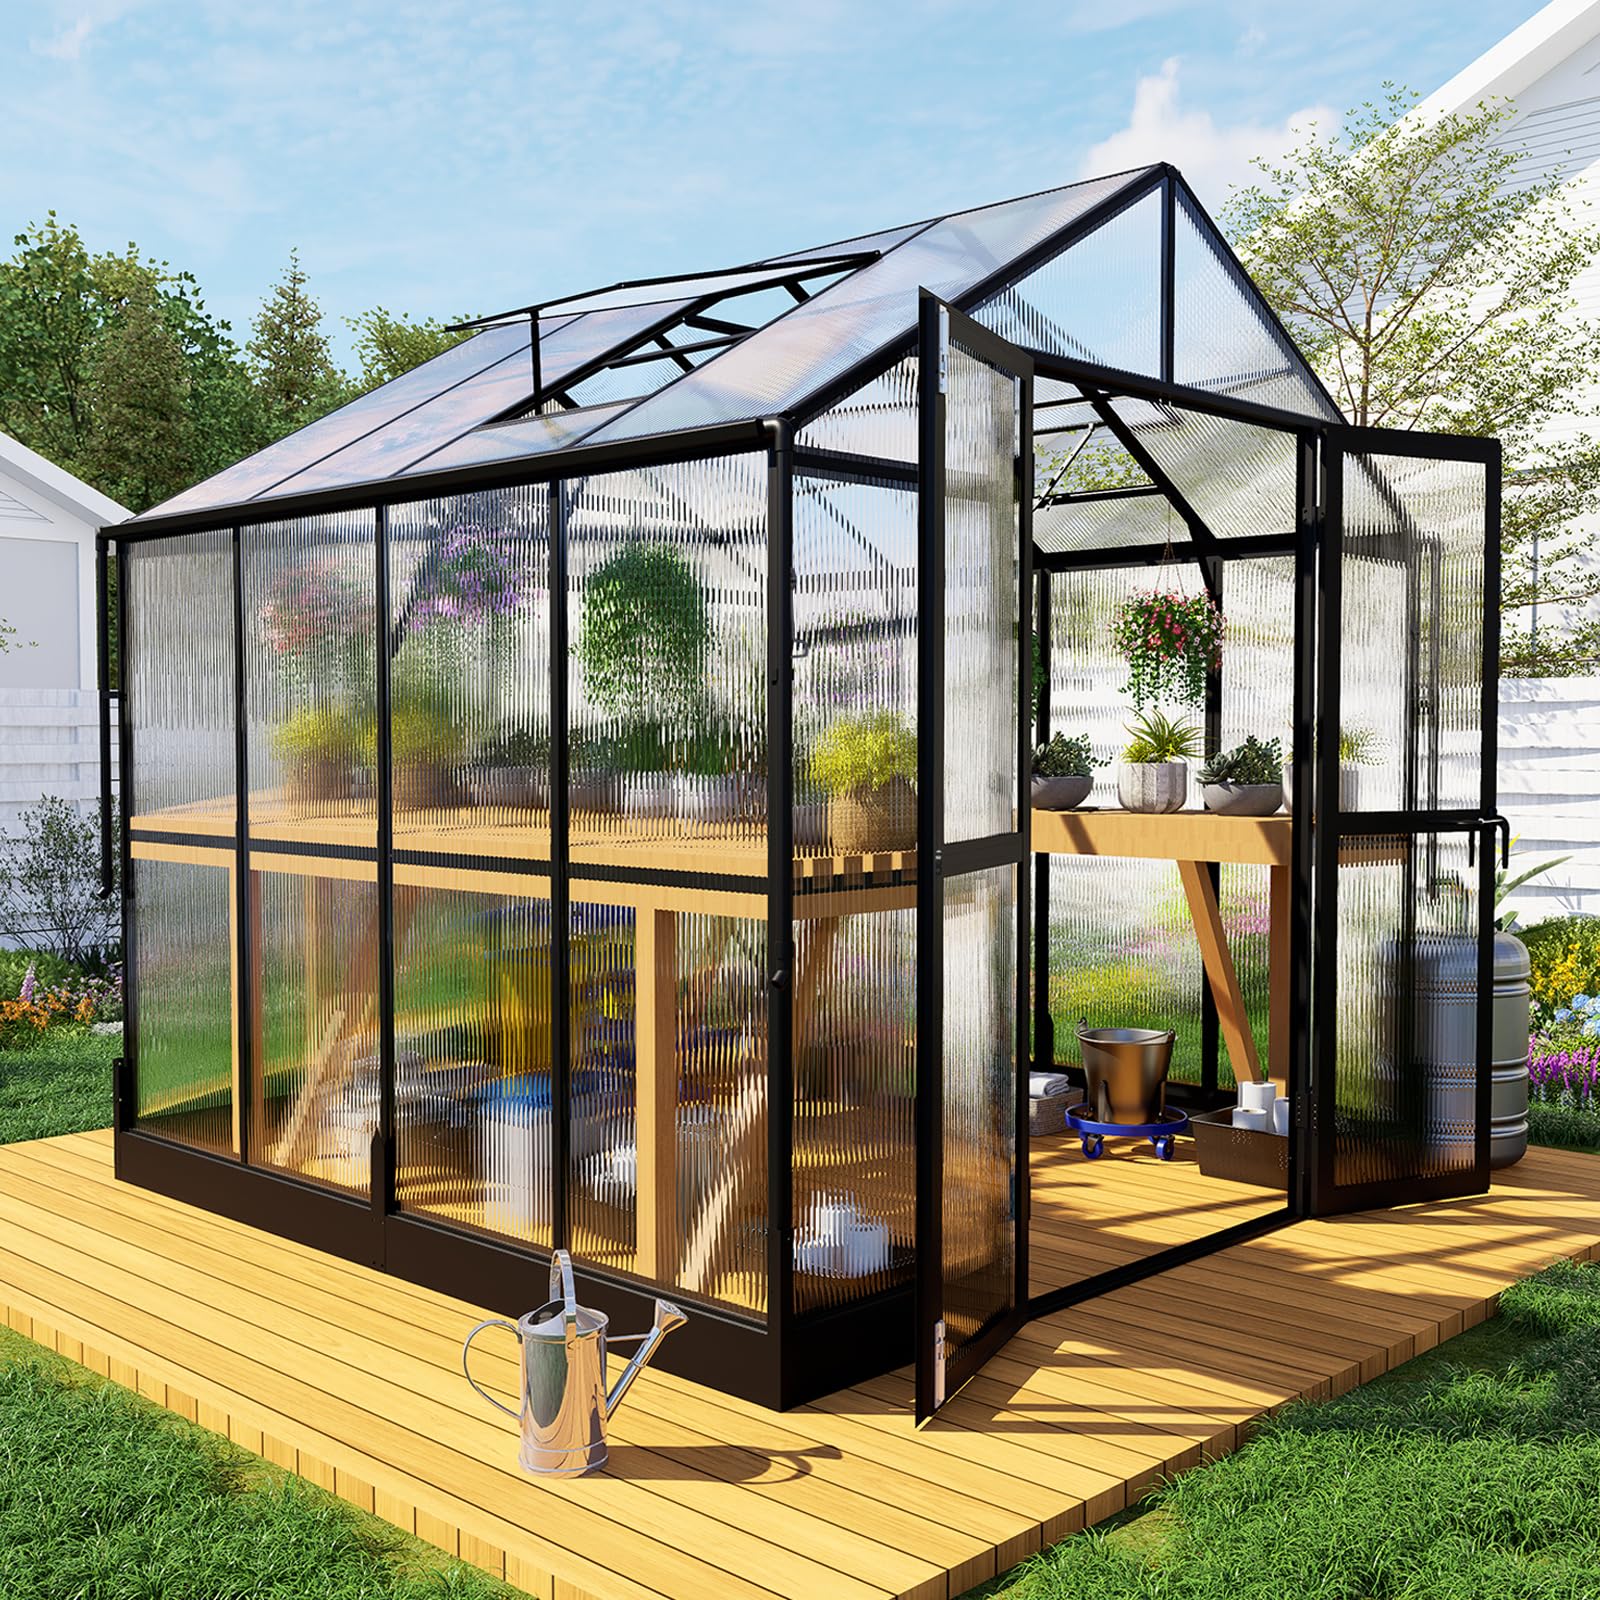
5. Backyard Discovery Poppy Cedar Greenhouse – Best Premium
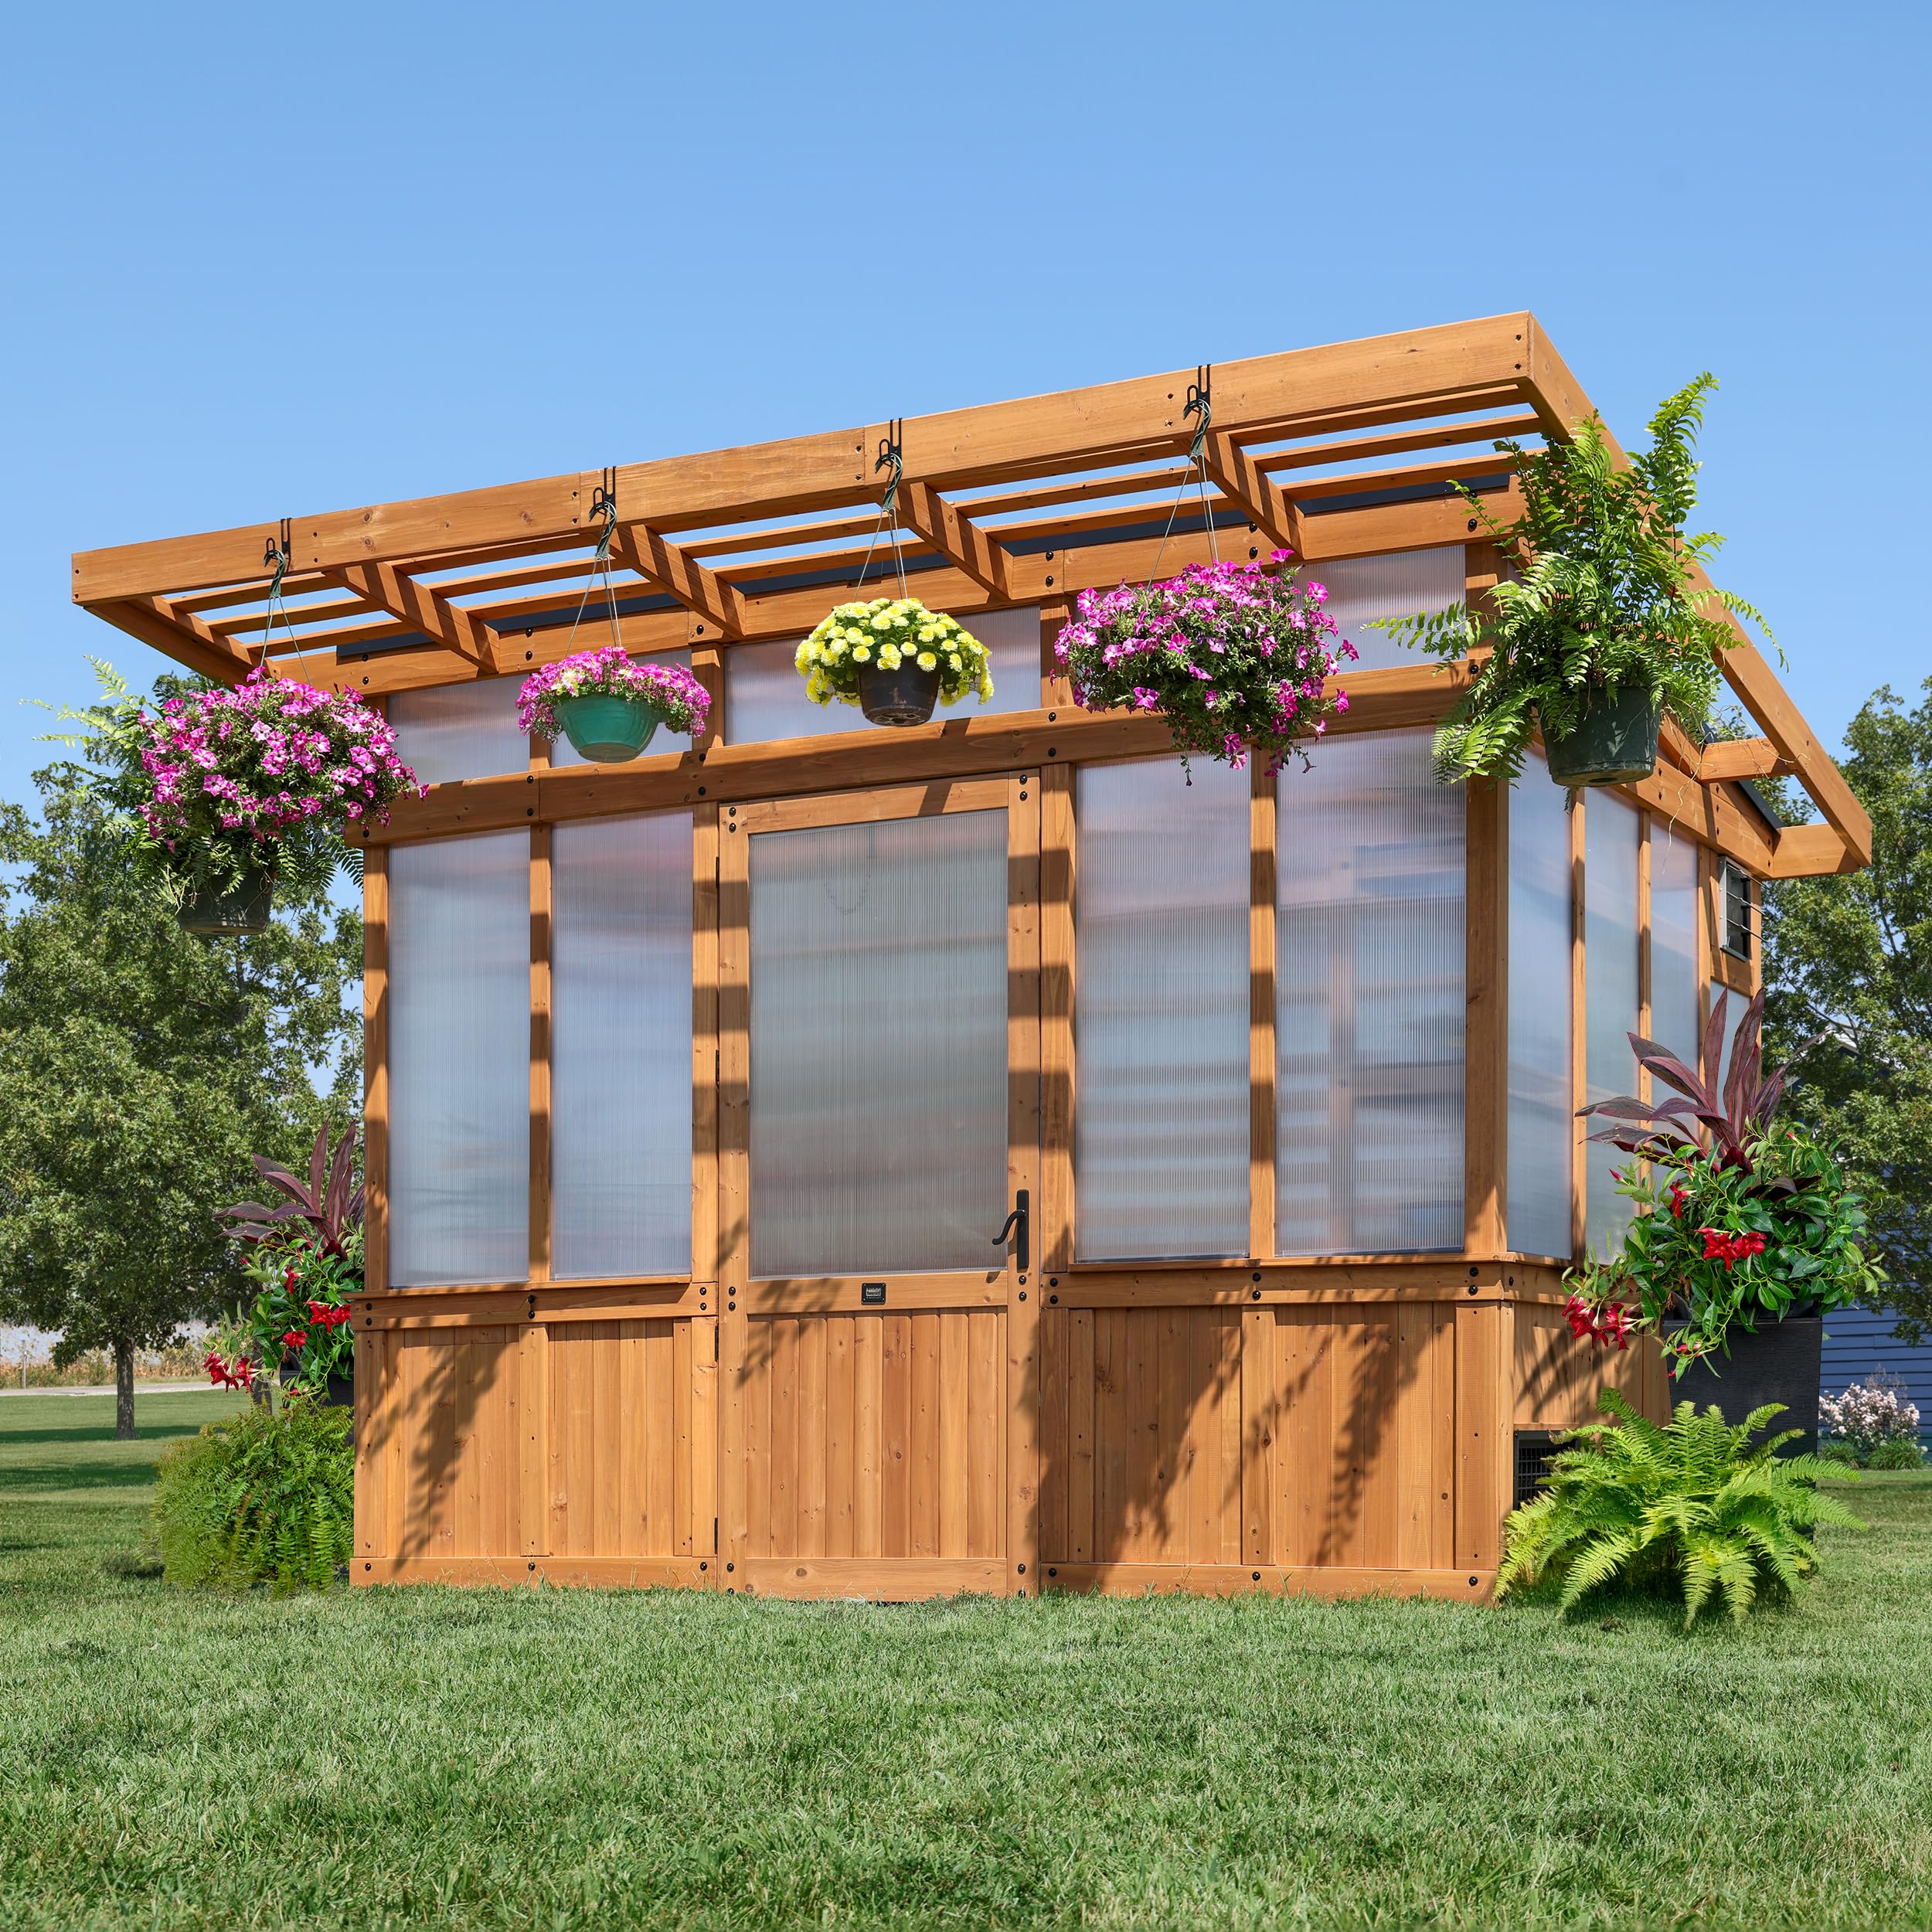
A professionally built cedar greenhouse with commercial-grade multi-wall polycarbonate, integrated exhaust fan, shelving, and electrical ports for serious year‑round gardening.
Why I picked it: I picked this for its commercial-grade insulation, cedar construction, and built-in conveniences for a year-round setup.
Best for: Gardeners who want a permanent, high-end greenhouse with strong insulation and integrated features.
Premium priced but comes with heavy-duty materials and thoughtful features.
Pros
- Cedar construction resists decay
- Commercial 4-wall polycarbonate
- Integrated exhaust fan and PowerPort
- Extensive fixed shelving and hooks
Cons
- Very time-consuming assembly
- Door panel replacement may be required
- Requires good foundation/anchoring
My take
This is the most finished kit I assembled. The cedar components are pre-cut and labeled, which helped once I organized everything on the floor before starting.
The multi-wall polycarbonate noticeably improved overnight heat retention compared with thinner panels I tested. The integrated temperature-activated exhaust fan and included PowerPort make it easy to run circulation and lights without aftermarket hacks.
Assembly took many hours and benefits from at least two people. I ran into a damaged door panel during my build but the manufacturer sent a replacement assembly—worth accounting for when planning the timeline.
If you want a long-term greenhouse that looks good and performs for year-round growing, the Poppy justifies its premium with solid materials and useful built-in features.
6. 4mm Double‑Wall Polycarbonate Panels (14 pcs) – Best for Replacements
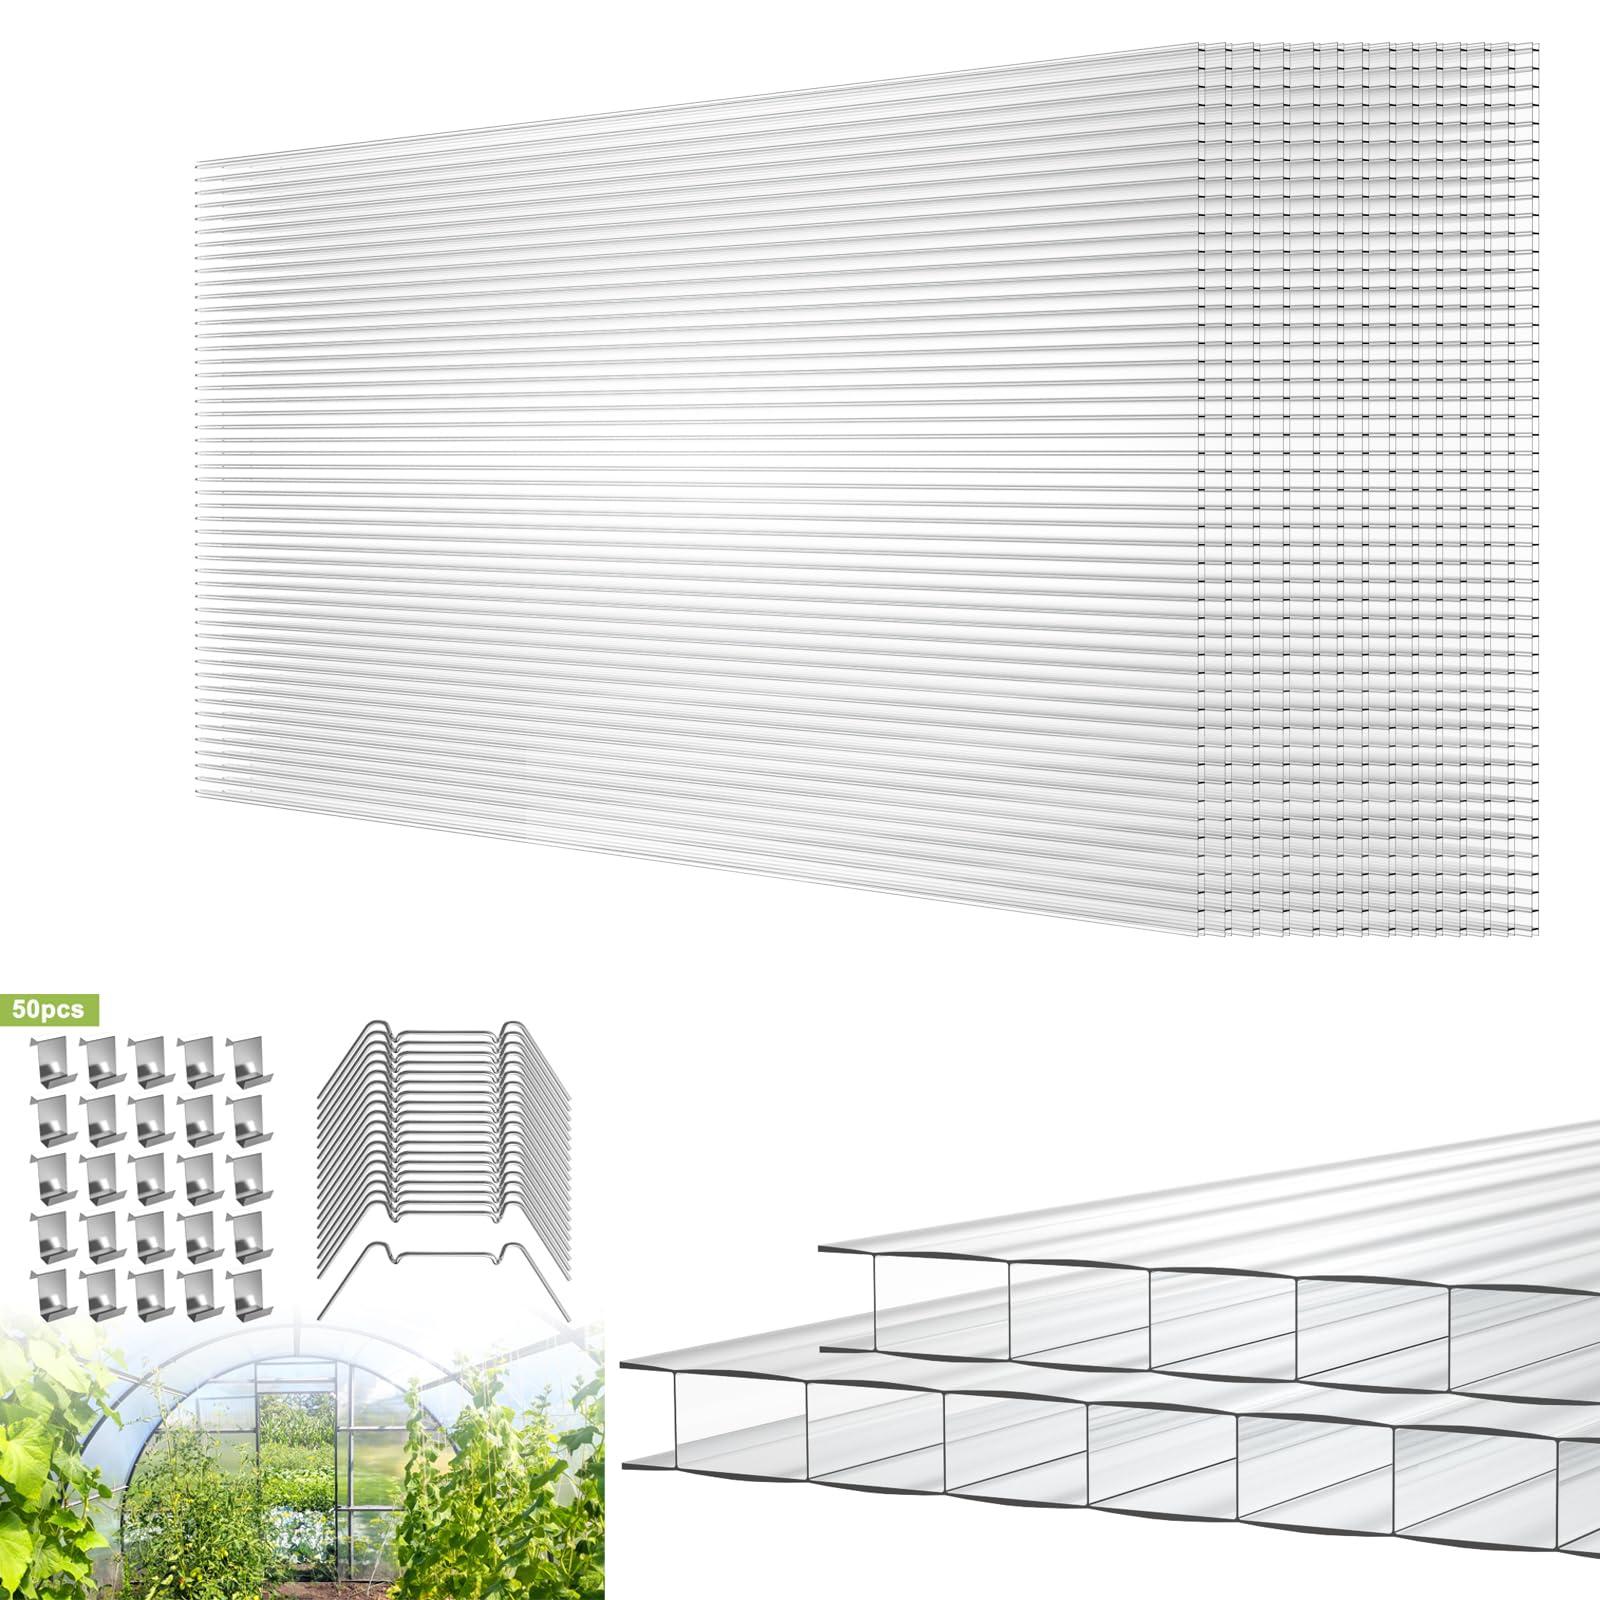
A bulk pack of 4mm double-wall polycarbonate panels suitable for replacing broken panes or building small cold frames and awnings.
Why I picked it: I reached for these when I needed multiple replacement sheets that were lightweight and easy to cut.
Best for: Repairing greenhouse windows, small DIY roofs, and cold frames.
Practical bulk option for repair projects and DIY builds.
Pros
- 14 panels in one box
- 700 g/m², 4mm thickness
- Easy to cut and handle
- UV and impact resistant
Cons
- Boxing can dent outer panels
- Edges may need trimming
- Long-term yellowing uncertain
My take
I used these panels to replace damaged glass in an old cold frame. They cut cleanly with a fine-tooth saw and the lightweight sheets were easy to lift into place.
The double-wall structure offered good thermal performance for spring and fall use. I liked that the panels are workable with basic tools and can be trimmed to non-standard openings.
Packaging sometimes left corner dents on the outermost pieces, so I inspected every sheet before installation. Once in, the panels held up well and kept the space protected from rain and wind.
7. YITAHOME 12×6 ft Polycarbonate Greenhouse – Best for Raised Beds
A long, walk-in greenhouse designed to cover raised beds and small plots with reinforced framing, sliding door, and dual skylights for strong ventilation.
Why I picked it: I chose this for its length and sliding door that makes it easy to run over raised beds and trellises.
Best for: People covering multiple raised beds or creating a long-season tunnel greenhouse.
A step up in size—better value for larger raised bed setups.
Pros
- Long 12×6 footprint
- Reinforced frame and diagonal rods
- Sliding door saves space
- Two adjustable skylights
Cons
- Two-person assembly recommended
- Some reports of fabric or panel wear
- May need extra anchoring
My take
I installed this over two raised beds and liked how the sliding door freed up space at the ends. The greenhouse warmed the soil noticeably compared with uncovered beds.
The diagonal rod reinforcement gives the structure more rigidity than simple hobby kits. I anchored the base frame and added silicone at panel joins to reduce drafts.
Assembly is straightforward with a partner, and the top-tilt design drains well. For long-term stability I recommend hard anchoring to a trench or foundation as suggested in the instructions.
8. Twin‑wall Polycarbonate Panels (6 pcs) – Best Budget Panels
A small set of twin-wall panels offering good light transmission and basic weather resistance for simple DIY roofs and small greenhouses.
Why I picked it: I used this pack for small repairs and appreciated the easy cutting and decent light transmission.
Best for: DIYers needing a small number of panels for patching or hobby projects.
Budget-friendly small pack for minor builds or repairs.
Pros
- Good light transmission
- Shatter-resistant
- Easy to cut and install
- Versatile for small projects
Cons
- Thinner than heavy-duty commercial panels
- May need extra insulation in deep freeze
- Short-term lifespan uncertain
My take
I used these panels to winterize a small chicken run and to make a compact potting-shelf roof. They let in plenty of light—about what I’d expect for seed starting—and cut cleanly with a utility knife.
For mild winter protection they worked well, but I wouldn’t rely on them alone for extreme cold without an additional layer or insulation.
Overall these panels are a practical, low-cost way to patch or improvise small transparent roofs.
How I Chose These Polycarbonate Greenhouses
Key features I tested
I ranked greenhouses by frame material, panel thickness, ventilation, and real-world durability in wind and rain.
I also paid attention to ease of assembly, whether kits included useful extras (gutters, thermometers, vents, shelving), and how well panels sealed at joints.
- Frame material: aluminum frames resist corrosion and give the best strength-to-weight ratio.
- Panel thickness: 4mm panels are fine for seasonal use; 6mm or multi-wall panels add better insulation for year-round growing.
- Ventilation: adjustable roof vents and lockable doors are essential to prevent overheating on sunny days.
- Anchoring: even sturdy kits need to be anchored or placed on a foundation for high wind or heavy snow.
- Accessories: connectors, gutters, and automatic vent openers make a big practical difference.
Installation tips from my builds
Inventory every hardware bag before you start. Missing screws or mislabeled parts are the most common slowdown.
Build with two people for any greenhouse over 6×4 ft—panels and frames need to be aligned as you tighten fasteners.
Seal gaps between panels with silicone to reduce drafts and prevent leaks in heavy rain.
- Lay out parts and read each step fully before tightening screws.
- Use silicone or glazing tape at panel joins for better weatherproofing.
- Consider a simple foundation (treated lumber or pavers) for a neat, level installation and extra wind resistance.
Choosing panels and accessories
If you’re repairing a greenhouse, match connector profiles to panel thickness—H connectors are inexpensive and make seams watertight.
Buy extra panels in bulk if you expect to replace panes over time; they’re cheaper per sheet and save future shipping delays.
- 6mm twin-wall or multi-wall panels = better thermal performance.
- H connectors and end caps prevent moisture and dust buildup.
- Automatic vent openers are a low-effort way to avoid overheating in summer.
Frequently Asked Questions
What panel thickness do I need for year-round use?
I prefer 6mm twin-wall or multi-wall panels for year-round use because they hold heat better overnight. For spring/fall seed starting, 4mm panels are usually sufficient.
How much assembly help will I need?
For anything larger than a compact 6×4 ft kit I recommend at least one helper. I assembled small kits solo but needed two people for mid-size and larger greenhouses to lift panels and align frames.
Will polycarbonate yellow over time?
In my experience good-quality panels with UV protection resist yellowing for several seasons. I still inspect and replace panels if clarity degrades on older installations.
How should I anchor a greenhouse?
I anchored units to a treated-wood perimeter or bolted them to a concrete or gravel base. Even sturdy frames benefit from extra anchoring in windy locations.
Final Take
I found a clear trade-off between convenience and long-term performance: smaller 4mm kits are easy to install and ideal for seasonal starts, while 6mm and multi-wall cabins give better insulation and durability for year-round gardening.
If you want a no-fuss starter greenhouse go with the compact walk-in kits; if you plan to winter over plants or build something permanent, invest in thicker panels and a stronger frame—or step up to the cedar Poppy for built-in features.
Whichever route you choose, inventory parts, plan anchoring, and consider a few accessory pieces (connectors, gutter, vent openers) to make the installation last.
")